
Vanilla Bean Cake Recipe
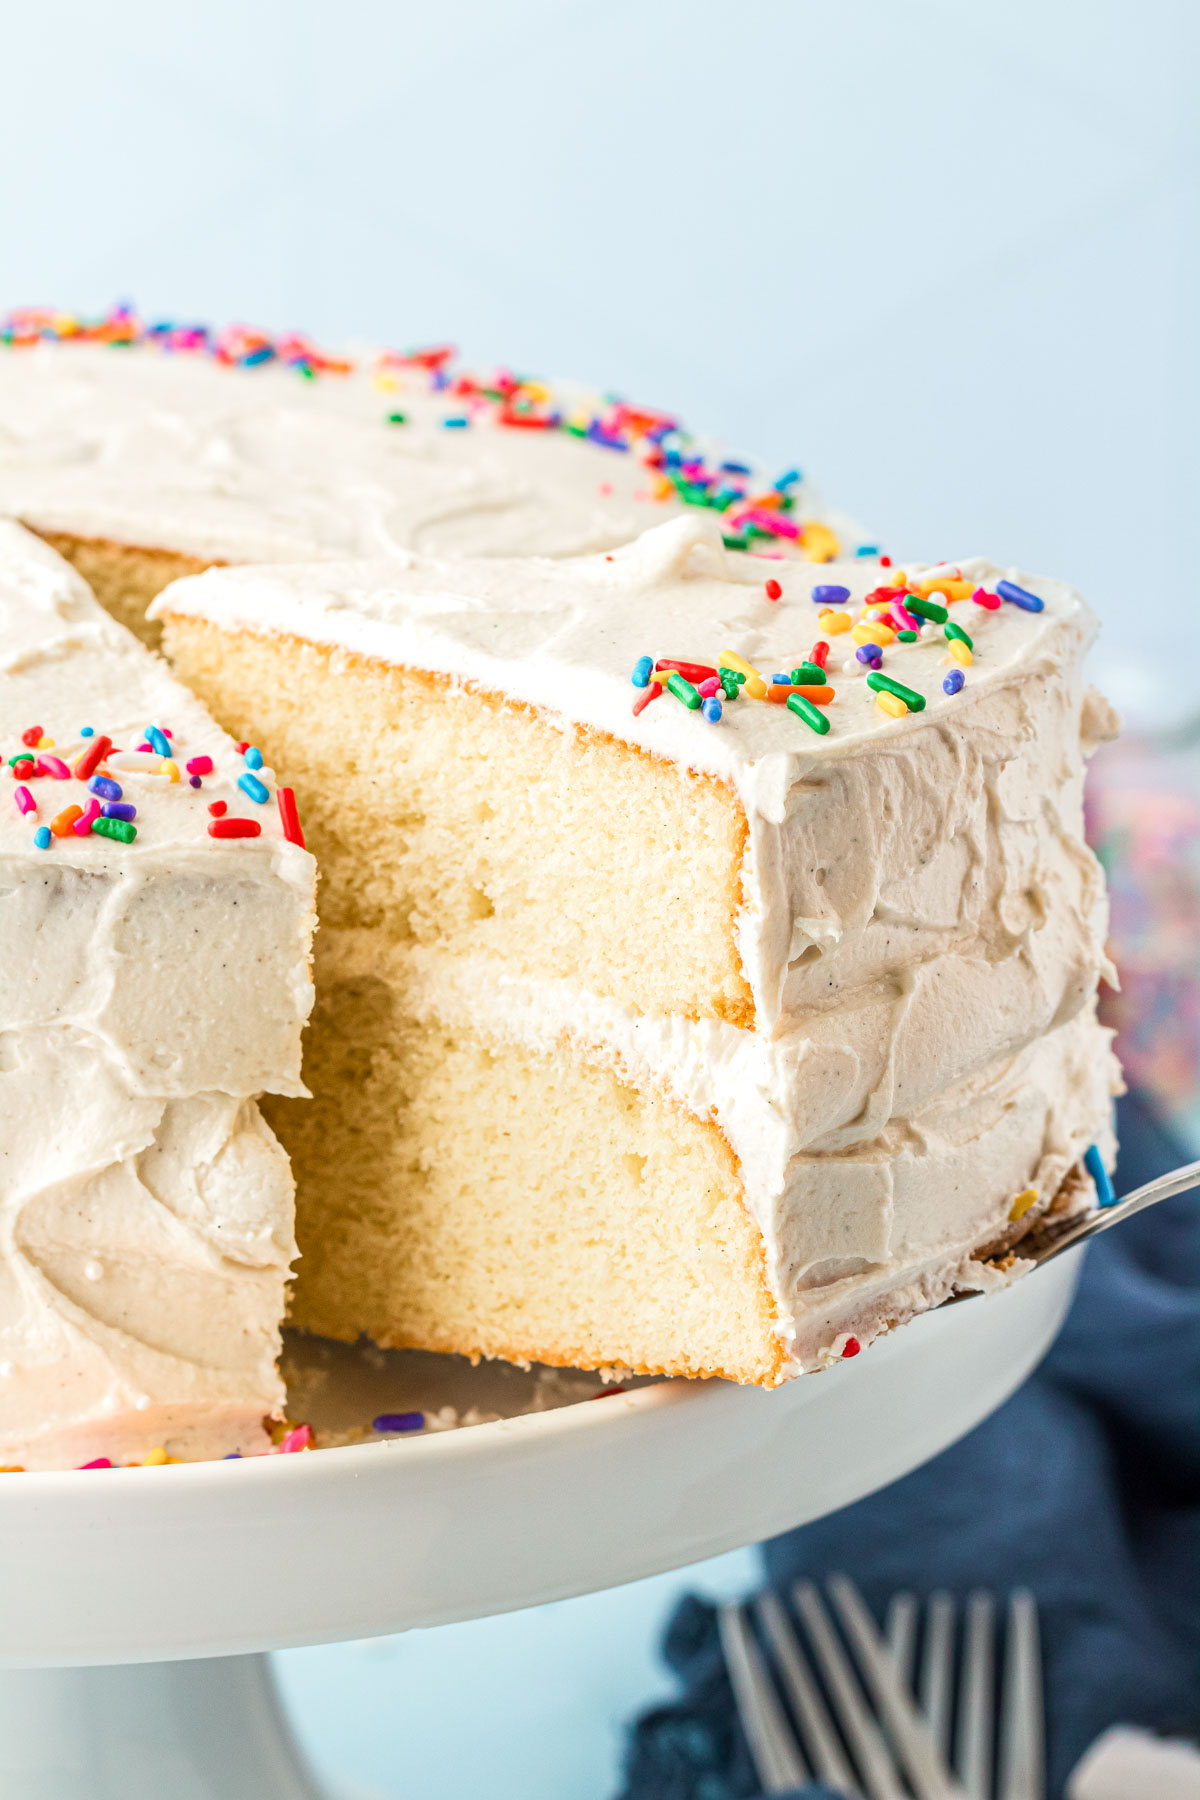
This sweet Vanilla Bean Cake Recipe is a buttery white cake bursting with sweet vanilla flavor and is the perfect canvas for all your favorite fillings and frostings! Incredibly tender, better than a box mix, and 100% from scratch, this bakery-style vanilla cake will impress everyone!

Homemade Vanilla Cake From Scratch
If you’re passionate about an incredibly good slice of cake, then this Vanilla Bean Cake recipe is for you! This is the ultimate recipe with detailed instructions to create the BEST-tasting vanilla bean cake you’ll ever have!
And don’t worry, it’s super easy to make even if baking cakes from scratch isn’t something you do very often!
Rebecca’s Recipe Review
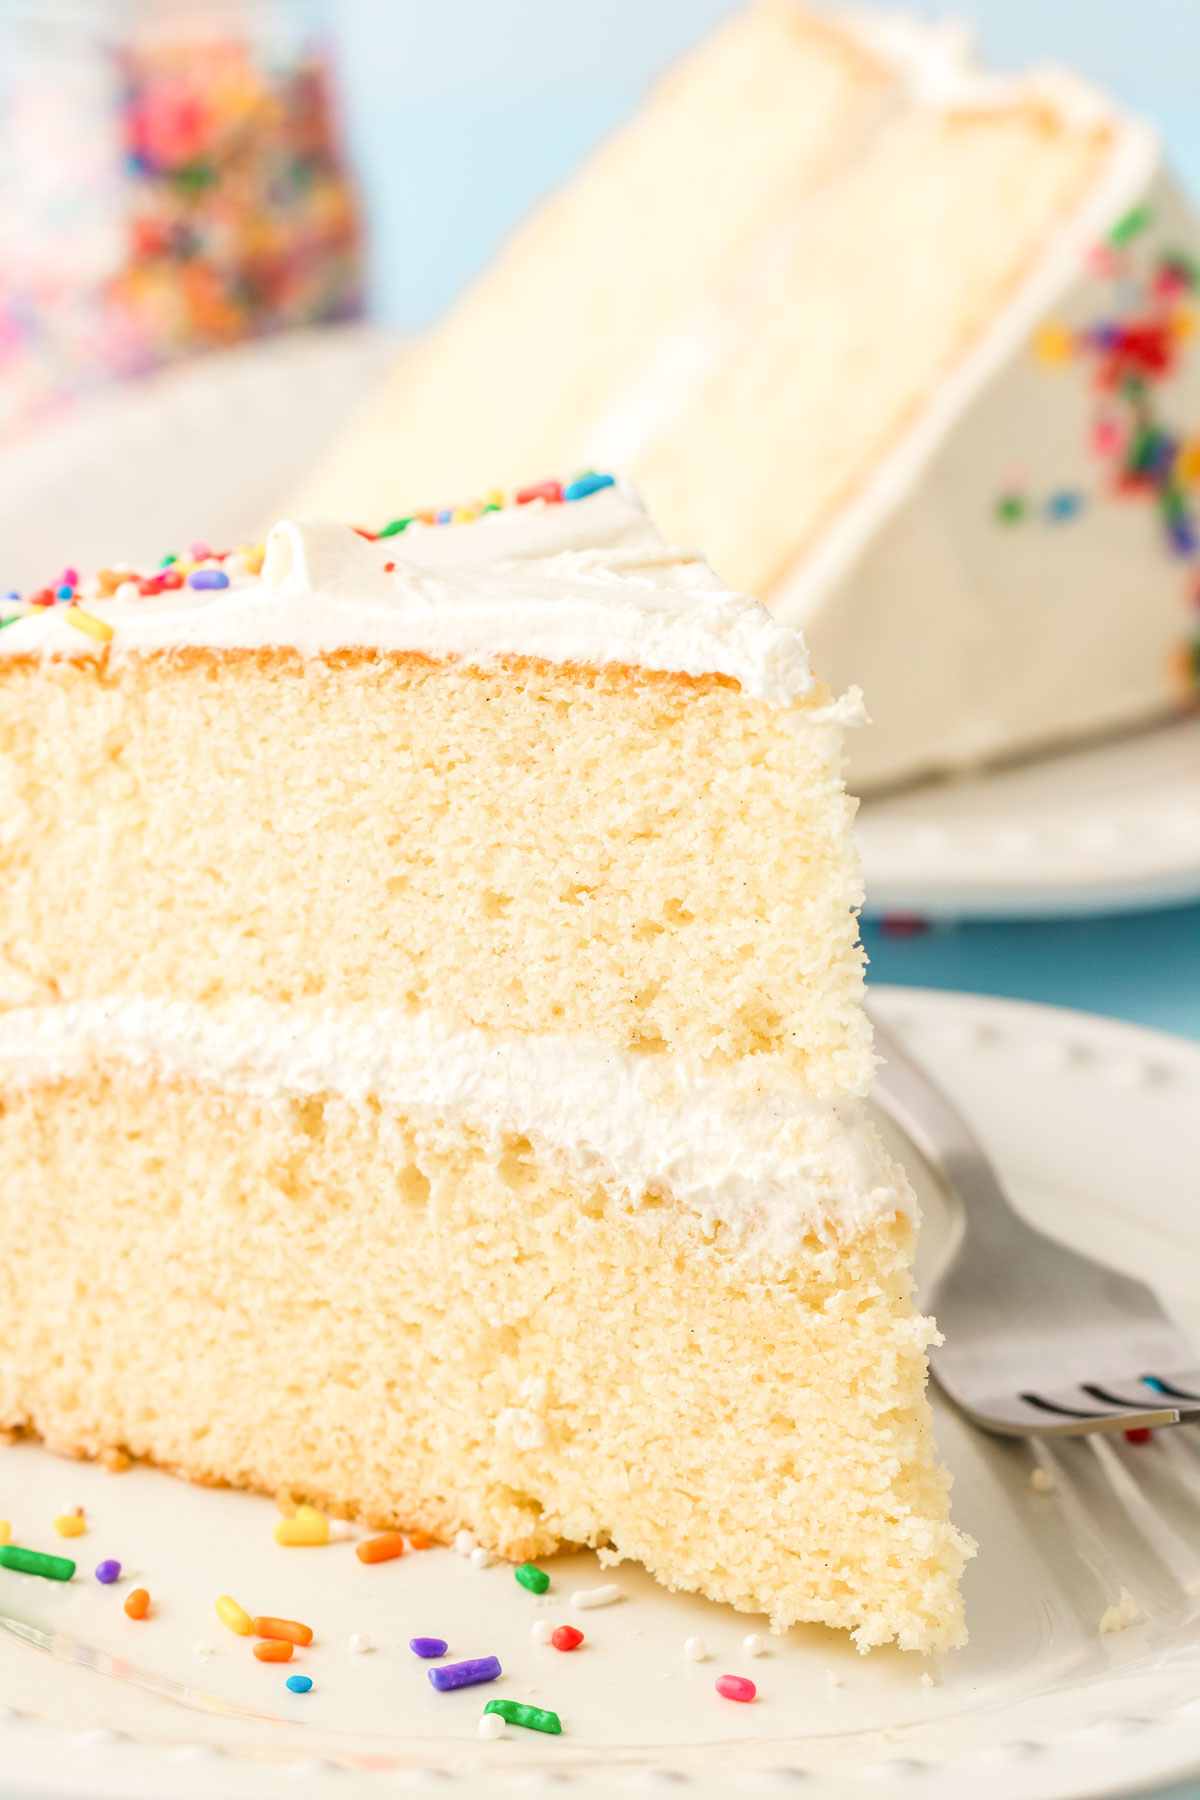
Taste: The sweet taste of vanilla starts with the batter that’s made with vanilla bean extract, travels to the baked cakes that are brushed with vanilla simple syrup, and ends with creamy vanilla frosting!
Texture: Incredibly tender cake with a fluffy frosting finish.
Ease: 6/10
Pros: A decadent appearance that’s flavor packed yet made with easy ingredients.
Cons: This cake recipe does take a bit more time than usual to complete. But it’s worth every crumb!
Would I Make This Again? Text
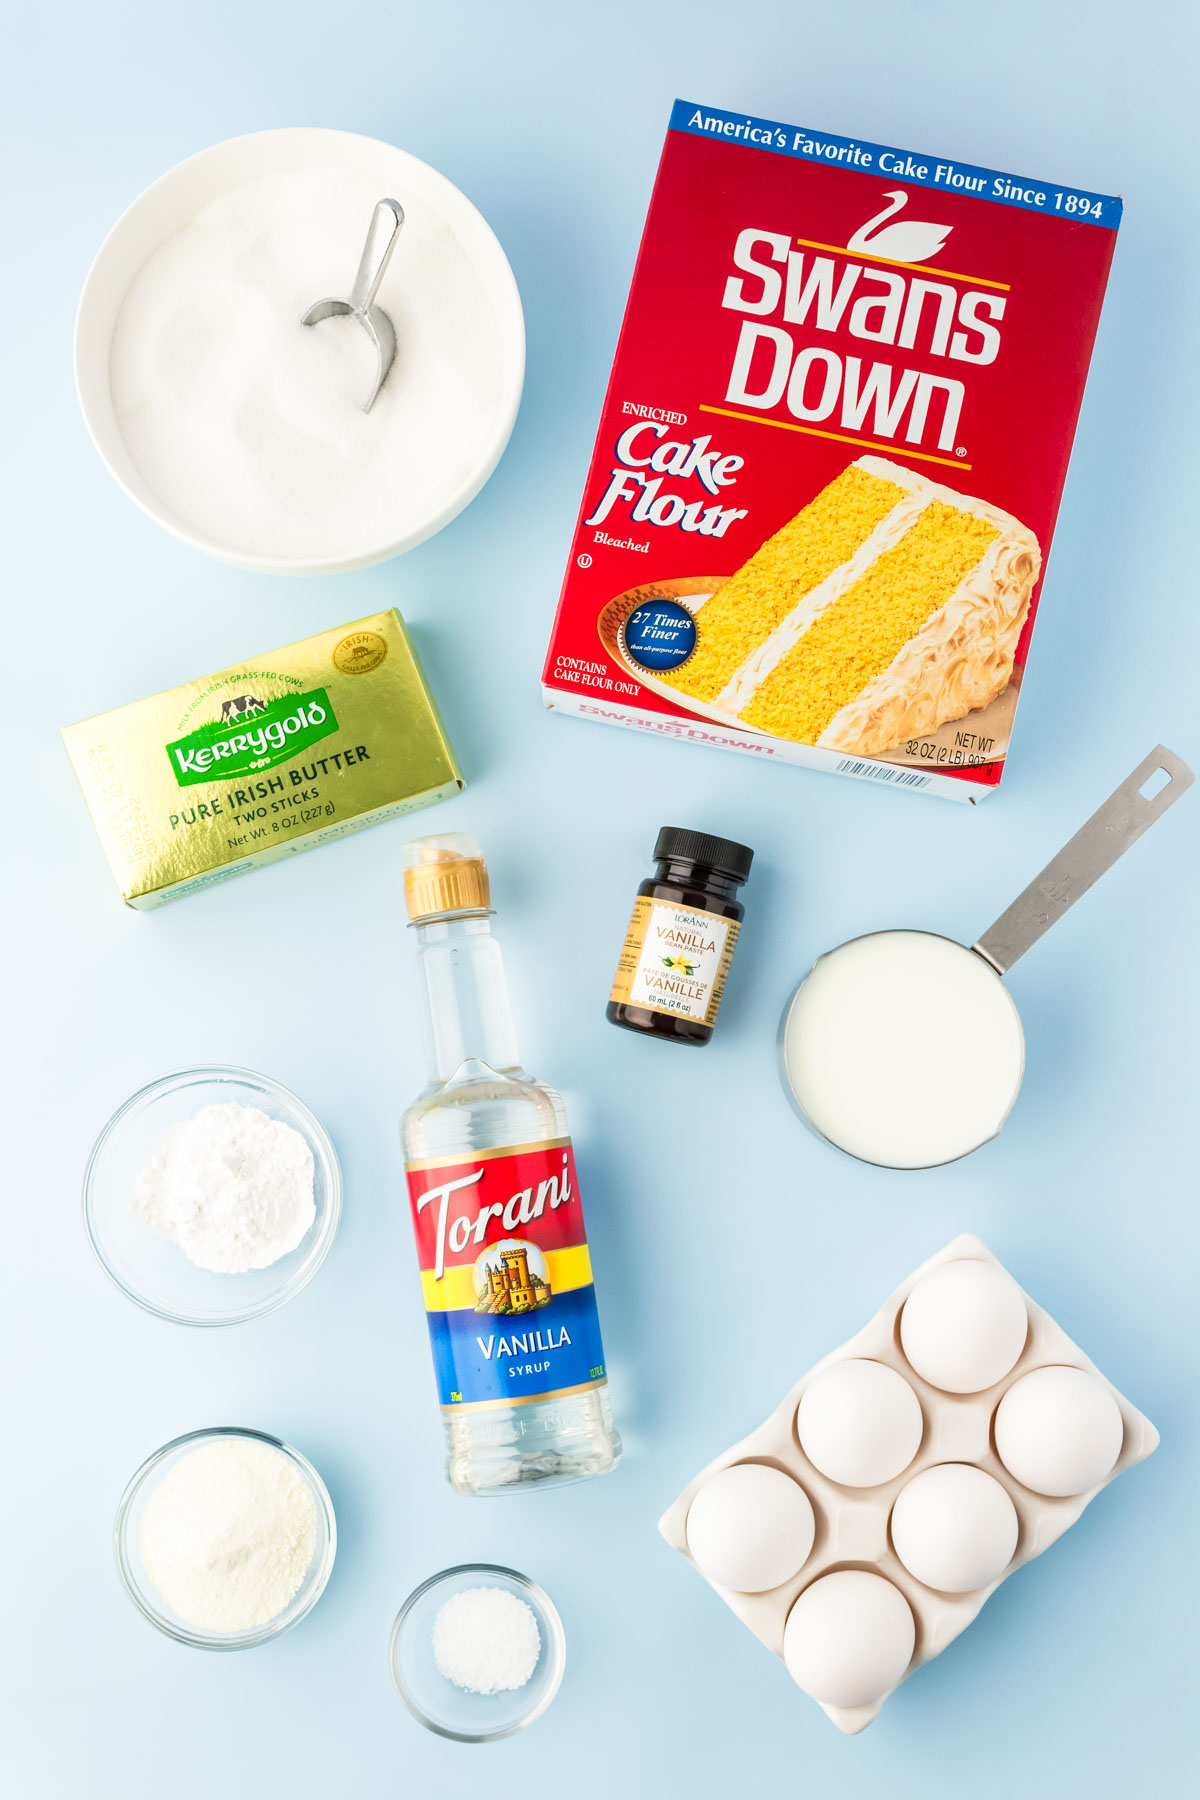
Vanilla Cake Ingredients
- Cake Flour
- Granulated Sugar
- Powdered Milk
- Baking Powder
- Salt
- Unsalted Butter
- Large Eggs
- Large Egg Whites
- Whole Milk
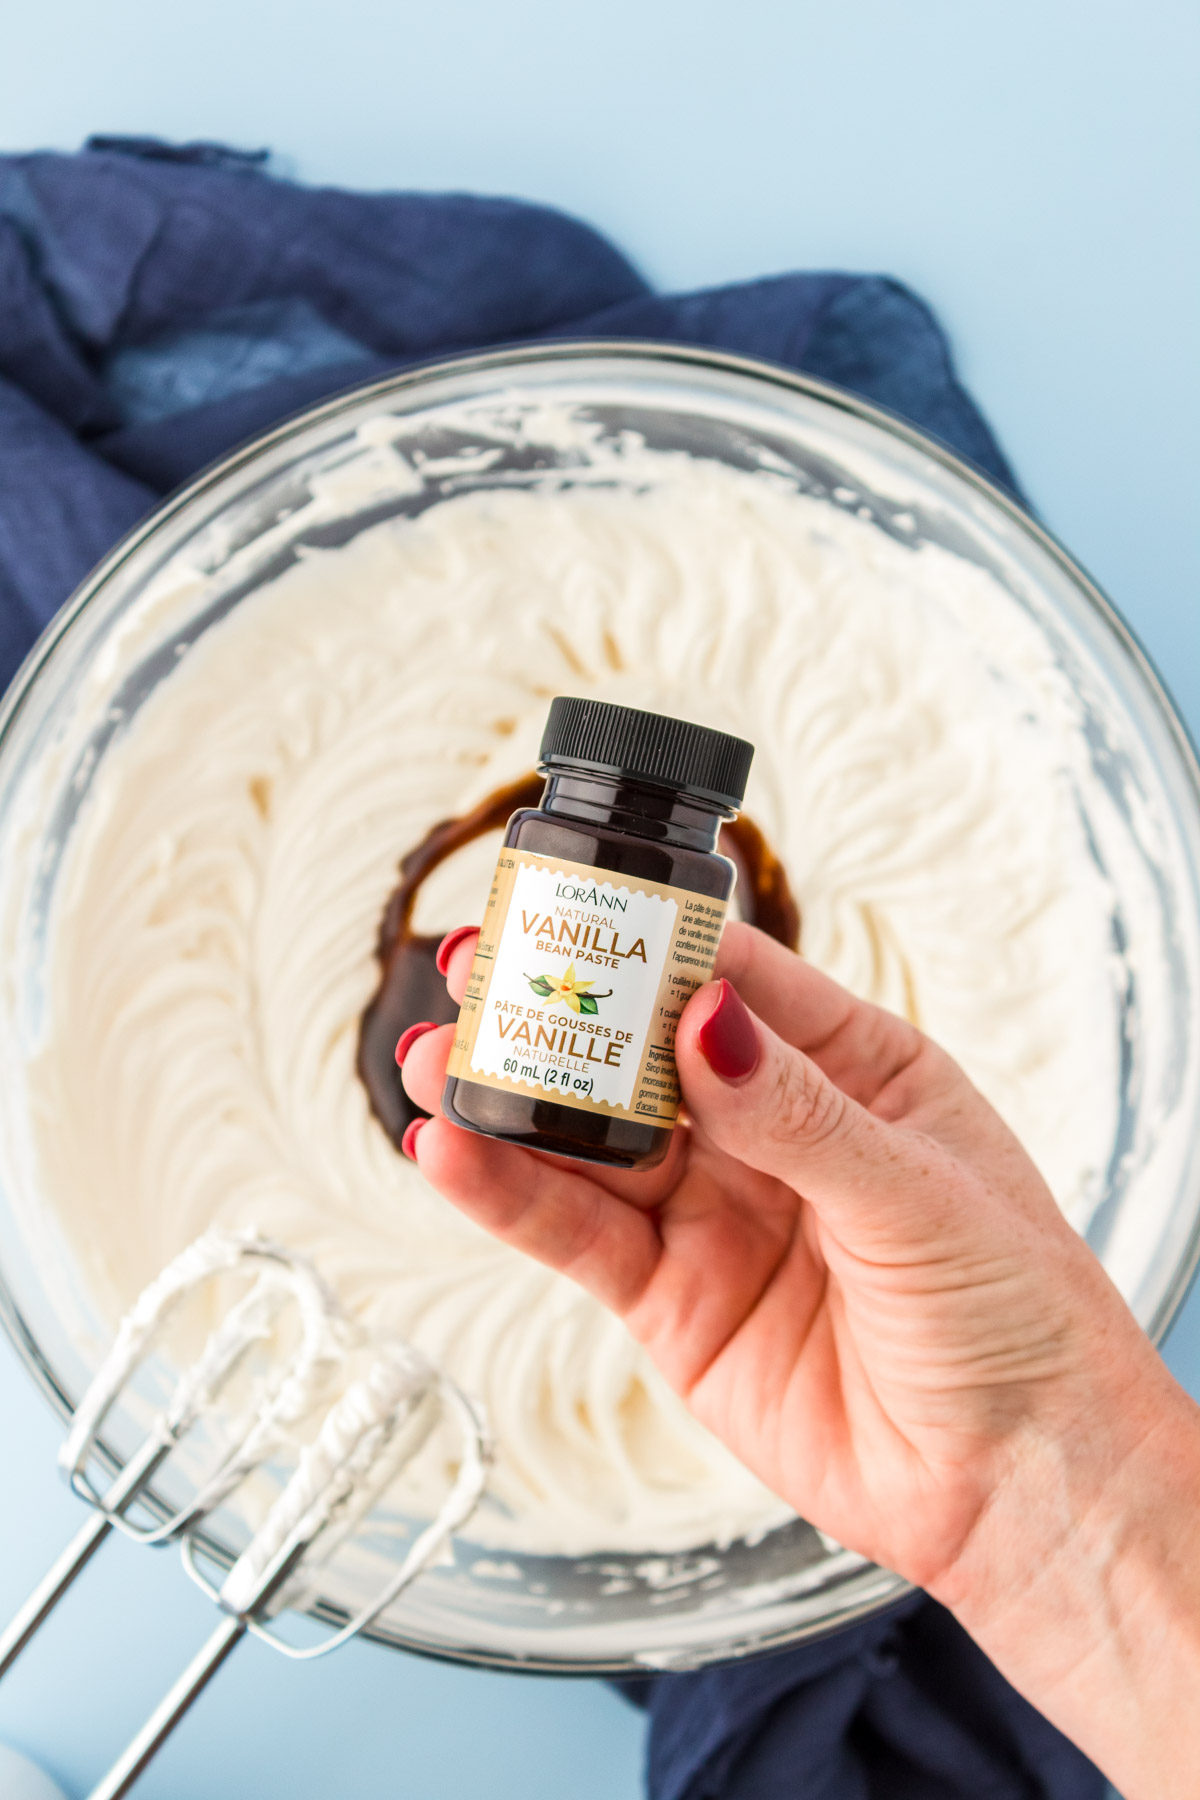
- Vanilla Bean Paste
- Vanilla Simple Syrup
- Powdered Sugar
- Heavy Cream
Cake flour, vanilla bean paste, and high-quality butter are standout ingredients that help to make the very best cake! Since cake flour has only a 7 to 9% protein content compared to all-purpose flour, which has 10 to 12%, there’s less gluten that forms in this cake.
This simple flour swap makes a large impact on the final crumb of the cake, giving you a light, fluffy dessert! To go with the tender crumb is that mouthwatering vanilla flavor.
To ensure that this cake has the very best vanilla flavor, I chose to use vanilla bean paste in the batter. This is because the paste has a more intense flavor whose thick consistency also holds specks of vanilla bean seeds that make for an eye-pleasing experience as well!
The last standout ingredient is butter! For the best rich flavor, I suggest using a European-style butter since it holds a higher fat content. I prefer using Kerrygold butter or Finlandia.
How To Make A Vanilla Cake
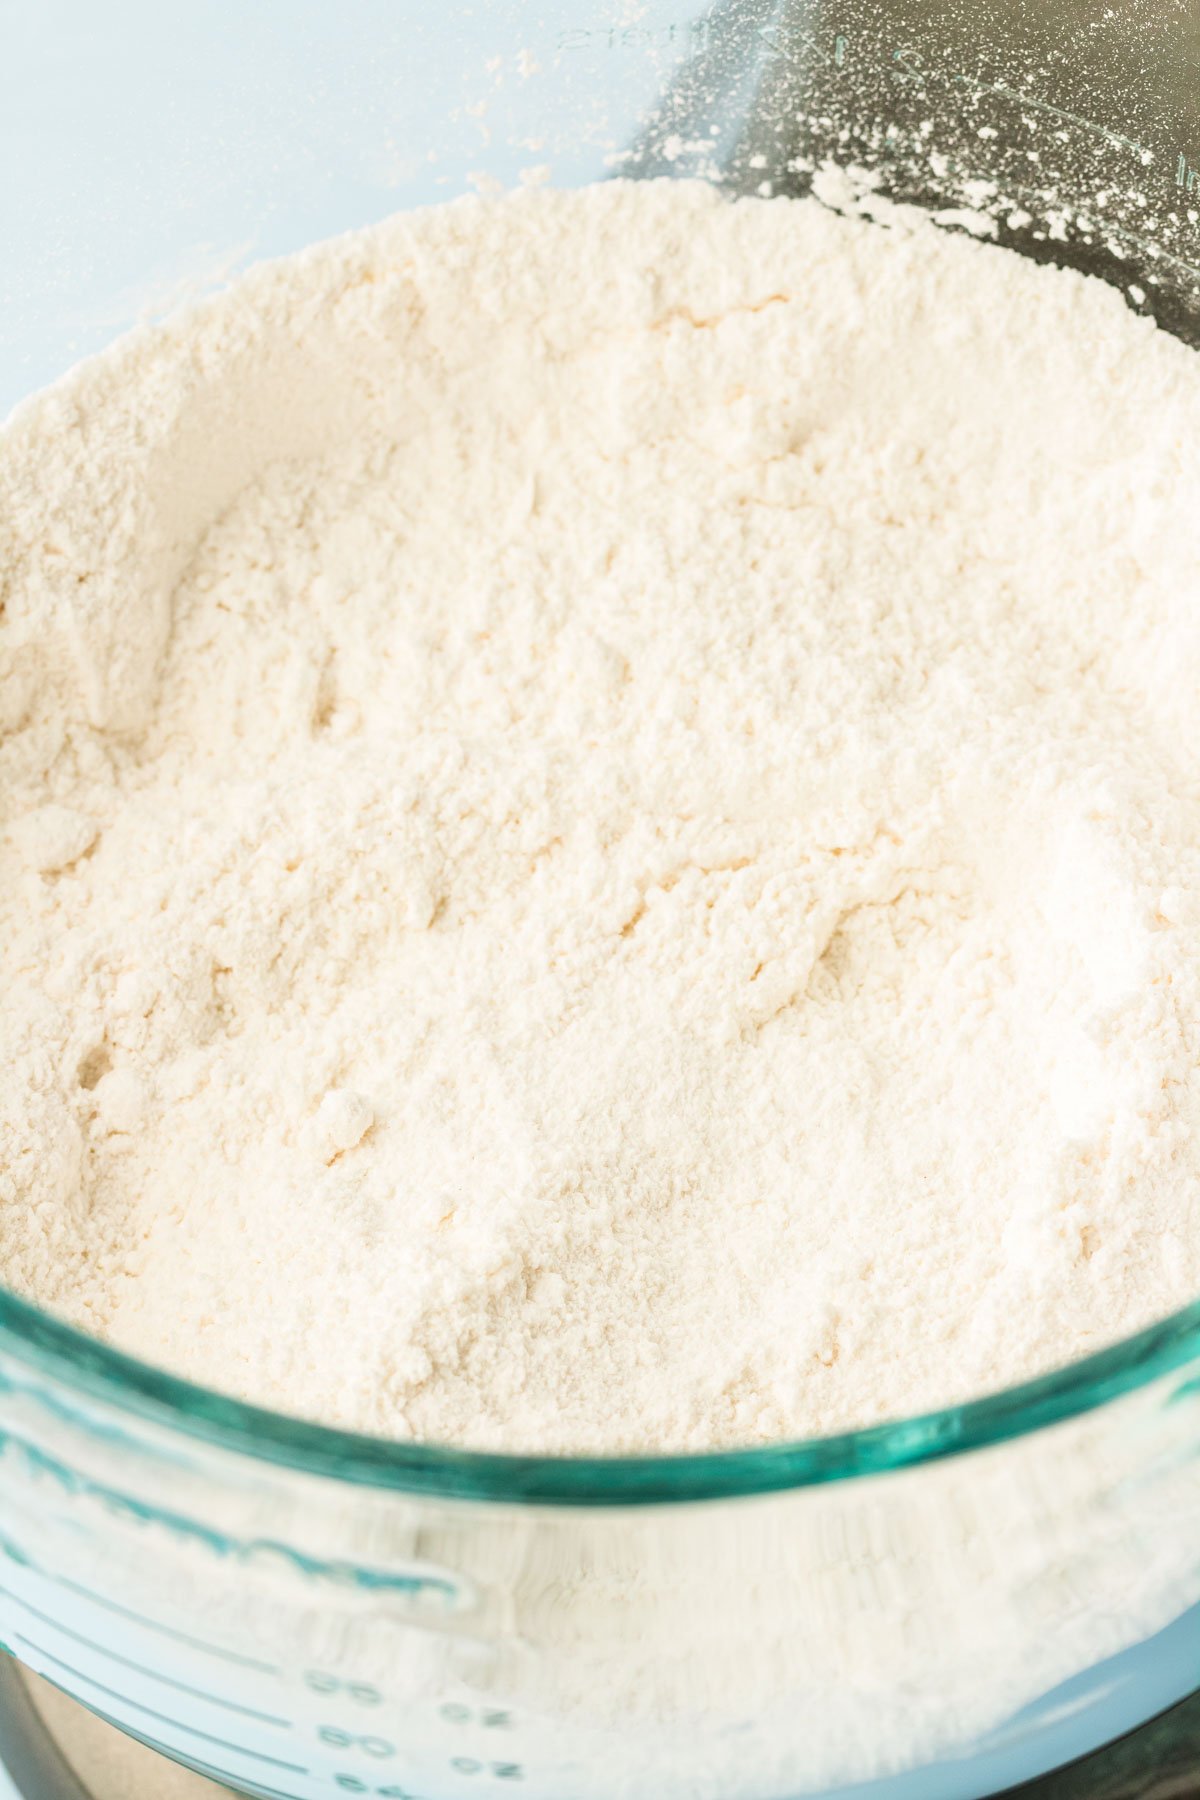
- Mix cake flour, granulated sugar, powdered milk, baking powder, and salt in the bowl of a stand mixer that’s fitted with a paddle attachment.
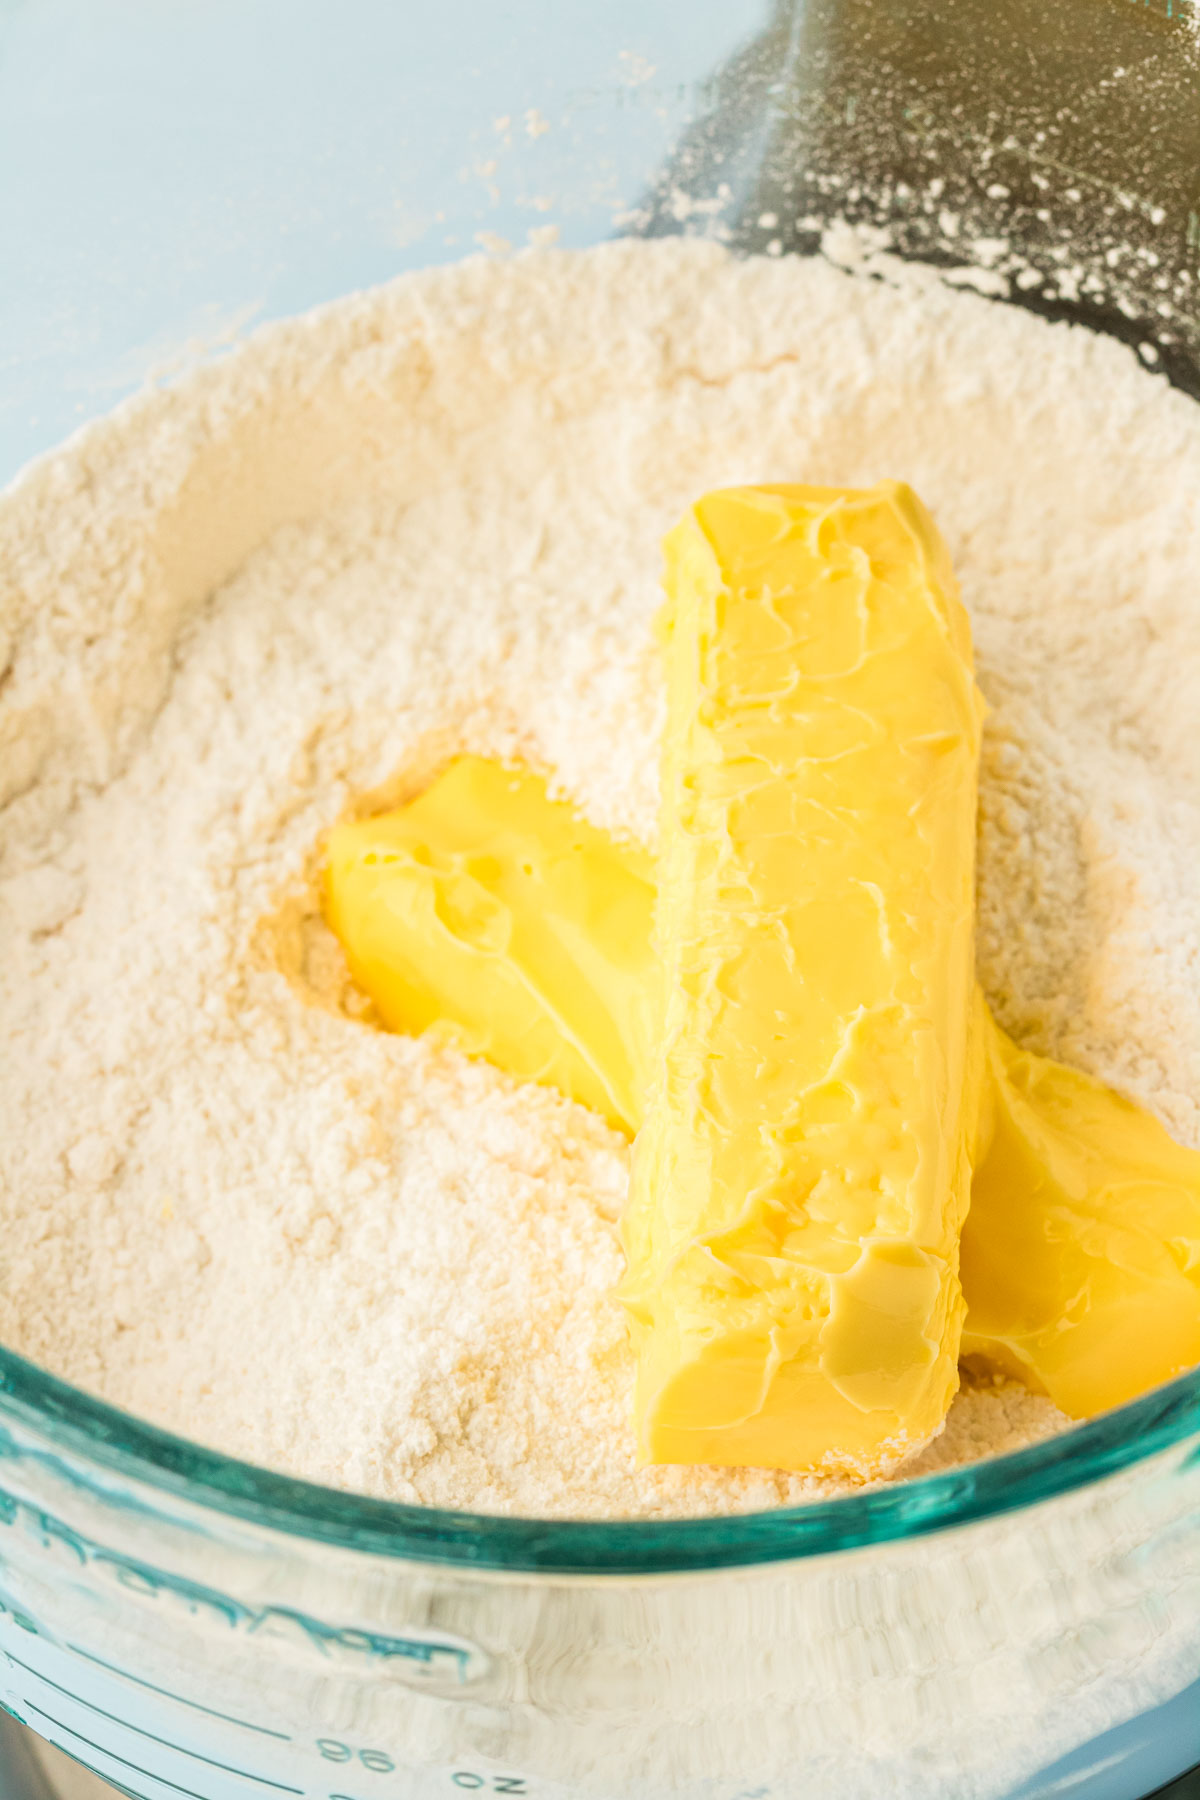
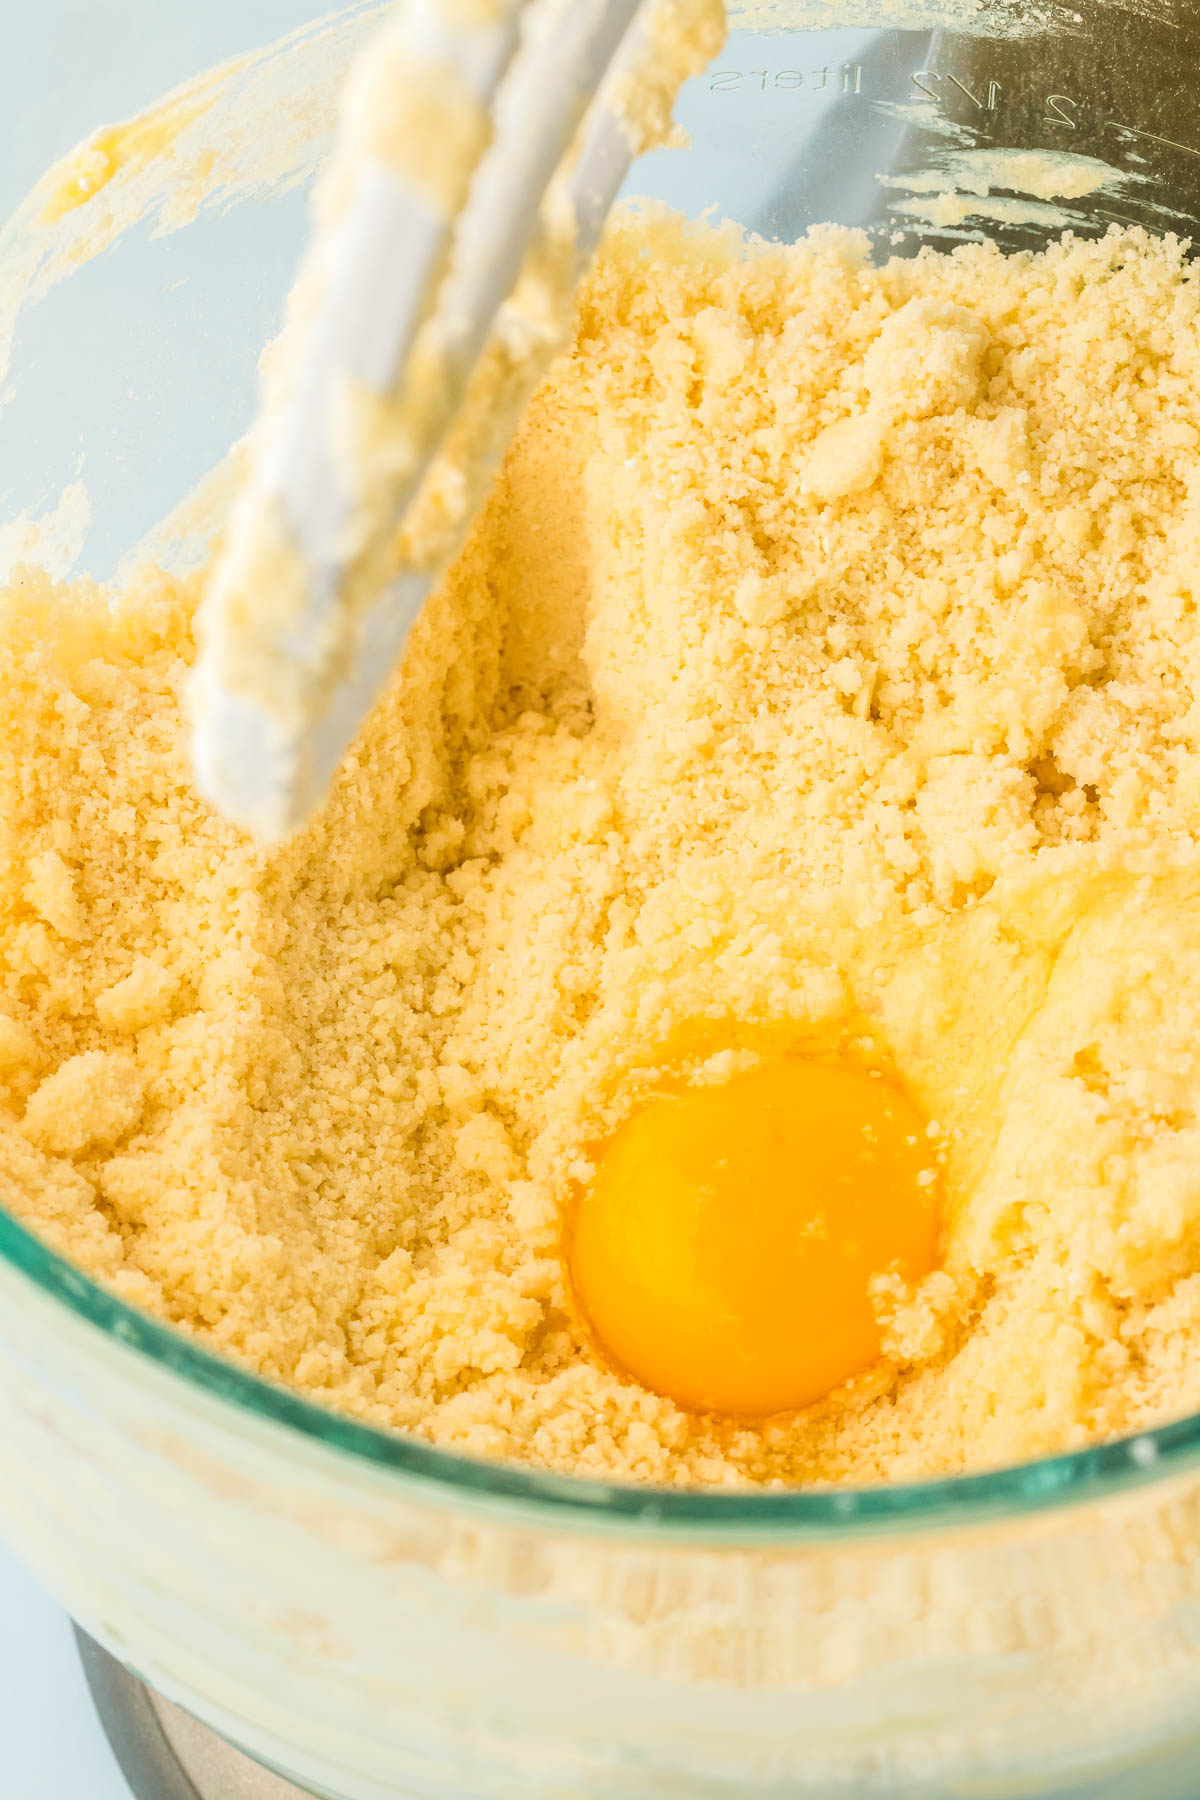
2. Add the unsalted butter to the dry ingredients and mix at medium-low speed until the mixture takes on a sandy texture; this is called reverse creaming.
3. One at a time, add in the large eggs and large egg whites, mixing after each addition. Use a rubber spatula to scrape the sides of the bowl down as you go.
4. Add in the vanilla bean paste and then the whole milk in three parts. Mix after each addition. Once all of the whole milk has been added, mix until the batter becomes smooth.
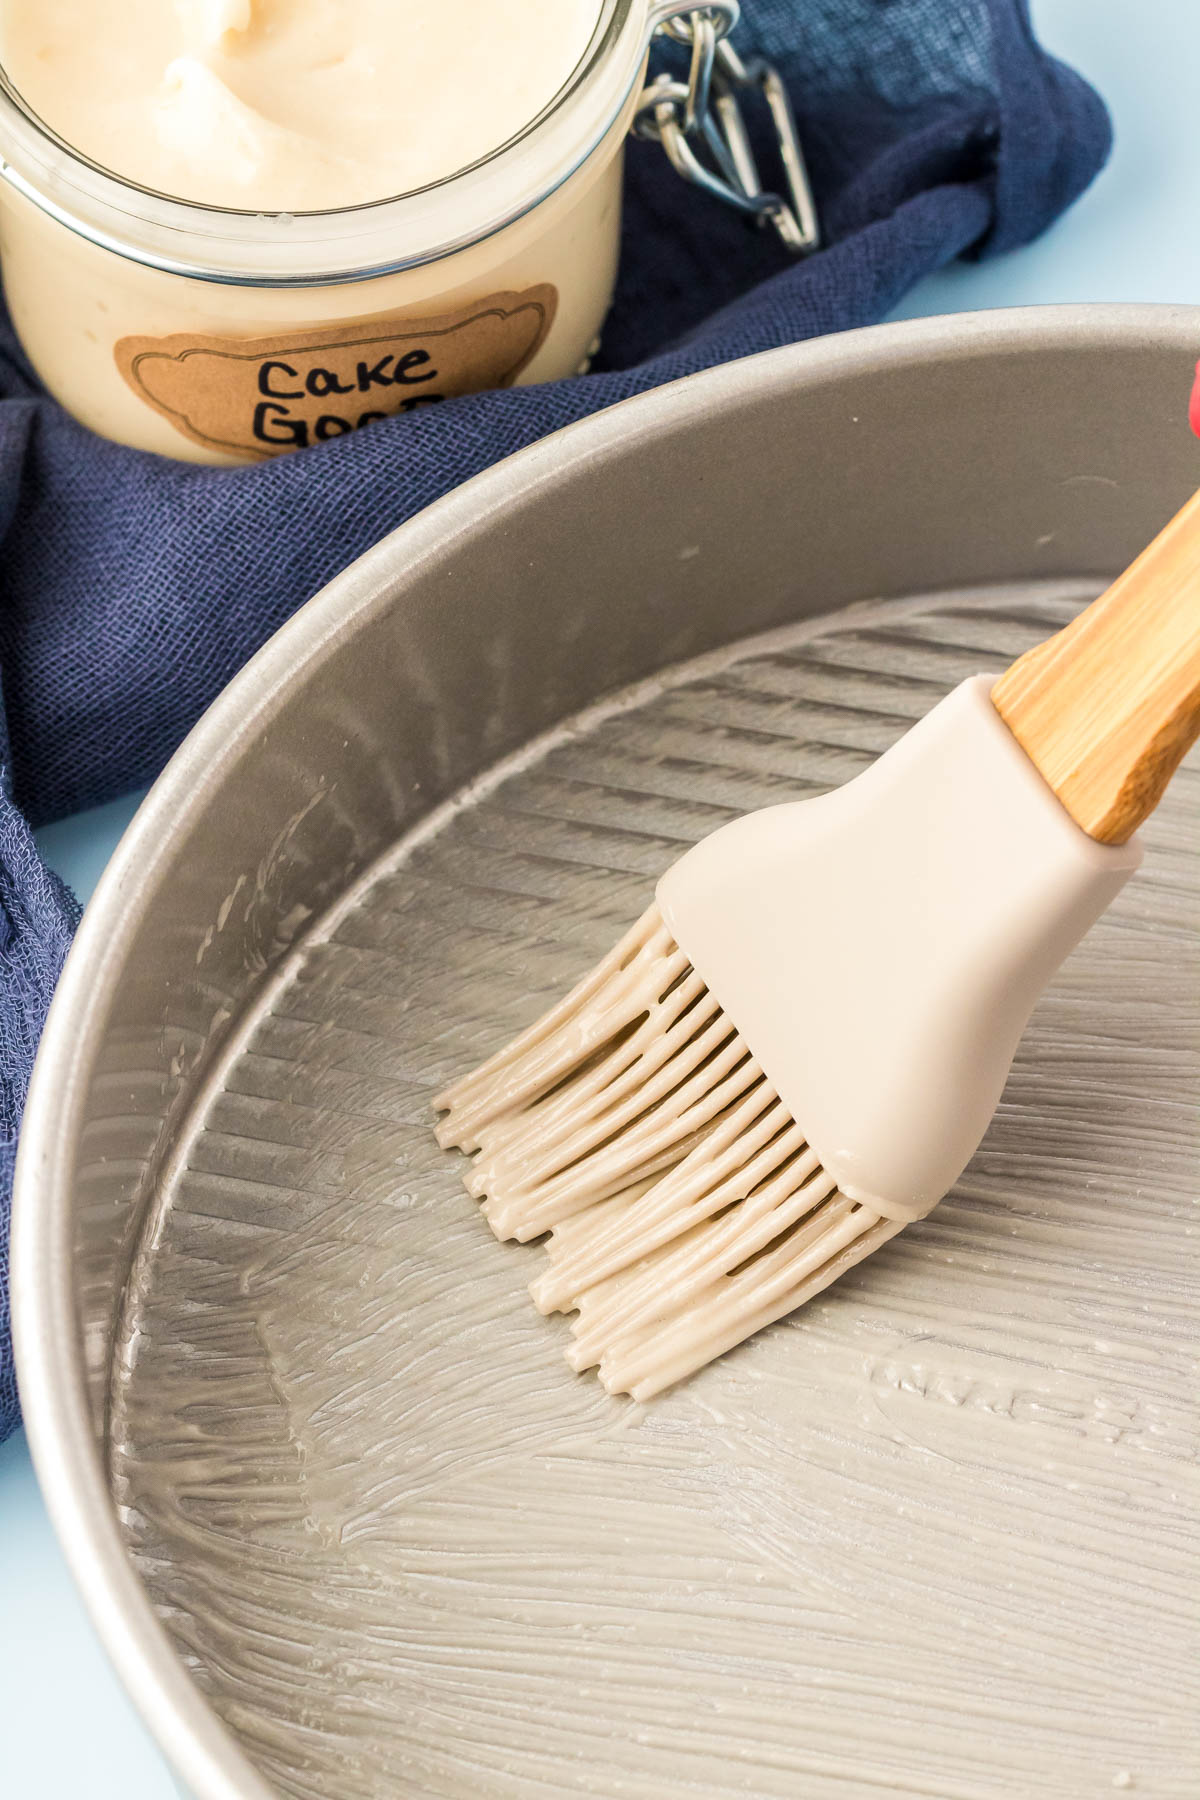
5. Use a pastry brush to apply magic cake release liberally to the bottom and sides of the cake pan. You can also grease with nonstick spray or shortening and line the bottom with parchment paper.
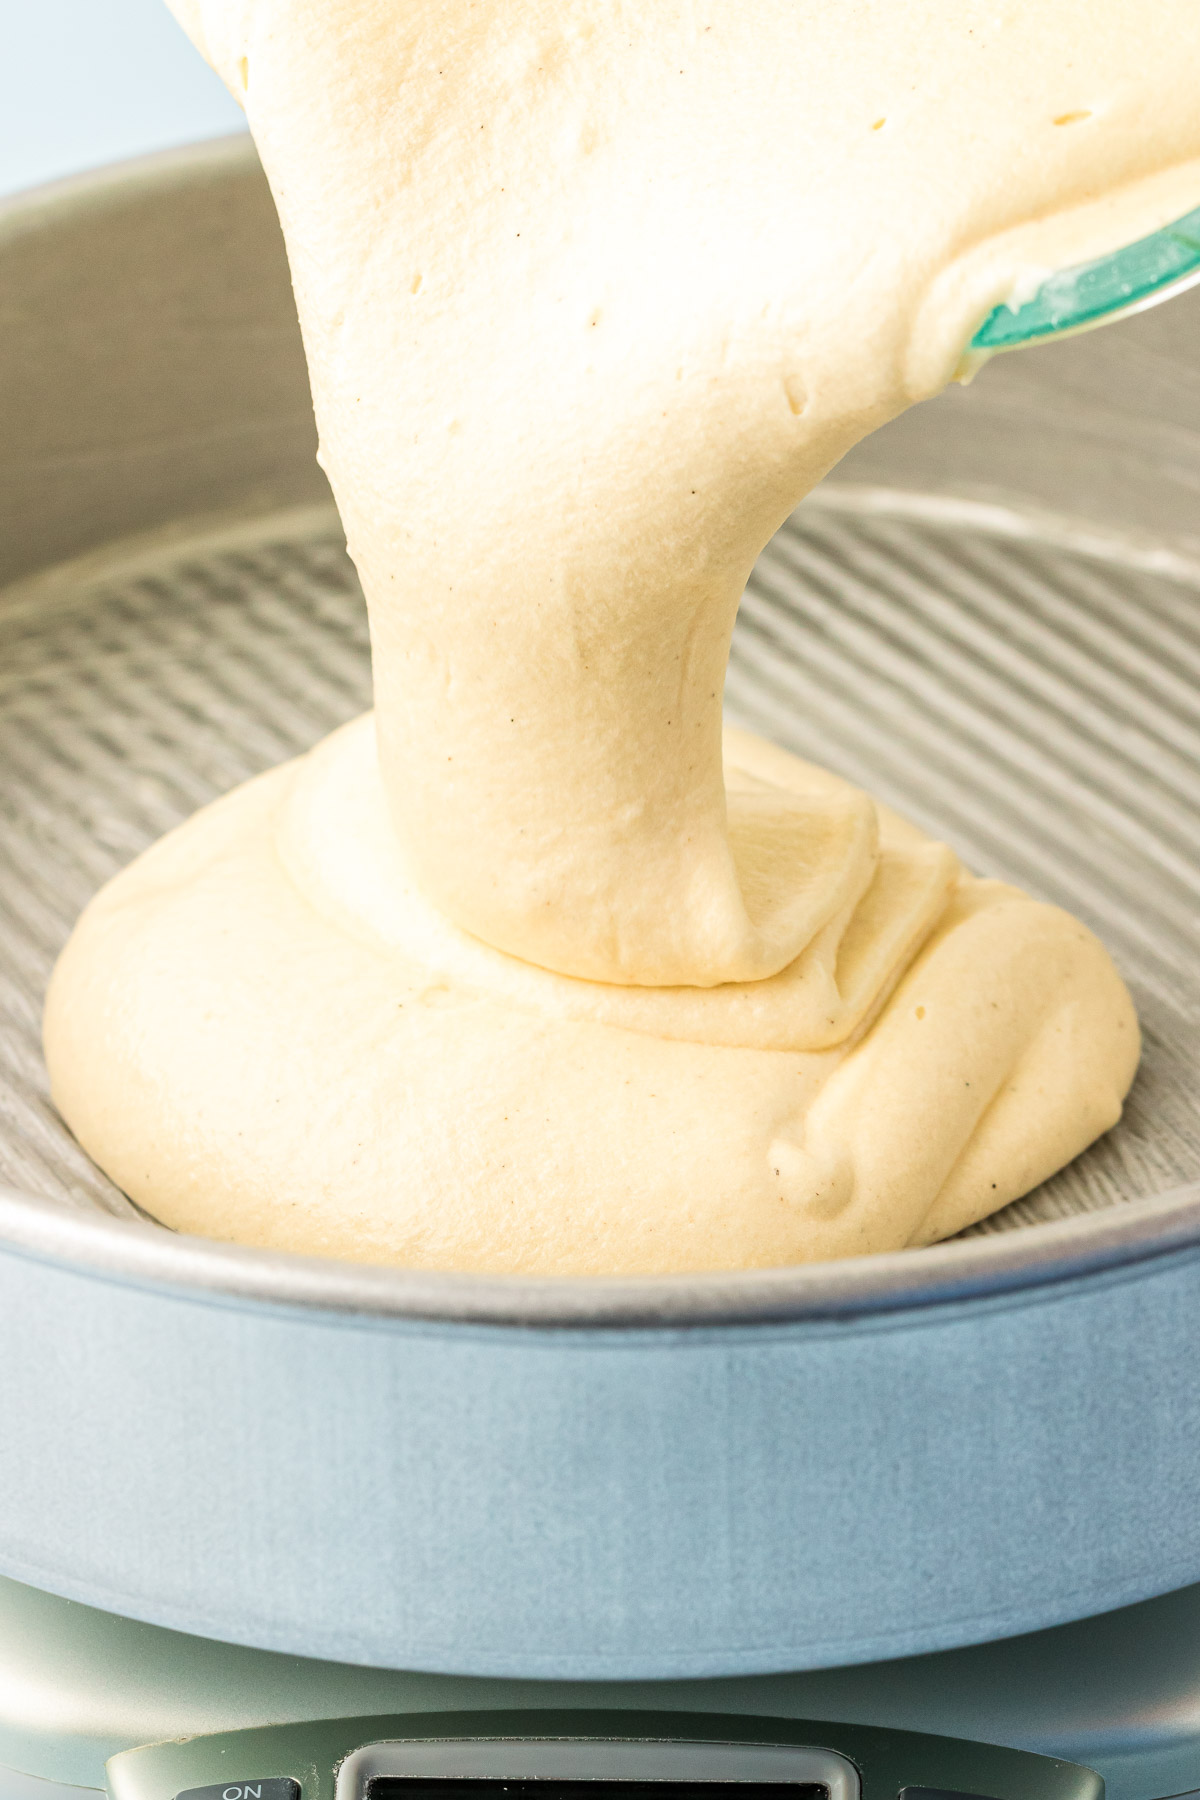
6. Pour the batter equally into two prepared pans. Then smooth out the top of the batter and bake until the edges of the cake begin to pull away from the pan and the top springs back when it’s gently touched.
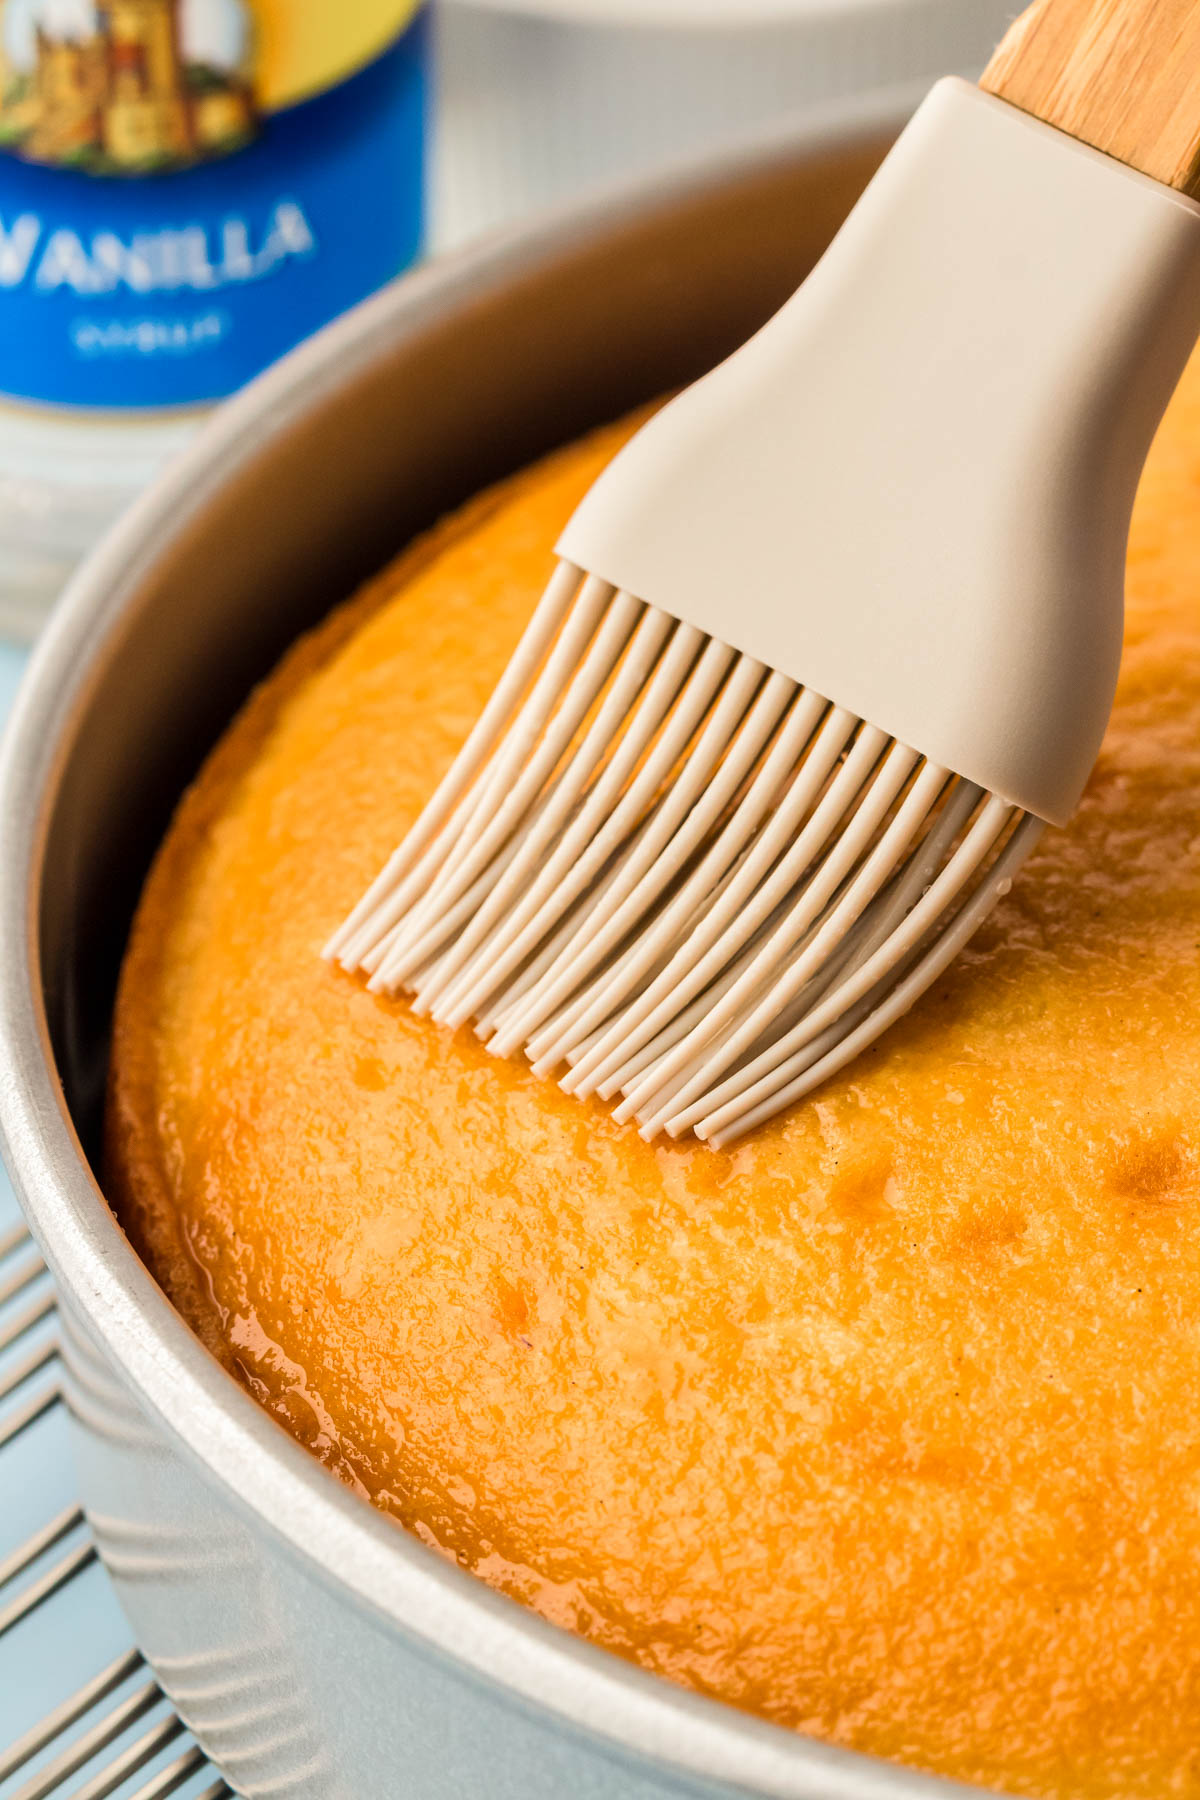
7. As soon as the cakes come out of the oven, brush the tops of them with vanilla simple syrup. Then, allow the cakes to cool in the pans before flipping them onto a wire rack. Once they’ve been flipped onto the wire rack, brush the bottoms and sides with the remaining simple syrup. Afterward, allow them to cool for at least an hour before frosting.
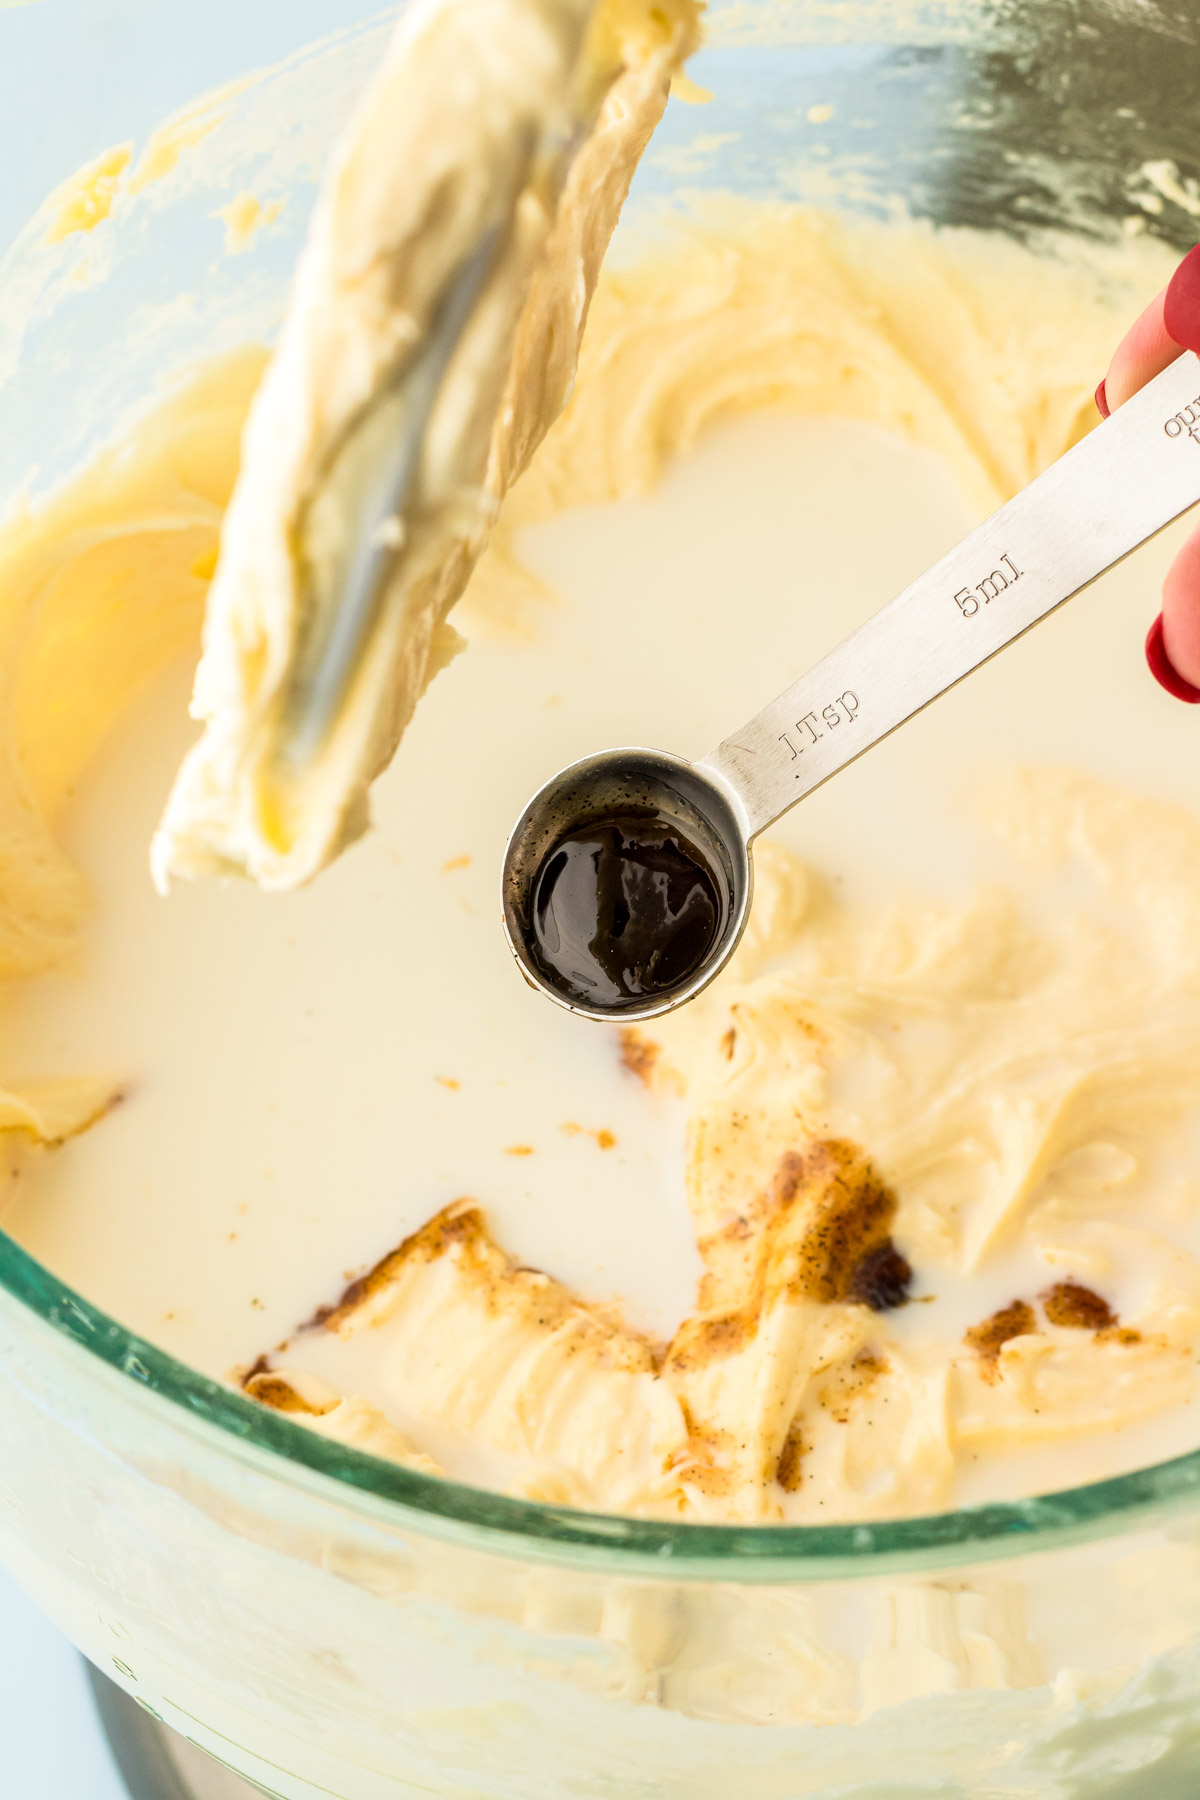
8. Prepare the frosting by creaming the unsalted butter, vanilla bean extract, and salt using a hand mixer or stand mixer fitted with a paddle attachment.
9. Add the powdered sugar in one cup at a time, alternating with heavy cream one ounce at a time. After each addition, mix the frosting at low speed only until incorporated.
10. Whip the frosting at high speed until it becomes light and fluffy.
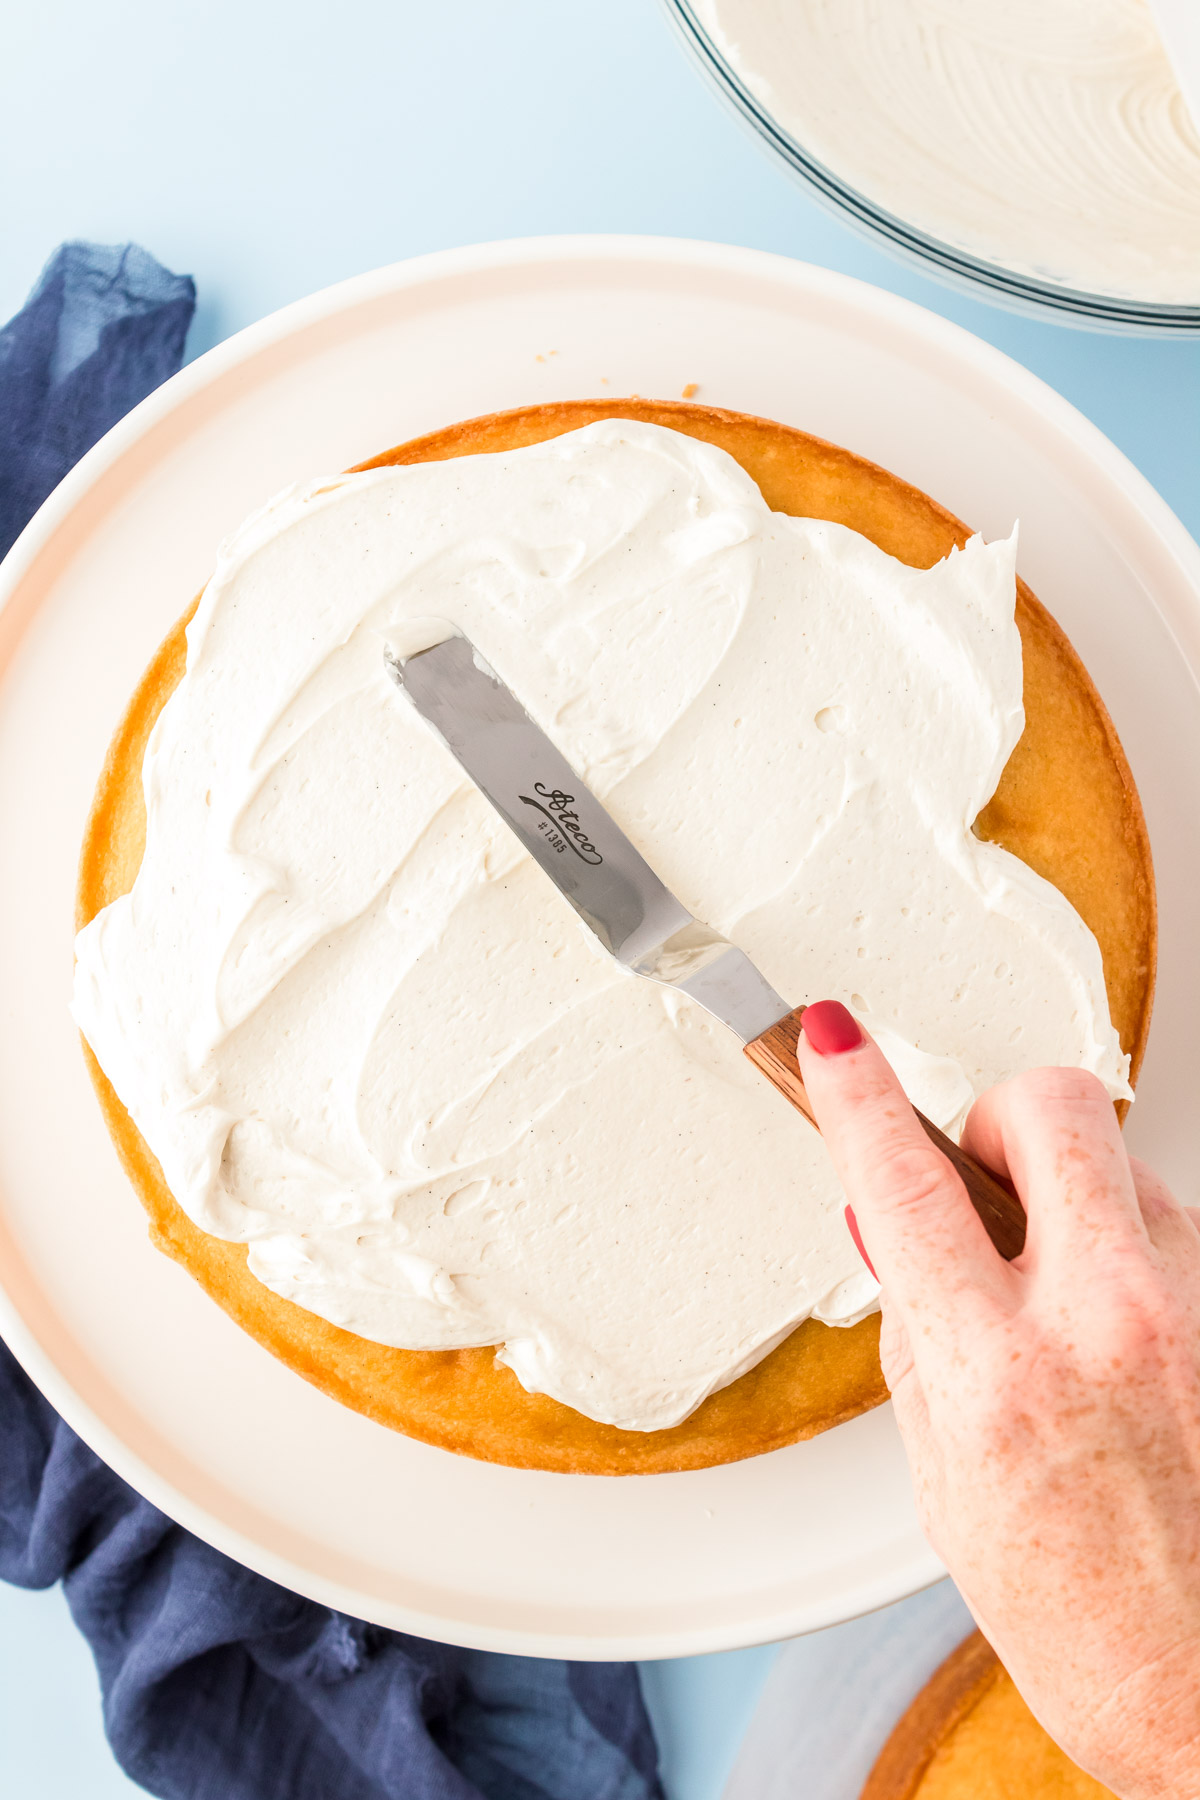
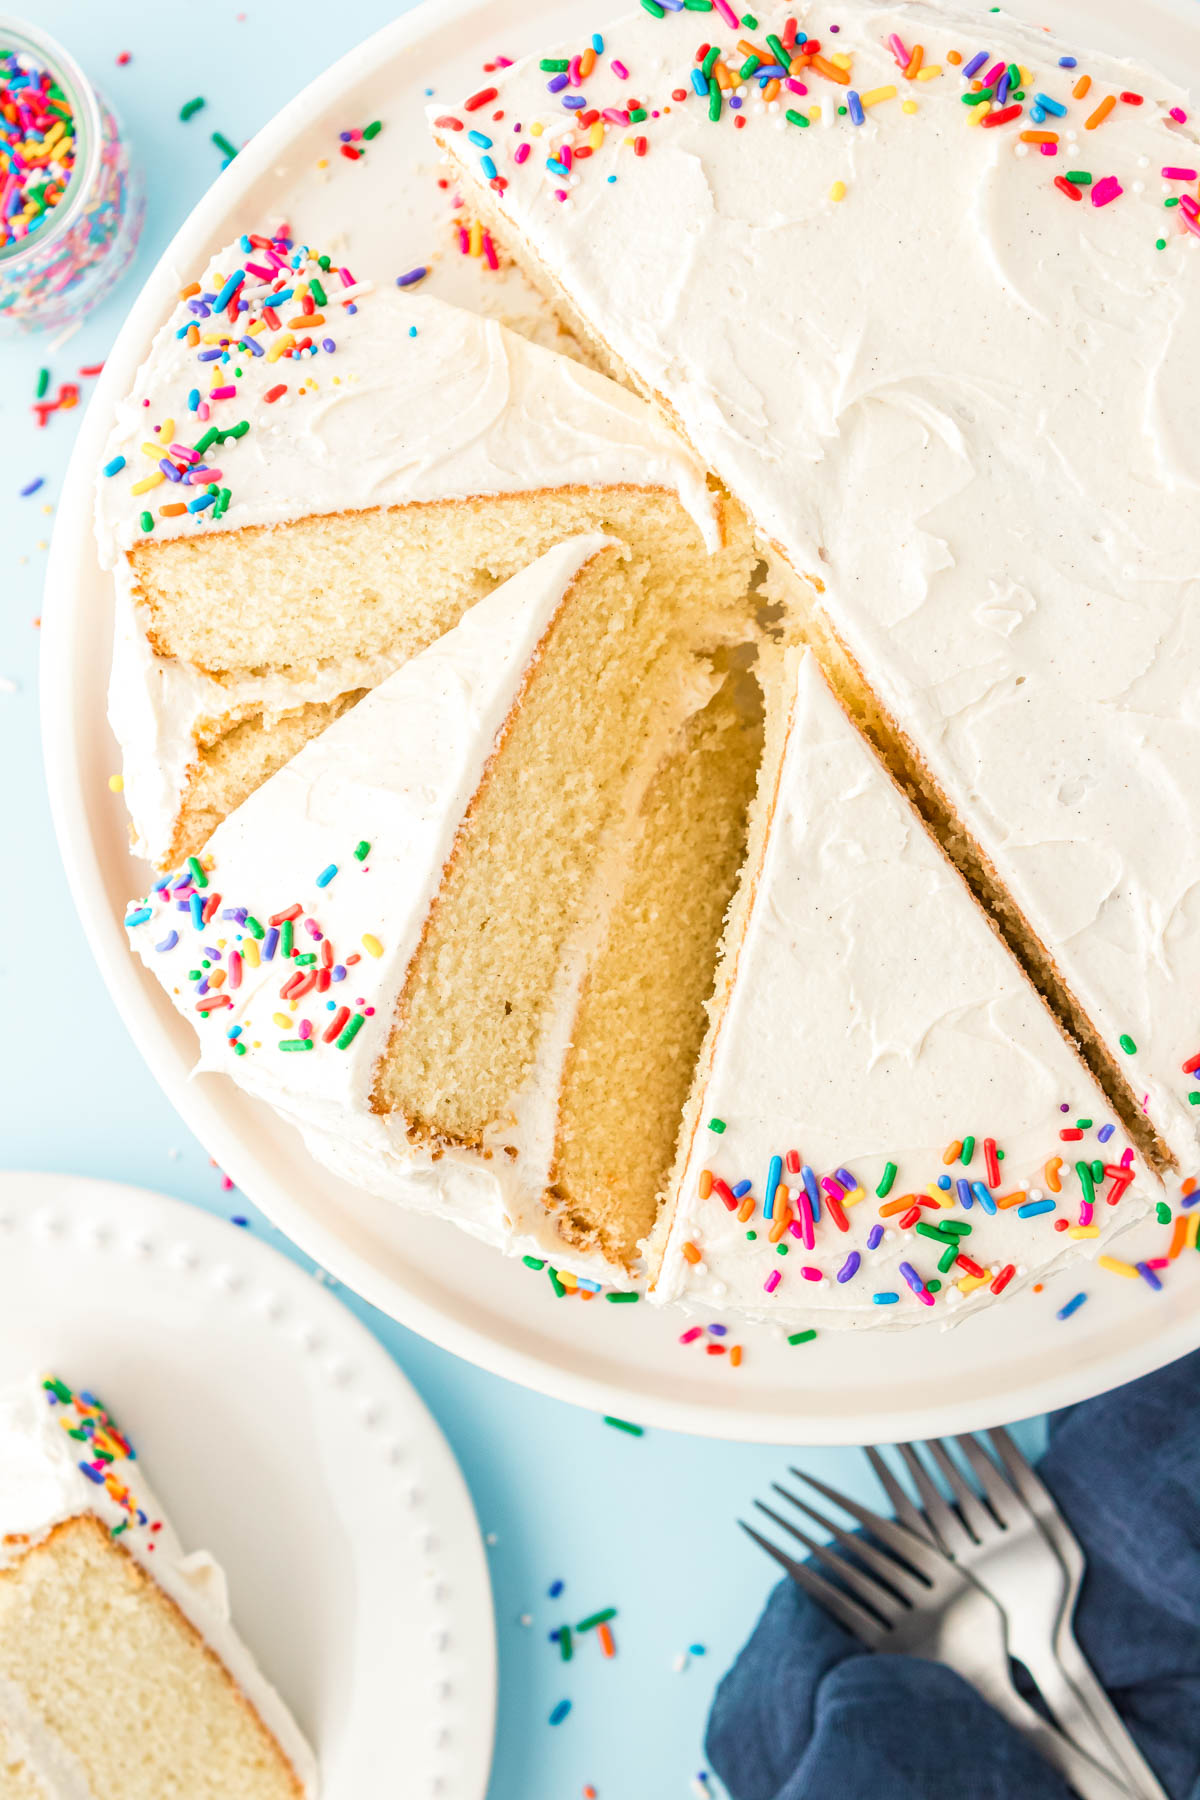
11. Assemble the cakes by placing one layer on top of your cake stand, plate, or board. Then, add some frosting on top to create a thick middle layer of frosting. I recommend using an offset spatula for frosting.
12. Place the second cake layer on top of the frosting and top it with frosting. Spread the frosting all over the cake to create a thin crumb coat. Afterward, place the cake in the fridge to chill and firm up the frosting layer.
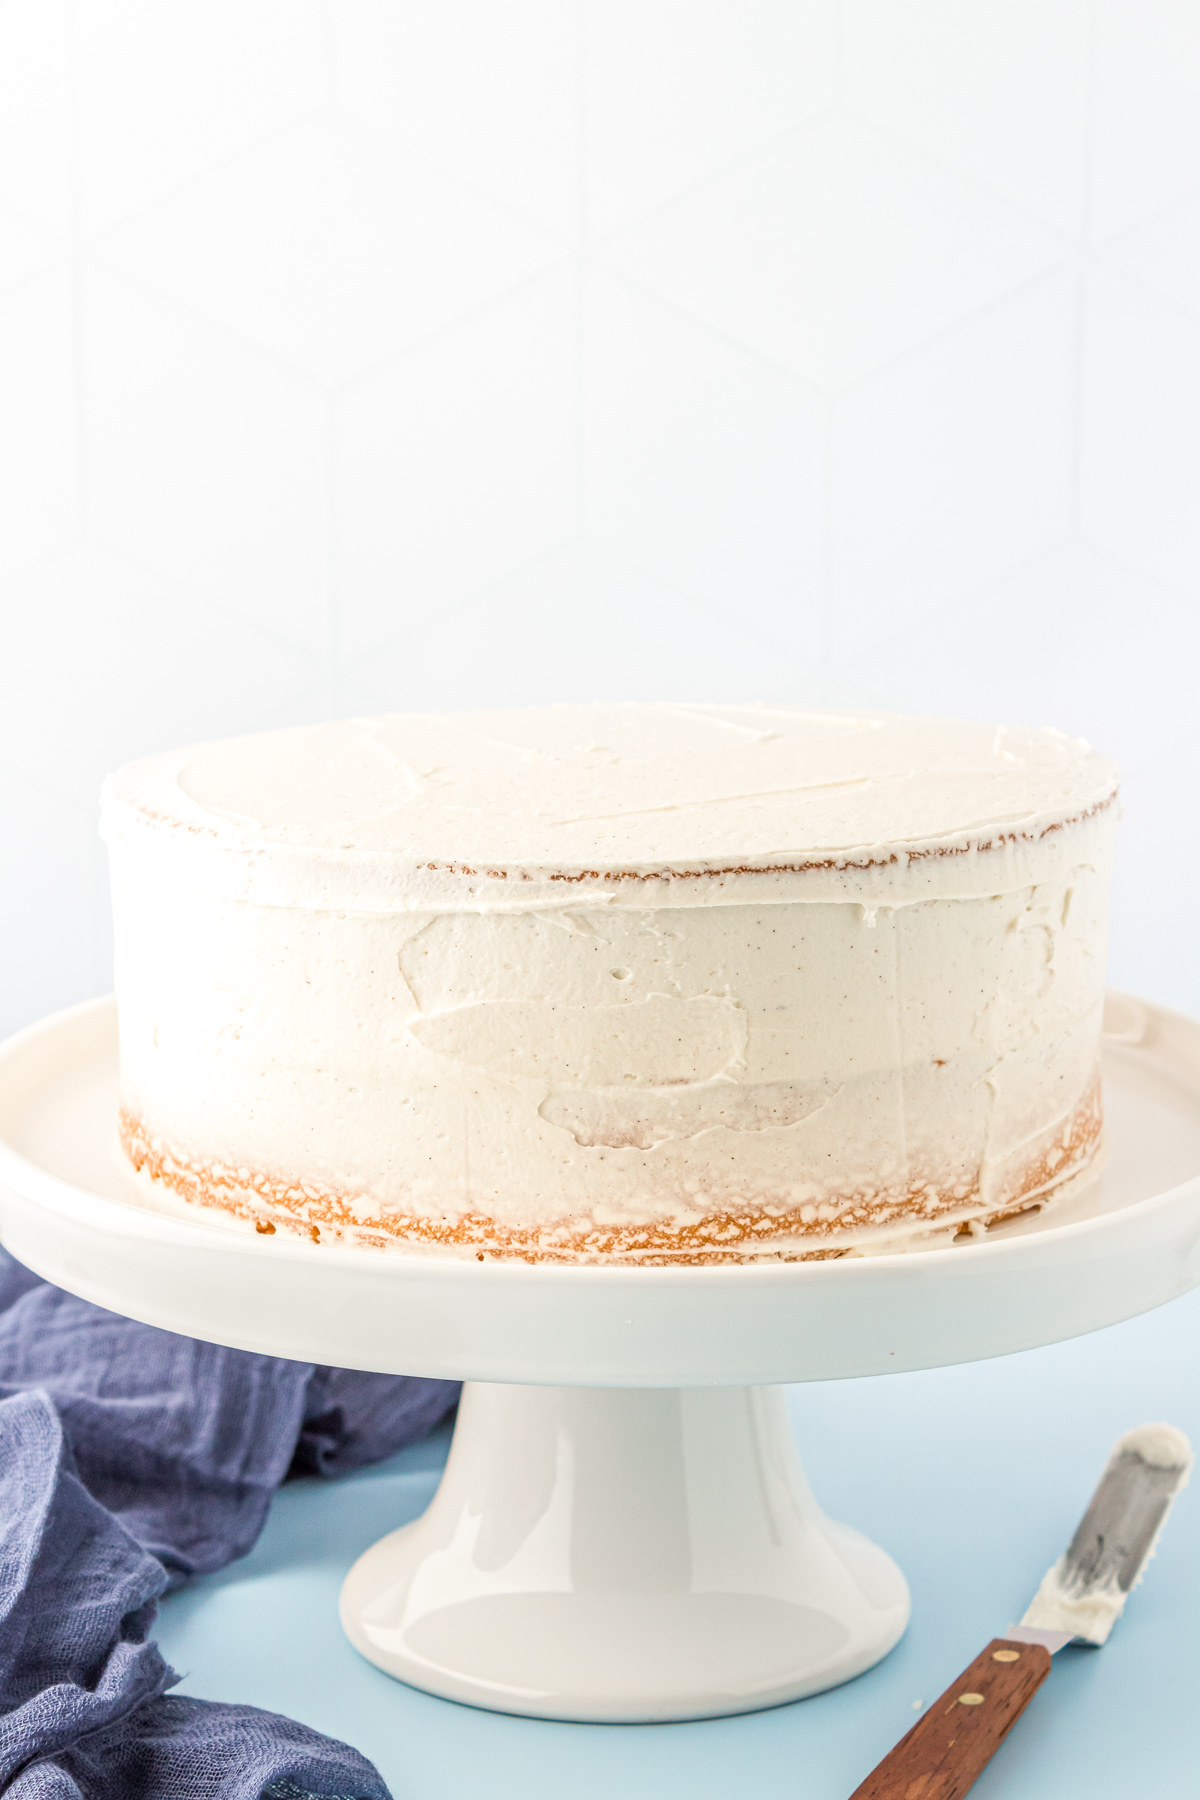
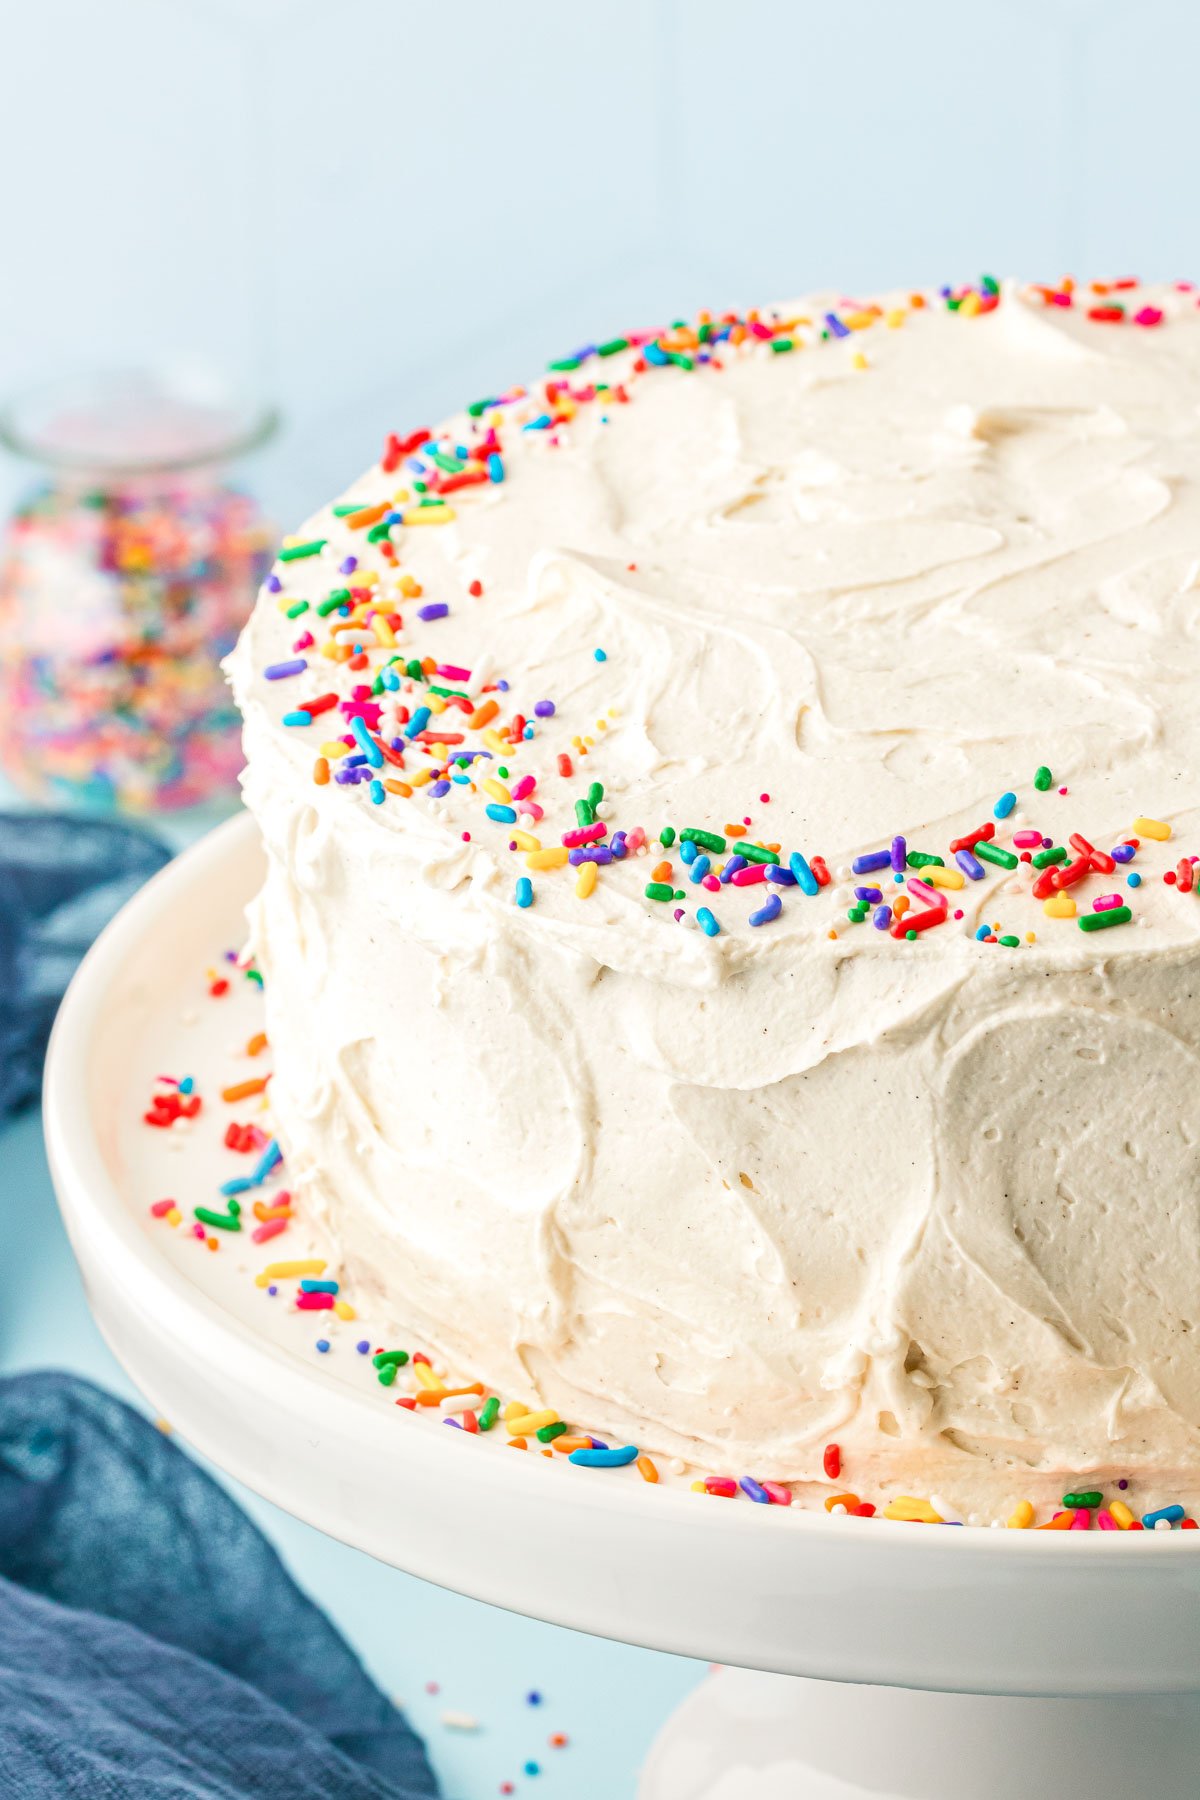
13. Remove from the refrigerator and finish frosting the cake with its final layer. Add sprinkles if desired.
Reverse Creaming Method
Also known as the “paste method,” this technique beats very soft butter into the dry ingredients of a cake instead of creaming it with the sugars prior to adding the egg, liquid, and dry ingredients. Rose Levy Beranbaum popularized the method in her cookbook, The Cake Bible, back in the 80s.
This method emulsifies the butter into the dry ingredients, resulting in ultra-tender cake. The butter coats the dry ingredients, which prevents too much gluten from forming as well as limits the possibility of overmixing.
This technique gives cakes more of that storebought texture by bringing the fat and dry ingredients together first to lend to a more velvety cake texture. It also usually leads to flatter cakes that don’t need to be trimmed before frosting and makes a very sturdy crumb that’s perfect for soaking up simple syrup and holding up thick raspberry cake filling!
Rebecca’s Tips
- Cake Pan Size – This recipe can be made with 9-inch or 8-inch pans. The 8-inch cake pans make pretty thick layers, and the centers will likely come out with small bubbles. These are the 8-inch pans I use with great success and the 9-inch ones (affiliate links)!
- Lining The Pan – Removing the cake layers perfectly from the pan is an important step to create a flawless-looking cake! To do this, I’d recommend using homemade cake goop! However, you can also spray the pan with non-stick cooking spray and then line them with parchment paper.
- Dividing Batter – For even layers, you’ll want to divide the batter into the two pans equally. I usually aim for 765 to 780g per pan. You can use a kitchen scale to measure for accuracy!
- Cake Doneness – Since all ovens and pans will bake differently, there’s a wide range of doneness time. I’d suggest starting with 35 minutes of baking time and then checking the cake layers for doneness. Once a kitchen thermometer inserted into the center of the cake reads 200 degrees F, they’re finished baking.
- Frosting Consistency – When making the frosting, you can add additional powdered sugar if it appears wet or grainy. If the frosting appears to be too stiff, you can add a tablespoon of heavy cream.
- Assembling The Cake – To secure the cake to a cake stand, board, or plate, first spread a dollop of frosting onto it. Then, place the bottom layer onto it. This will help grip the cake and keep it secure!
Substitutions & Variations
- Cake Flour – You can make your own cake flour substitute using just two ingredients.
- Salted Butter – I prefer to use unsalted butter as this gives more flavor control over the recipe. However, you can use unsalted butter and then add an additional 1/4 teaspoon of salt with the dry ingredients.
- Vanilla Bean Paste – Vanilla bean paste has a stronger flavor, but it can be replaced with vanilla bean extract if needed.
- Frosting – Feel free to frost this cake with your choice of frosting! If you’re more of a chocolate fan, I’d recommend enjoying this cake with my Chocolate Cream Cheese Buttercream Frosting!
Vanilla Bean Cake Storage
Cover the cake with the cake plate lid or lightly wrap it with plastic wrap. You can also transfer slices into an airtight container. The Vanilla Bean Cake can then be stored at room temperature for up to two days or in the fridge for up to 5 days.
How To Make Vanilla Cake Ahead Of Time
You can also make the cake layers to freeze for prepping a dessert ahead of time! To do so, follow the recipe instructions, allow the cakes to cool, and hold off on frosting.
Wrap each layer individually in plastic wrap and then again in aluminum foil. Afterward, transfer each double-wrapped cake layer into a large Ziploc bag and carefully squeeze the excess air out of it.
Then, store the bagged layers in the freezer to use within 3 months. When you’re ready to enjoy them, allow the layers to thaw at room temperature. Lastly, make the frosting and decorate your cake!

More Cake Recipes:
- Strawberry Vanilla Cake – Sweet, sticky strawberry filling between two layers of vanilla cake!
- Classic Coconut Cake – Coconut flavored caked wrapped in sweetened flaked coconut!
- Best Italian Cream Cake Recipe – A truly show-stopping cake!
- Easy Buckeye Cake – Rich chocolate cake meets peanut butter balls!
- Funfetti Cake – A dreamy birthday cake that’s covered in sprinkles!
Did You Make This Recipe?
If you’ve tried this recipe, please let leave a review in the comments below. I love hearing from you! Don’t forget to tag me – @sugarandsoulco – on Instagram and Pinterest with your photos, or join our Sugar & Soul Show-offs Community and share them there.

Vanilla Bean Cake
Ingredients
Vanilla Cake
- 3½ cups cake flour 420g
- 2 cups granulated sugar 400g
- 2 tablespoons powdered milk 10g
- 4 teaspoons baking powder 16g
- 1 teaspoon salt 7g
- 1 cup unsalted butter 227g, room temperature, very soft – see notes
- 2 large eggs room temperature
- 4 large egg whites room temperature
- 1 cup whole milk room temperature
- 1 tablespoon vanilla bean paste
- ⅓ cup vanilla simple syrup
Vanilla Bean Frosting
- 1 cup unsalted butter 227g, room temperature
- 1 tablespoon vanilla bean extract
- 4 cups powdered sugar 500g
- ¼ cup heavy cream
- ½ teaspoon salt
Instructions
Cake
- Preheat the oven to 325°F, grease two 9-inch round cake pans with cake goop, or use non-stick spray and line the bottom with parchment paper, and set aside.
- Add 3½ cups cake flour, 2 cups granulated sugar, 2 tablespoons powdered milk, 4 teaspoons baking powder, and 1 teaspoon salt to a stand mixer bowl fitted with a paddle attachment and mix for 1 minute.
- Add 1 cup unsalted butter and mix at medium-low speed until the mixture becomes sandy in texture.
- Add the 2 large eggs and 4 large egg whites one at a time, mixing after each addition. Scrape down the sides of the bowl.
- Add 1 tablespoon vanilla bean paste, then 1 cup whole milk in three parts, mixing for 1 minute after each addition and scraping down the bowl. Mixing until the batter is smooth.
- Divide the batter between the two prepared pans. (I usually get about 765 to 780g per pan).
- Smooth out the top of the batter and bake for 35 to 45 minutes (see notes) until the edges of the cake begin to pull away from the pan and the top springs bake when touched. A cake tester should also come back clean from the center, and the cake should read an internal temperature of 200°F. If using 8-inch pans, the cakes will likely need 5 to 7 additional minutes.
- Immediately after removing from the oven, use a pastry brush to the top of the cakes with some of the ⅓ cup vanilla simple syrup. Allow the cakes to cool in the pans for 10 minutes.
- After 10 minutes, flip them onto a wire rack and brush the bottoms and sides of the cakes with the remaining simple syrup and allow them to cool completely before frosting. About 1 hour.
Frosting
- Cream 1 cup unsalted butter 1 tablespoon vanilla bean extract, and ½ teaspoon salt in a large mixing bowl with a hand mixer or a stand mixer bowl fitted with a paddle attachment (recommend this method).
- Add 4 cups powdered sugar 1 cup at a time, alternating with ¼ cup heavy cream 1 ounce at a time. Mixing at low speed after each addition just until incorporated.
- Increase speed to high and whip for 2 to 3 minutes until light and fluffy. If the frosting looks wet or grainy, add an additional ½ cup of powdered sugar, if it's too stiff, add 1 tablespoon of heavy cream.
Assembly
- Spread a small bit of frosting on your cake stand, board, or plate to help grip the cake.
- Place one of the cake layers on top of that frosting and add some frosting on top to create and thick middle layer of frosting. You can pipe this on and smooth it out with a bench scraper also.
- Place the next layer on top of the frosting, then top with frosting and spread all over to create a thin crumb coat. Place the cake in the refrigerator for 15 minutes.
- Remove from the fridge and finish frosting it with the rest of the frosting. I like to make luscious-looking swirls with this cake, but you can pipe it or decorate however you like. Add sprinkles immediately after frosting so they stick before the frosting starts to crust.
Notes
- I recommend using European-style butter and letting it sit out overnight before using it for the best results.
- These are the pans I use: 9-inch or 8-inch will work. Note that the 8-inch pans make pretty thick layers, and the centers of the cakes are likely to have some small bubbles.
- There is a wide range in the doneness time because different ovens and pans bake differently. I recommend starting with 35 minutes and checking for doneness and adding a few minutes at a time as needed. The center of the cake should be 200 degrees F when fully done.
Nutrition
Did You Make This Recipe?
Don’t forget to share it with me on Instagram @sugarandsoulco and follow on Tiktok @sugarandsoulco and Pinterest @sugarandsoulco for more!
Share your thoughts!
Love this recipe? Share your thoughts with me and leave a review! And don’t forget to connect on your favorite social platform below!


Hi
Did you use european style butter in the frosting recipe to.
I usually do, but you do not have to! It’s more important in the cake because of the high fat content!