
Peppermint Mocha Cookies

Peppermint Mocha Cookies are made with a deep, coffee-flavored chocolate cookie dough around a peppermint patty that’s topped with a marshmallow! A reasonably simple, no-chill, gourmet cookie recipe that will impress friends and family!
Fill your holiday gatherings with more cool peppermint flavor by also making these Peppermint Sugar Cookies or a batch of Chocolate Peppermint Thumbprint Cookies! Both delicious recipes take just 20 minutes to prep!
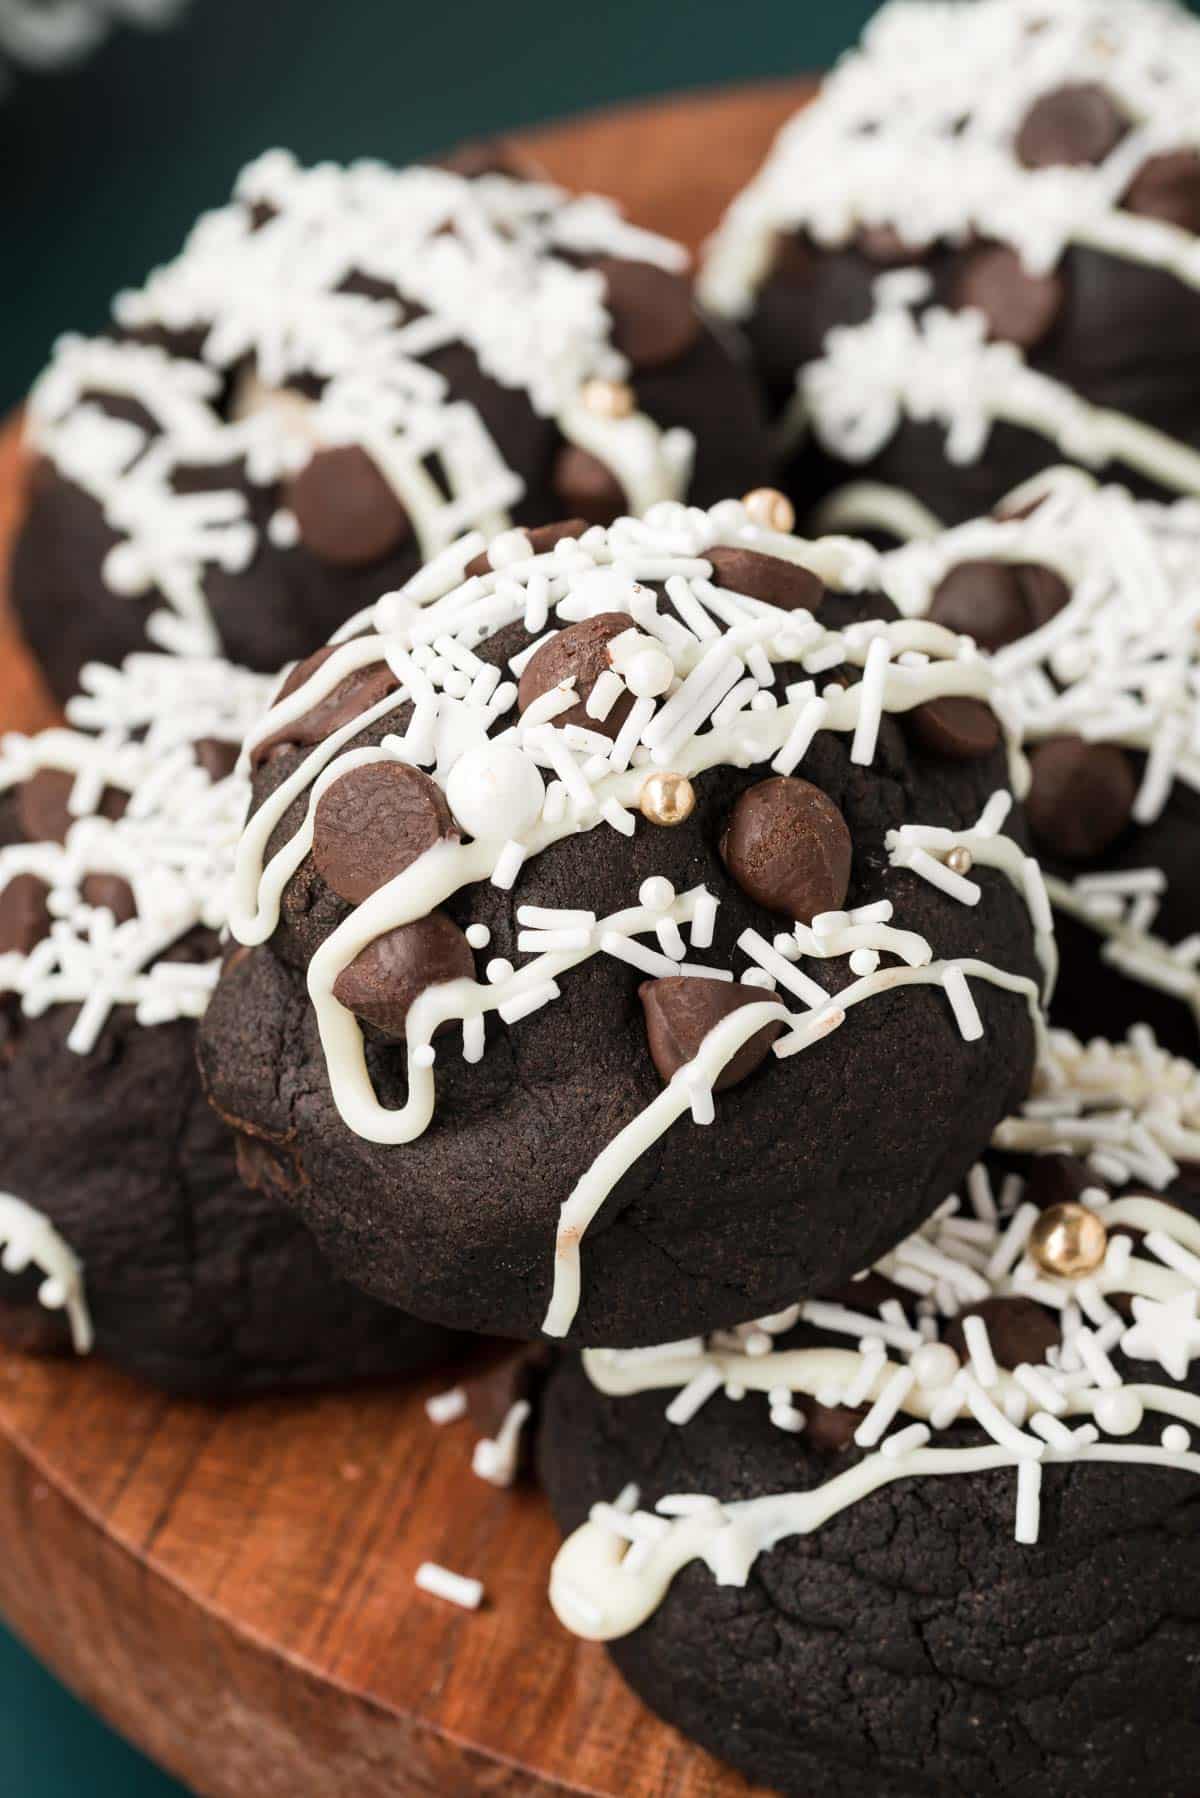
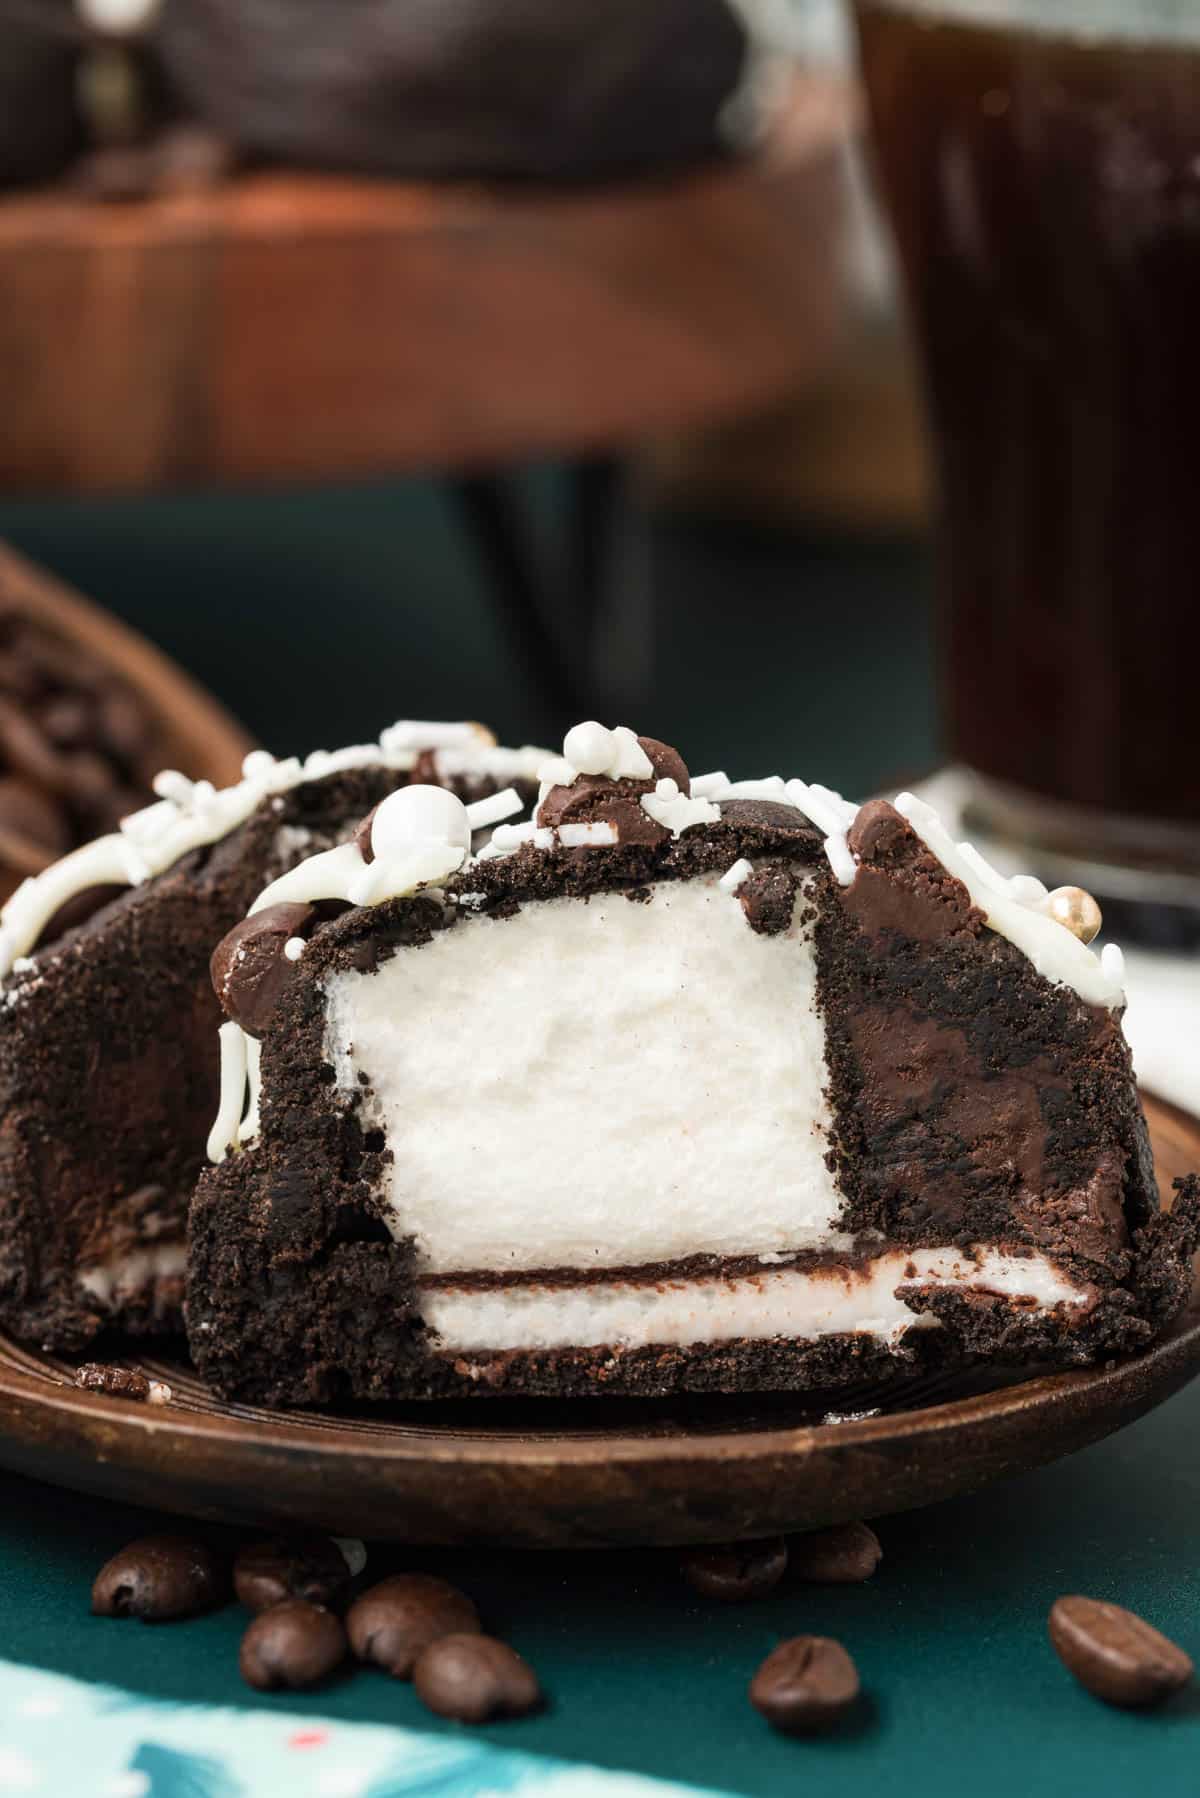
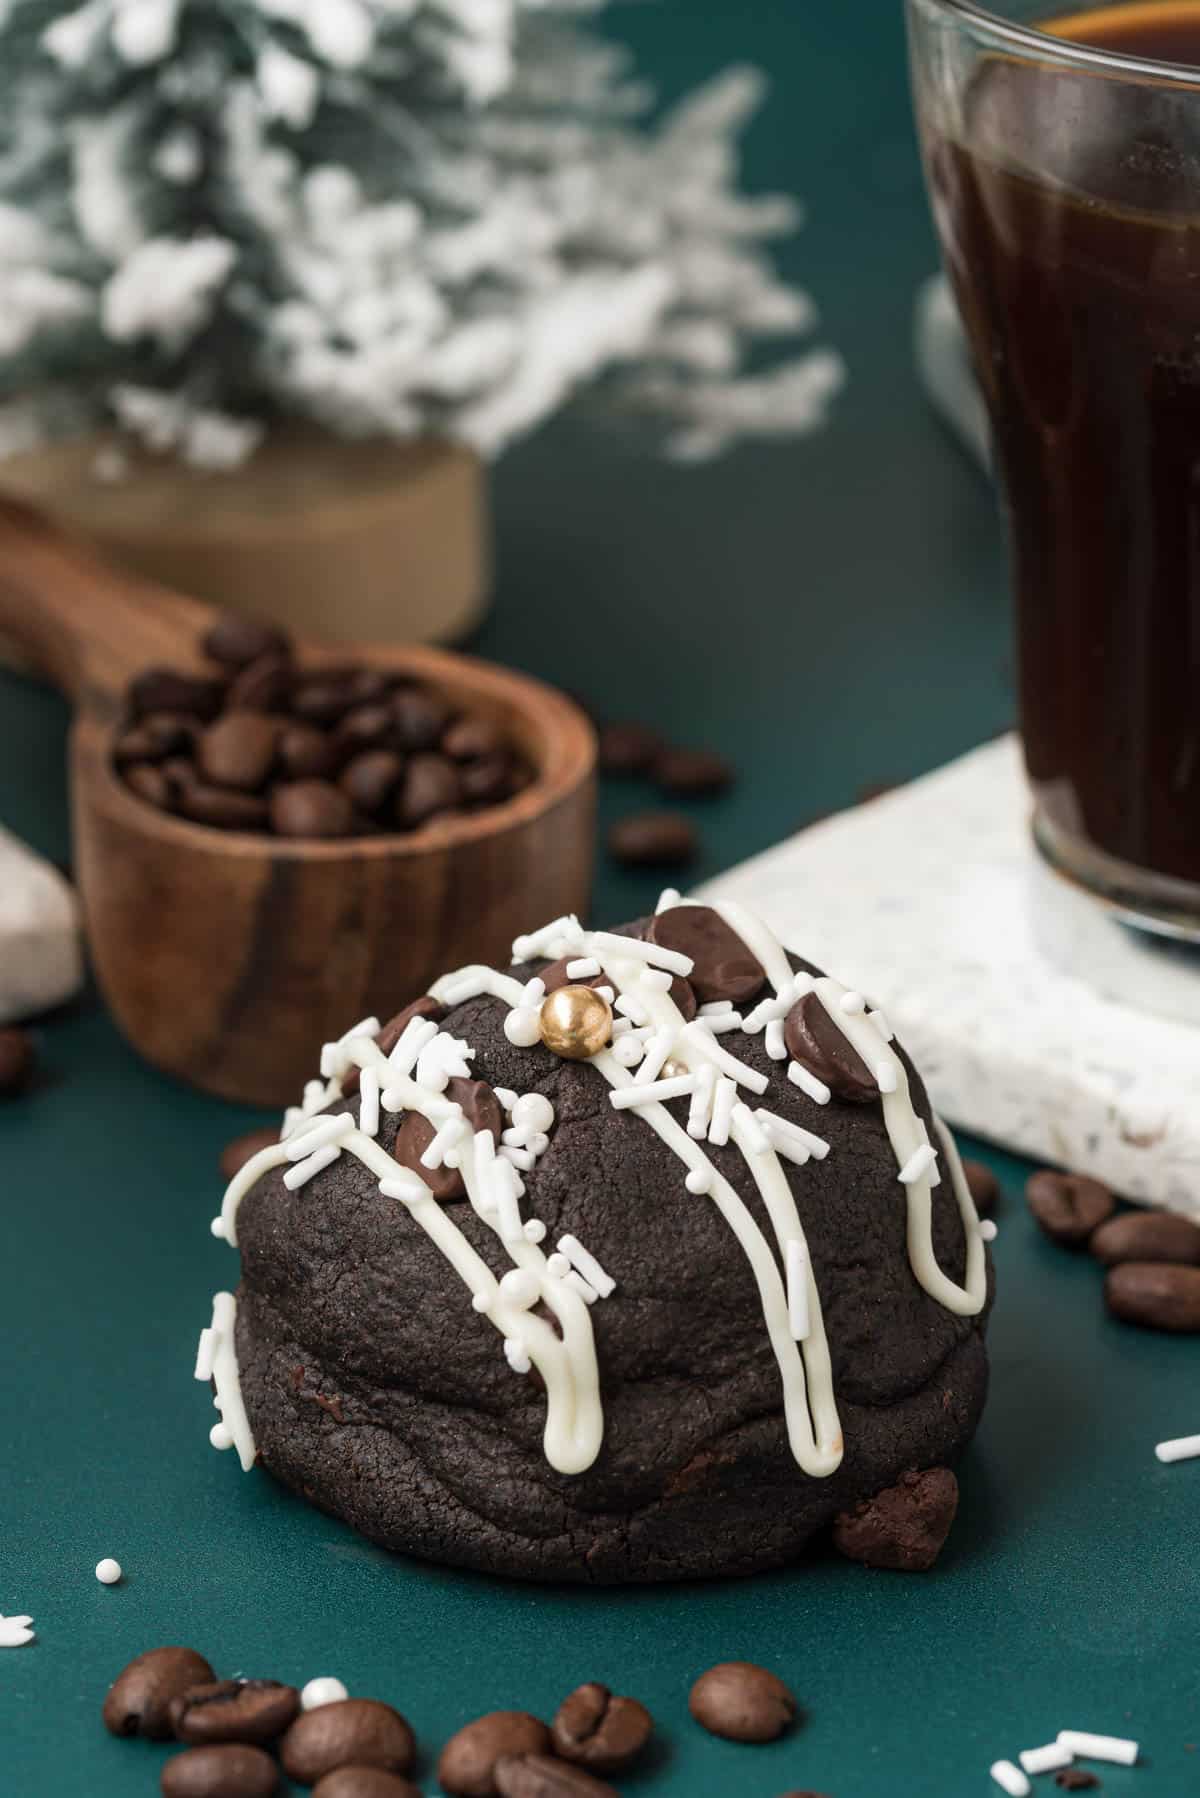
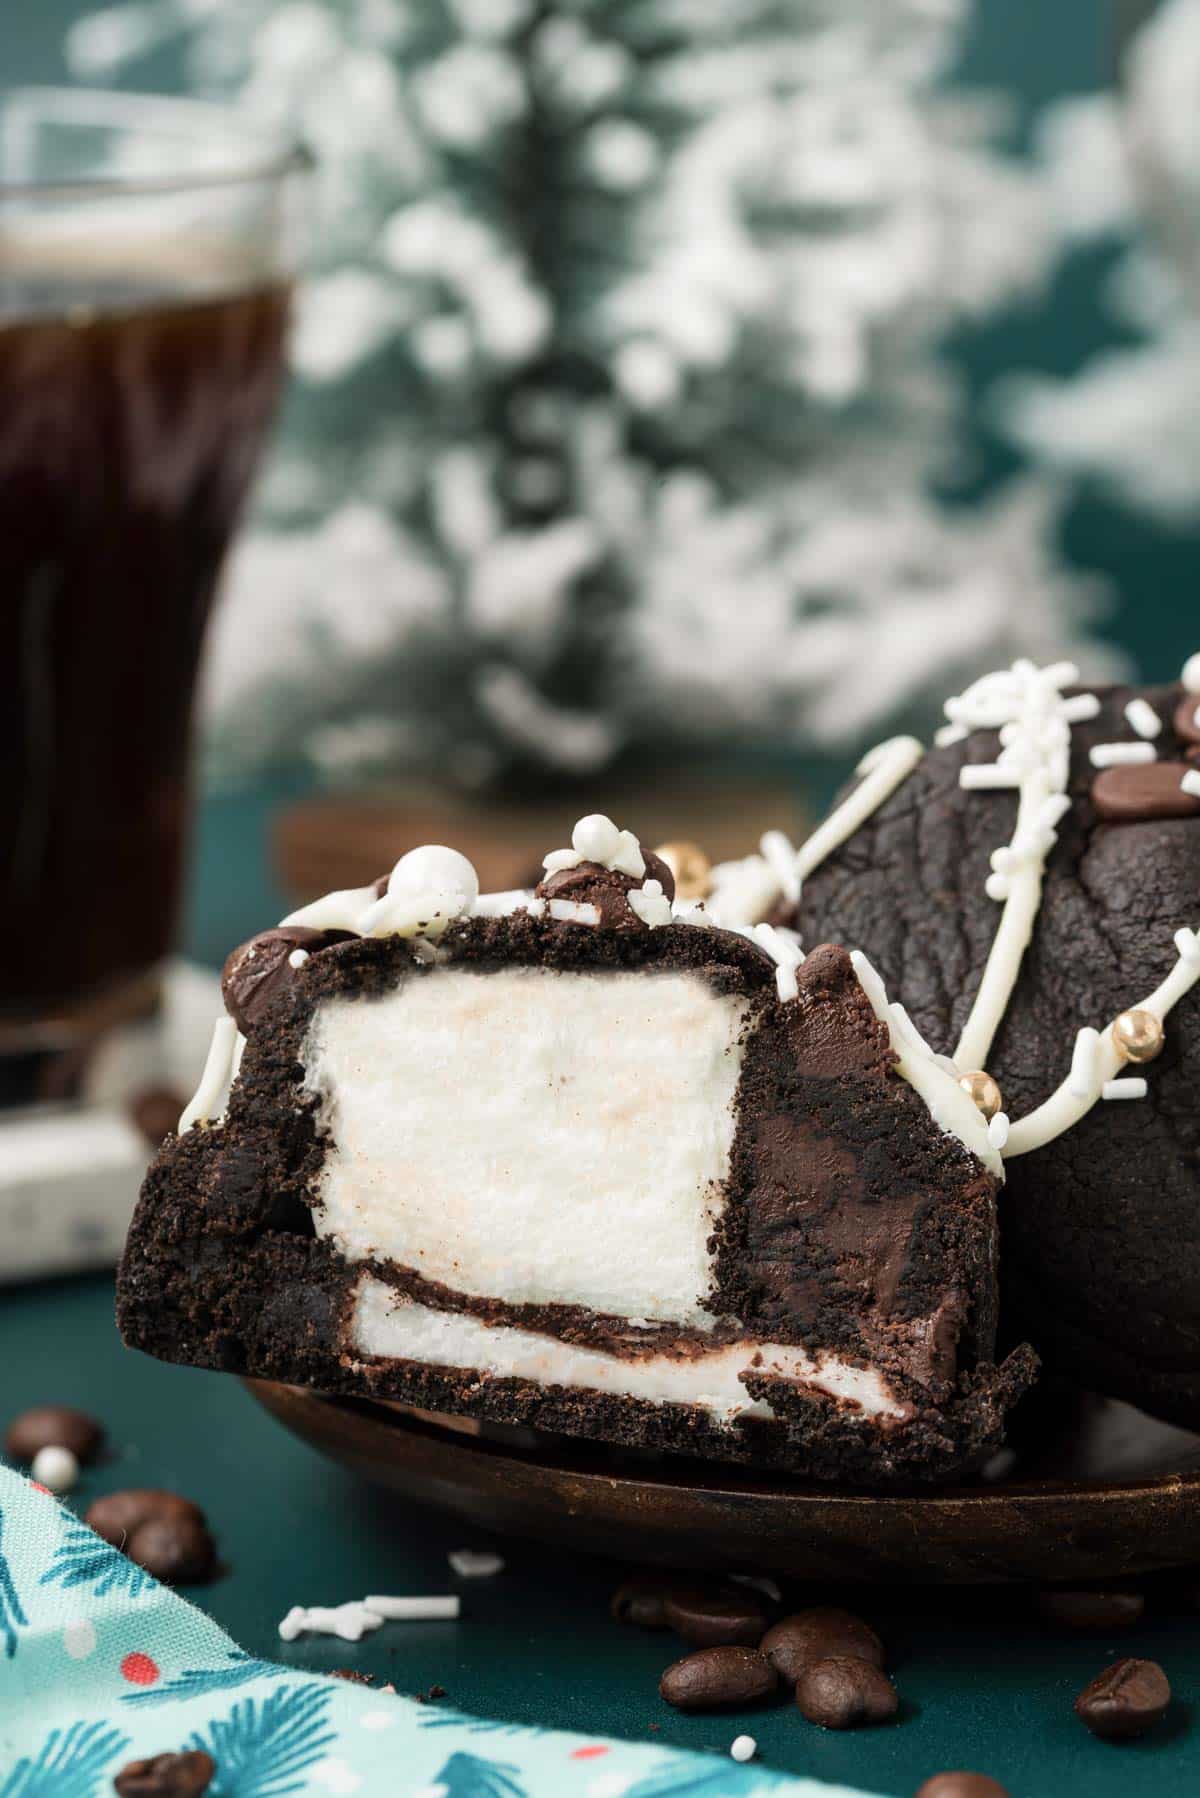
These Peppermint Mocha Cookies are a show-stopping treat that tastes just as good as they look! Each cookie carefully wraps deep flavored cookie dough around a peppermint patty and marshmallow.
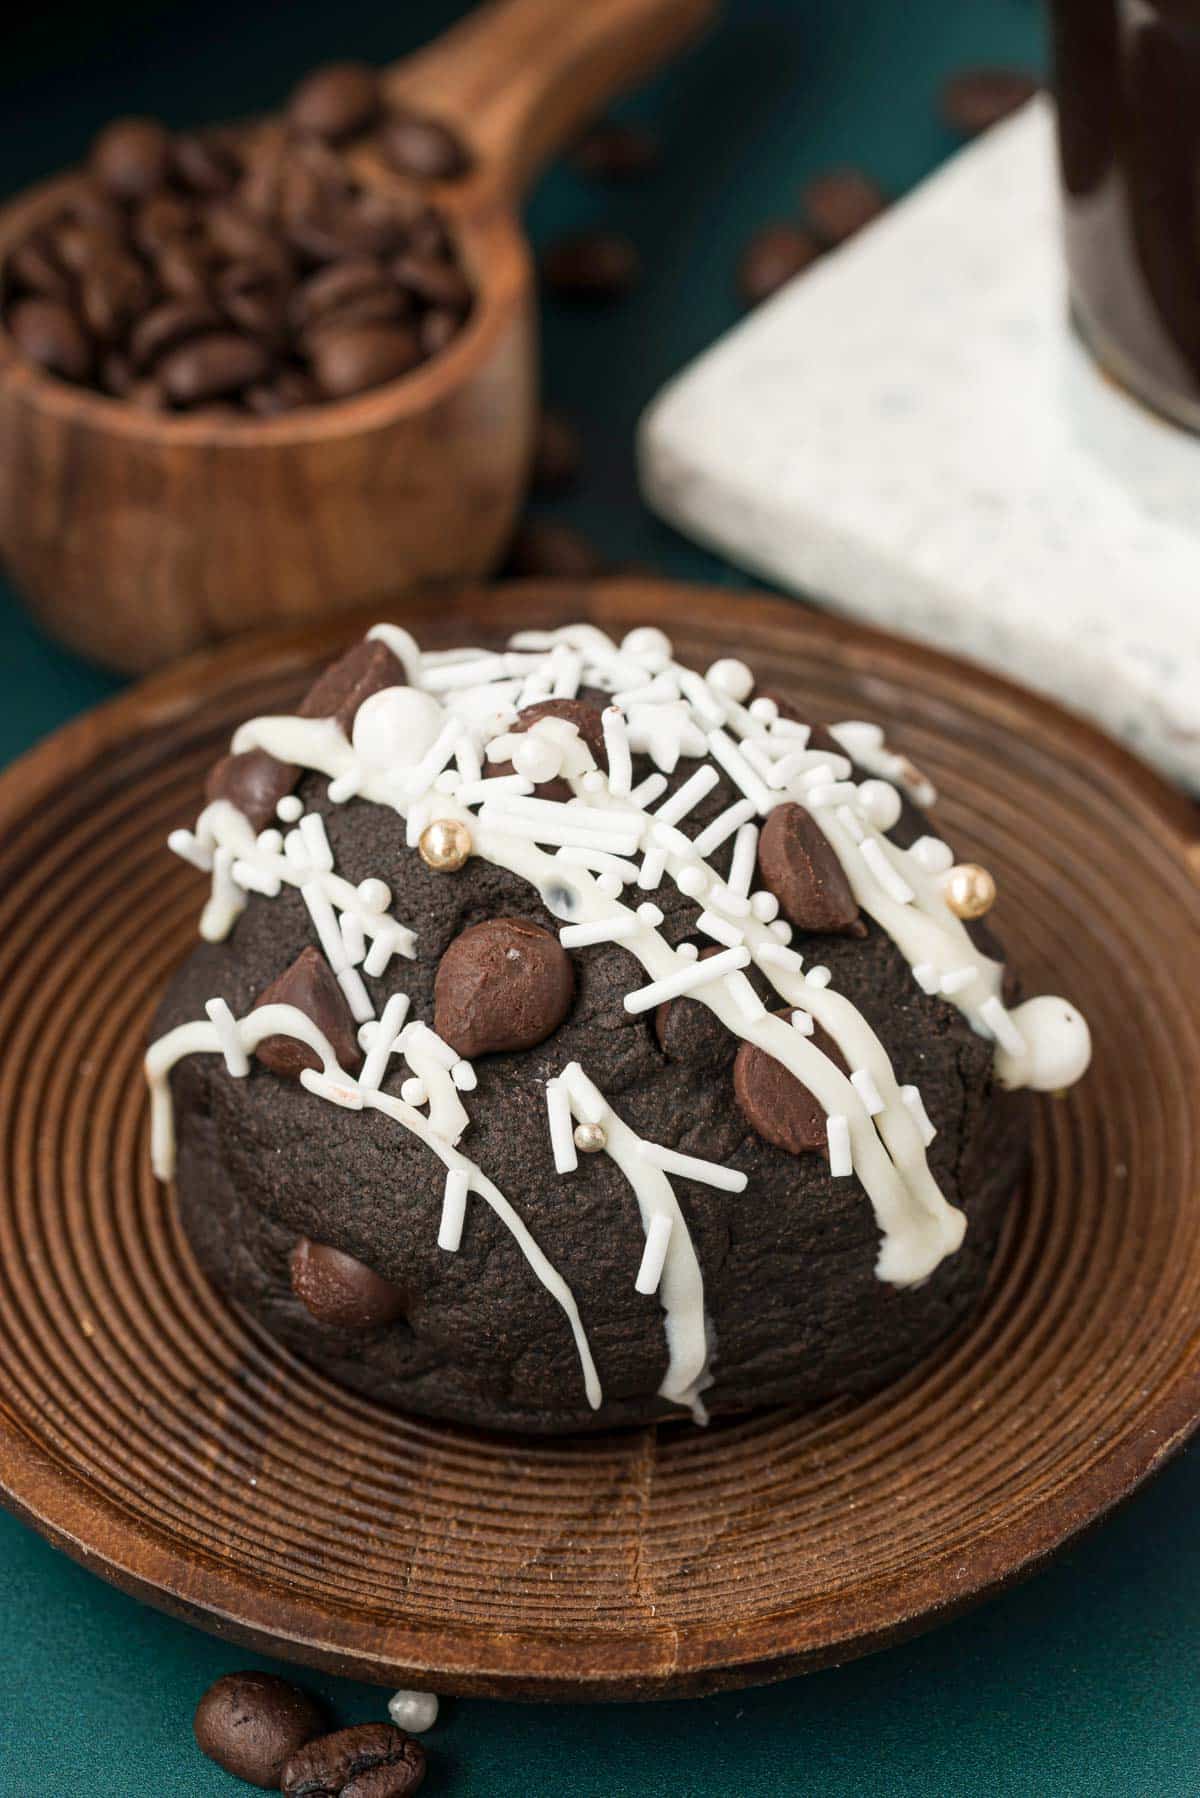
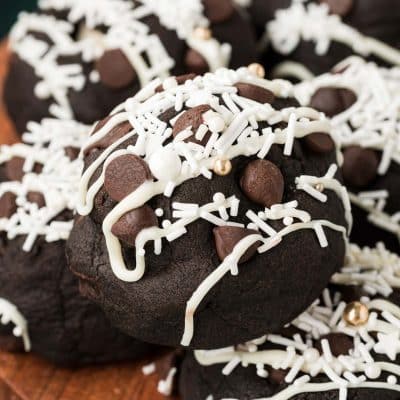
Once baked, the soft cookies are drizzled with melted white chocolate and topped with festive sprinkles! Delivering up a Gourmet Cookie that’s actually pretty simple to make and ready in under an hour!
Everyone loves these Peppermint Christmas Cookies that remind them of Starbucks’ Peppermint Mocha! It’s an impressive gourmet cookie that you’ll want to include on holiday cookie trays, gifts to teachers, and serve at holiday parties alongside Crockpot Hot Chocolate!
Rebecca’s Recipe Review
Taste: With ingredients such as espresso powder, black cocoa powder, and dark chocolate chips, you can expect a deep coffee-flavored cookie! With the marshmallow bringing a level of sweetness and the peppermint patties delivering a taste of seasonal flavor!
Texture: These thick cookies are firm but soft, moist, and tender! Each bite is filled with soft marshmallows to ensure you get the best cookie texture of all, chewiness! Once cooled, the peppermint patties firm back up but aren’t hard, so they hold their shape but yield themselves to a nice easy bite.
Ease: 5/10
Pros: Impressive gourmet cookies that make great gifts or a treat to enjoy with friends and family.
Cons: If you don’t tightly seal the dough around the filling, the marshmallow can leak out during baking.
Would I Make This Again? Yes, I make these every holiday season!
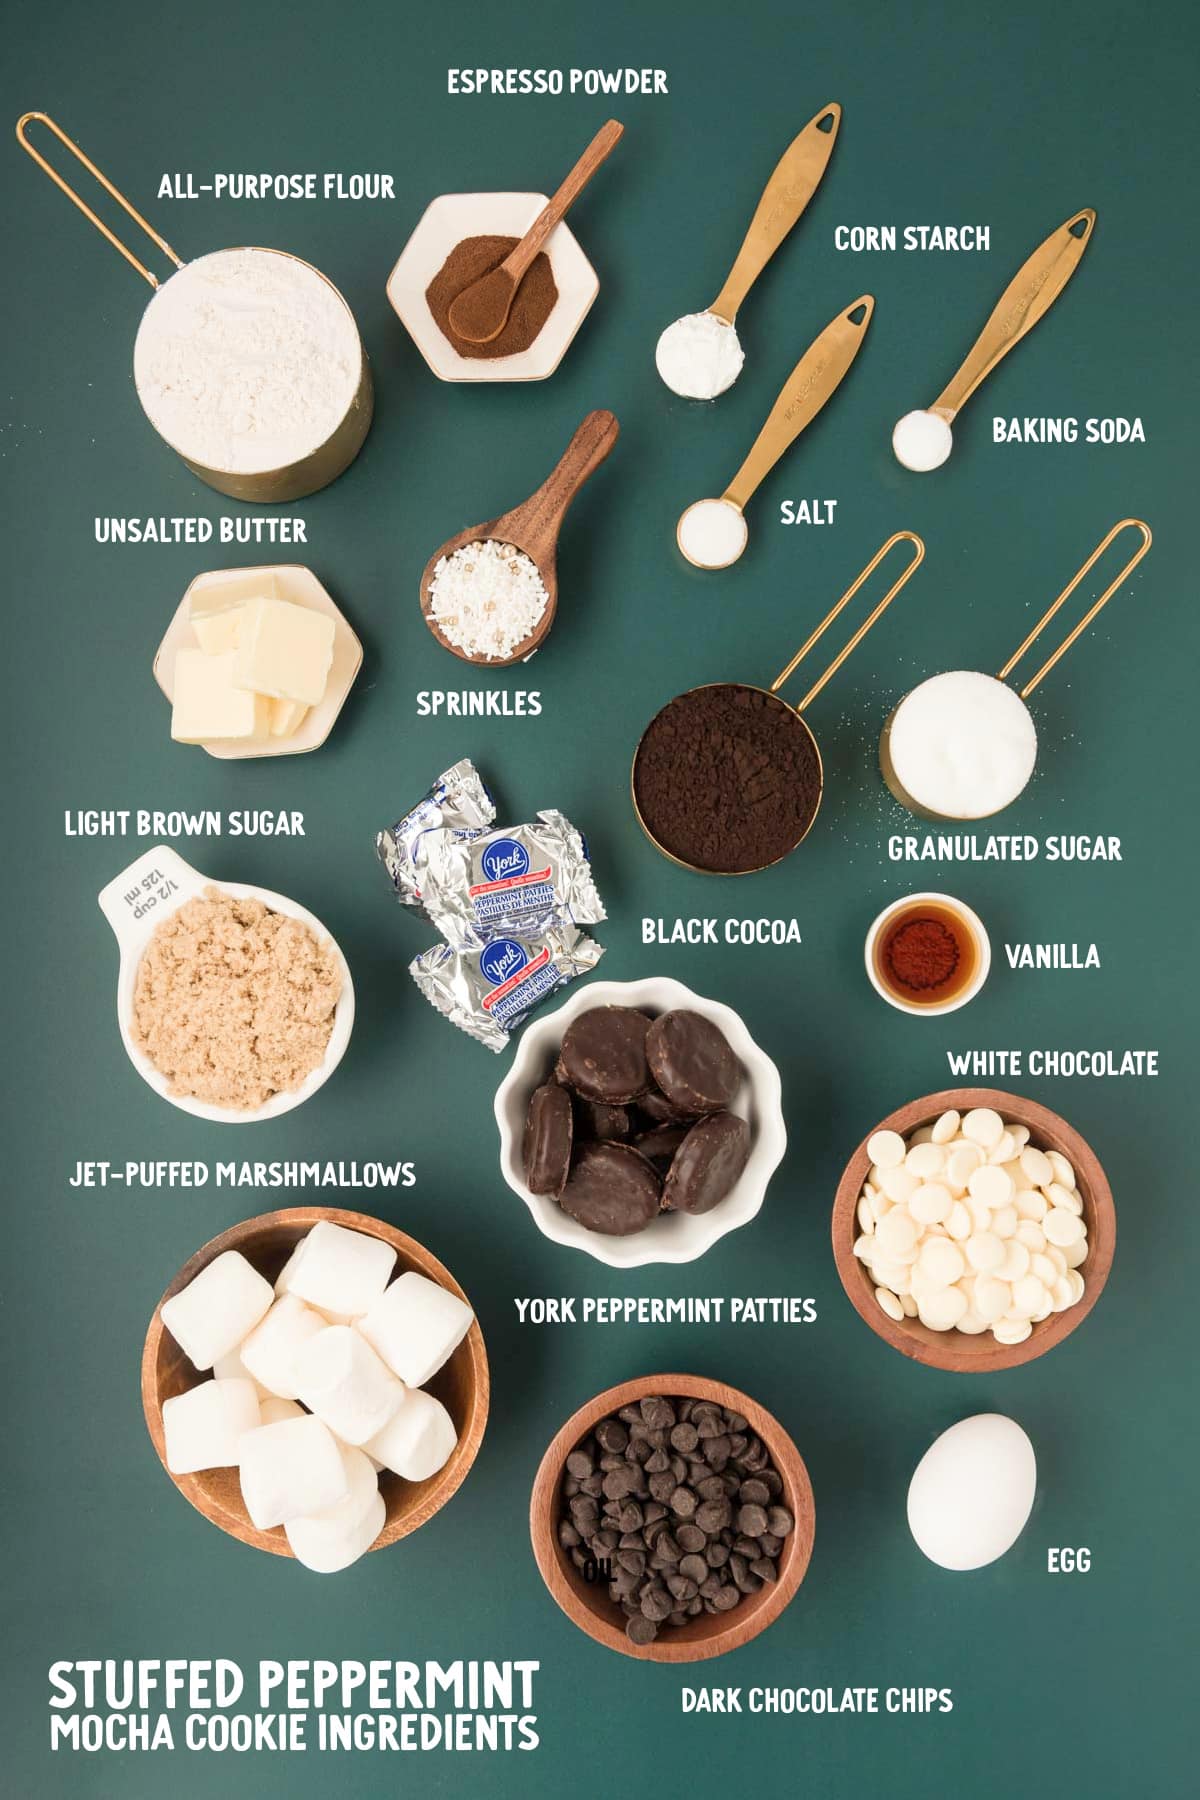
Ingredients For Peppermint Mocha Cookies
- All-Purpose Flour
- Black Cocoa Powder
- Espresso Powder
- Cornstarch
- Salt
- Baking Soda
- Unsalted Butter
- Light Brown Sugar
- Granulated Sugar
- Large Egg
- Pure Vanilla Extract
- Dark Chocolate Chips
- York Peppermint Patties
- Regular-Sized Marshmallows
- White Chocolate Melting Wafers
- Holiday Sprinkles
Using Black Cocoa Powder In This Cookie Recipe
To achieve the deep, bold coffee flavor of these Peppermint Mocha Cookies cookies, the addition of black cocoa powder is essential! Black cocoa powder (affiliate link) is a type of cocoa powder that has been heavily alkalized.
Giving it a much smoother taste than other cocoa powders! When it pairs with the espresso powder in this recipe, it creates cookies with a bold, deep flavor.
If you don’t have any on hand, you can swap it out for Dutch-processed cocoa powder. However, it may alter the final taste of these cookies a bit! And will definitely change the final color.
Not All Marshmallows Are Created Equal
We discovered during testing that Jet-Puffed marshmallows worked the best in these Easy Peppermint Mocha Cookies. Other marshmallows were too firm and didn’t like being squished in the dough and causing the dough to keep separating after being sealed and rolled.
Alternatively, you can stuff these cookies with miniature marshmallows. They won’t create quite as rounded of a cookie structurally, but they will still be delicious.
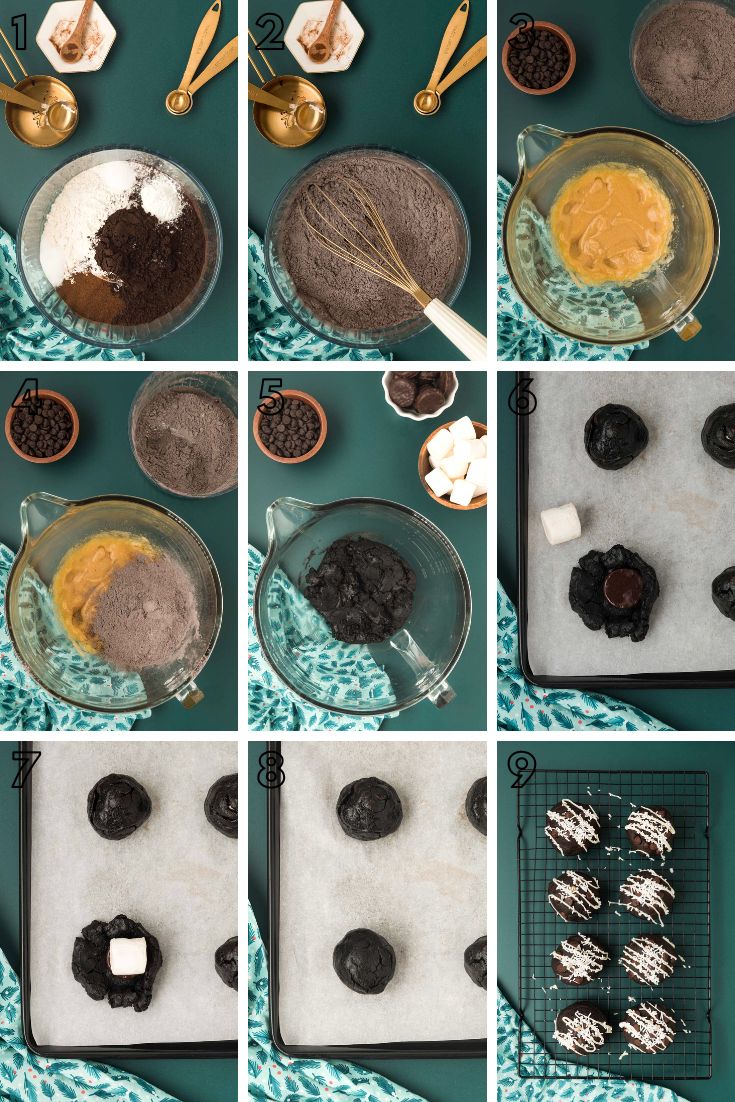
How To Make Peppermint Mocha Cookies (Step by Step)
- Whisk together the dry ingredients in a mixing bowl (1 & 2).
- Partially melt the butter, then mix it with the sugars, egg, and vanilla in a large mixing bowl (3).
- Add in the dry ingredients to create a dough that feels like playdough (4 & 5).
- Portion the dough into 8 equally sized balls – I HIGHLY recommend using a kitchen scale to do this (6).
- Place a York Peppermint Patty in the bottom of the well, then top it with a marshmallow – make sure it’s lying on its side (7).
- Gently work the dough up and around the filling and pinch to seal, then roll to smooth out any seams (8).
- Bake and then cool completely before topping with white chocolate drizzle and sprinkles (9).
Rebecca’s Tips
Even though these Chocolate Peppermint Cookies are gourmet, they are actually pretty easy to make. But it’s important to make note of some of these tips so the process goes smoothly!
- Weighing Ingredients – I have included some weighted measurements in this recipe to help you have total success! Using a kitchen scale (affiliate link) is the surest way to ensure your baked goods turn out properly! If not, if too much flour is accidentally added, the result could be dry, crumbly cookies.
- Assembling The Cookies – Portion the dough out into 8 even amounts. Then use your thumb to make a well in them. Then, place a peppermint patty in each well and top it with a marshmallow – make sure it is on its side. Use bits of the 10th portion of dough to add to the other balls if needed. to cover.
- Sealing The Dough – Gently work the cookie dough up around the sides to cover the filling and pinch it to seal. Then roll it between your palms to smooth it out! Make sure to get a good seal or the marshmallow could see out during baking.
- Peppermint Patty Bottom – When placing the wrapped cookie on the baking sheet, try to place it with the peppermint patty on the bottom.
- Checking For Doneness – These cookies get baked only until the edges are just set. This usually takes around 8 to 10 minutes. They will still look slightly underdone, but that’s normal for these cookies!
- Sweeten Them Up – This treat does have a deep coffee flavor. Therefore, if you prefer a sweeter cookie, you may want to consider rolling the dough in granulated sugar before baking.
- Dressing The Cookies Up – After the cookies have finished cooling, it’s time to dress their tops up! Make sure to add the sprinkles as soon as you drizzle on the white chocolate. That way, the sprinkles stick nicely to the cookies, giving them their festive appearance! You could also top them with crushed candy canes and green and red sprinkles for a more festive look!
- Make A Mini Version – If you don’t want full-size cookies, you can make this Christmas treat into a mini version! Just use mini marshmallows and mini peppermint patties to do so!
- “Decaf” Cookies – Maybe you’re not big on the idea of mocha flavor – that’s fine! Go ahead and omit the espresso powder to make Chocolate Peppermint Cookies instead!
How To Store Peppermint Mocha Cookies
These cookies are best stored in an airtight container at room temperature. They can then be enjoyed for up to 3 to 4 days. Any longer, and I find that the cookie starts to dry out a bit.
More Peppermint Recipes:
- Peppermint Brownie Mix Cookies Recipe – Made with a doctored-up brownie mix!
- Easy Peppermint Oreo Balls Recipe – No bake, bite-sized dessert balls!
- Peppermint Hot Chocolate – Sweet, minty goodness to warm up with!
- Creamy Peppermint Chocolate Pudding Shots – An easy-to-make adult treat!
- Chocolate Peppermint Martini – A rich, creamy cocktail that doubles as dessert!
Did You Make This Recipe?
If you’ve tried this recipe, please let leave a review in the comments below. I love hearing from you! Don’t forget to tag me – @sugarandsoulco – on Instagram and Pinterest with your photos, or join our Sugar & Soul Show-offs Community and share them there.
Peppermint Mocha Cookies
Ingredients
- 1½ cup all-purpose flour 197g
- ½ cup black cocoa powder 55g
- 1½ tablespoons espresso powder
- 2 teaspoons corn starch
- ¾ teaspoon salt
- ¼ teaspoon baking soda
- ½ cup unsalted butter 113g
- ½ cup light brown sugar packed (115g)
- ½ cup granulated sugar 110g
- 1 large egg
- 1 teaspoon pure vanilla extract
- ½ cup dark chocolate chips I use Guittard extra dark
- 9 York peppermint patties
- 9 regular-sized marshmallows see notes
- ½ cup white chocolate melting wafers
- 1 tablespoon holiday sprinkles
Instructions
Cookies
- Preheat the oven to 350°F and line a large baking sheet with parchment paper and set aside. If you only have a 9×13-inch baking sheet, you'll want to use two baking sheets for two batches.
- In a medium bowl, whisk together the flour, black cocoa, espresso powder, corn starch, salt, and baking soda. Set aside.1½ cup all-purpose flour, ½ cup black cocoa powder, 1½ tablespoons espresso powder, 2 teaspoons corn starch, ¾ teaspoon salt, ¼ teaspoon baking soda
- Partially melt the butter in a microwave-safe bowl. I melt mine for 45 seconds directly from the refrigerator. You want the melted butter to just be pooling a bit but still have a decent amount of stick left.½ cup unsalted butter
- Add the butter and sugars to a large bowl or stand mixer fitted with a paddle attachment and cream just until smooth.½ cup light brown sugar , ½ cup granulated sugar
- Add in the egg and vanilla extract and beat until fully incorporated.1 large egg, 1 teaspoon pure vanilla extract
- Add half of the dry ingredients to the wet ingredients and beat just until incorporated. Then add the remaining dry ingredients and mix until thoroughly combined.
- Fold in the chocolate chips.½ cup dark chocolate chips
- Portion out the dough into 8 even portions (about 3.3oz. each) and gently press your thumb into the middle of the ball to create a well. Place a peppermint patty in each well and top it with a marshmallow, then gently use your hands to work the dough up and around the sides and top of the marshmallow and pat and pinch to seal.9 York peppermint patties, 9 regular-sized marshmallows
- Place the cookies on the baking sheet, trying to keep the peppermint patty side down. Place cookie dough at least 4 inches apart on the prepared baking sheet. Bake for 8 to 10 minutes until the edges are just set. The cookies will look slightly underdone; this is normal as they will continue to cook as they cool, and when warm the marshmallow is going to be gooey inside, giving them a softer look.
- Allow the cookies to cool on the pan for 15 minutes before transferring them to a wire rack with a spatula to cool completely. These cookies are very soft right after baking and will firm up while they cool.
- Once cooled, melt the white chocolate melting wafers in the microwave at 30-second intervals, stirring between each one until fully melted. Drizzle over the tops of the cookies and then top with holiday sprinkles or crushed peppermint candy if desired.½ cup white chocolate melting wafers, 1 tablespoon holiday sprinkles
Notes
- Please use Jet-Puffed Marshmallows! We discovered during testing that not all marshmallows are created equal. Kraft Jet-Puffed worked the best and didn’t cause any issues. Others were too firm and didn’t like being squished into the dough and causing the cookies to crack open while baking. You could also use mini marshmallows instead; probably 6 to 8 will work.
- Assembling The Cookies – Portion the dough out into 8 even amounts. Then use your thumb to make a well in each of them, placing a peppermint patty in each and topping it with a marshmallow – make sure it is on its side.
- Sealing The Dough – Gently work the cookie dough up around the sides to cover the filling and pinch it to seal. Then roll it between your balms to smooth it out!
- Peppermint Patty Bottom – When placing the wrapped cookie on the baking sheet, try to place it with the peppermint patty on the bottom.
- Checking For Doneness – These cookies get baked only until the edges are just set. This usually takes around 8 to 10 minutes. They will still look slightly underdone, but that’s normal for these cookies!
- Sweeten Them Up – This treat does have a deep coffee flavor. Therefore, if you prefer a sweeter cookie, you may want to consider rolling the dough in granulated sugar before baking.
- Dressing The Cookies Up – After the cookies have finished cooling, it’s time to dress their tops up! Make sure to add the sprinkles as soon as you drizzle on the white chocolate. That way, the sprinkles stick nicely to the cookies, giving them their festive appearance!
- Make A Mini Version – If you don’t want full-size cookies, you can make this Christmas treat into a mini version! Just use mini marshmallows and mini peppermint patties to do so!
- How To Store: These cookies are best stored in an airtight container at room temperature. They can then be enjoyed for up to 3 to 4 days. Any longer, and I find that the cookie starts to dry out a bit.
- Recipe adapted from Crispi Cookies.
Nutrition
Did You Make This Recipe?
Don’t forget to share it with me on Instagram @sugarandsoulco and follow on Tiktok @sugarandsoulco and Pinterest @sugarandsoulco for more!


Share your thoughts!
Love this recipe? Share your thoughts with me and leave a review! And don’t forget to connect on your favorite social platform below!