
No Bake Avalanche Cookies


These Avalanche Cookies are a 6-ingredient no-bake treat made with Rice Krispies, peanut butter, white chocolate, marshmallows, and chocolate chips! They are super easy to make and hard to stop eating!

Avalanche Cookies Are The Perfect No Bake Cookie!
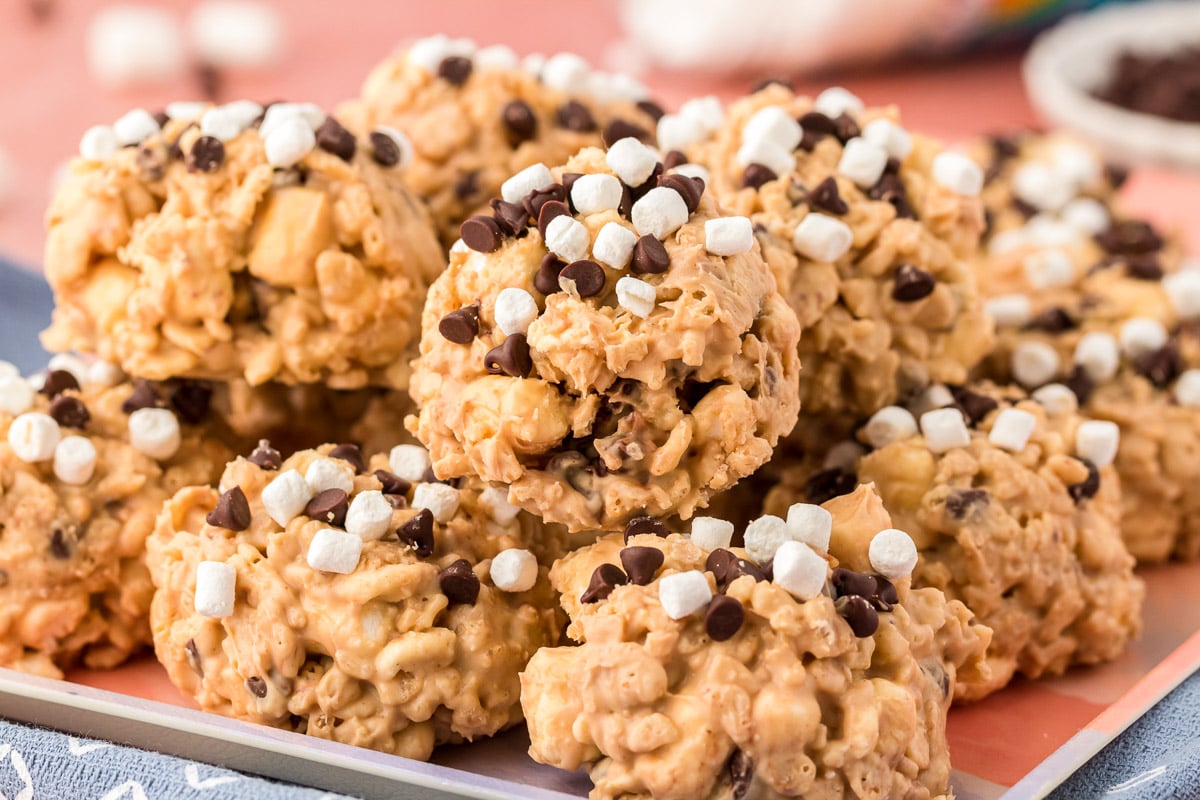
No Bake Avalanche Cookies take minimal time and effort to make yet are totally irresistible! They’re satisfyingly sweet and chewy with a nice crunch that keeps you grabbing for another!
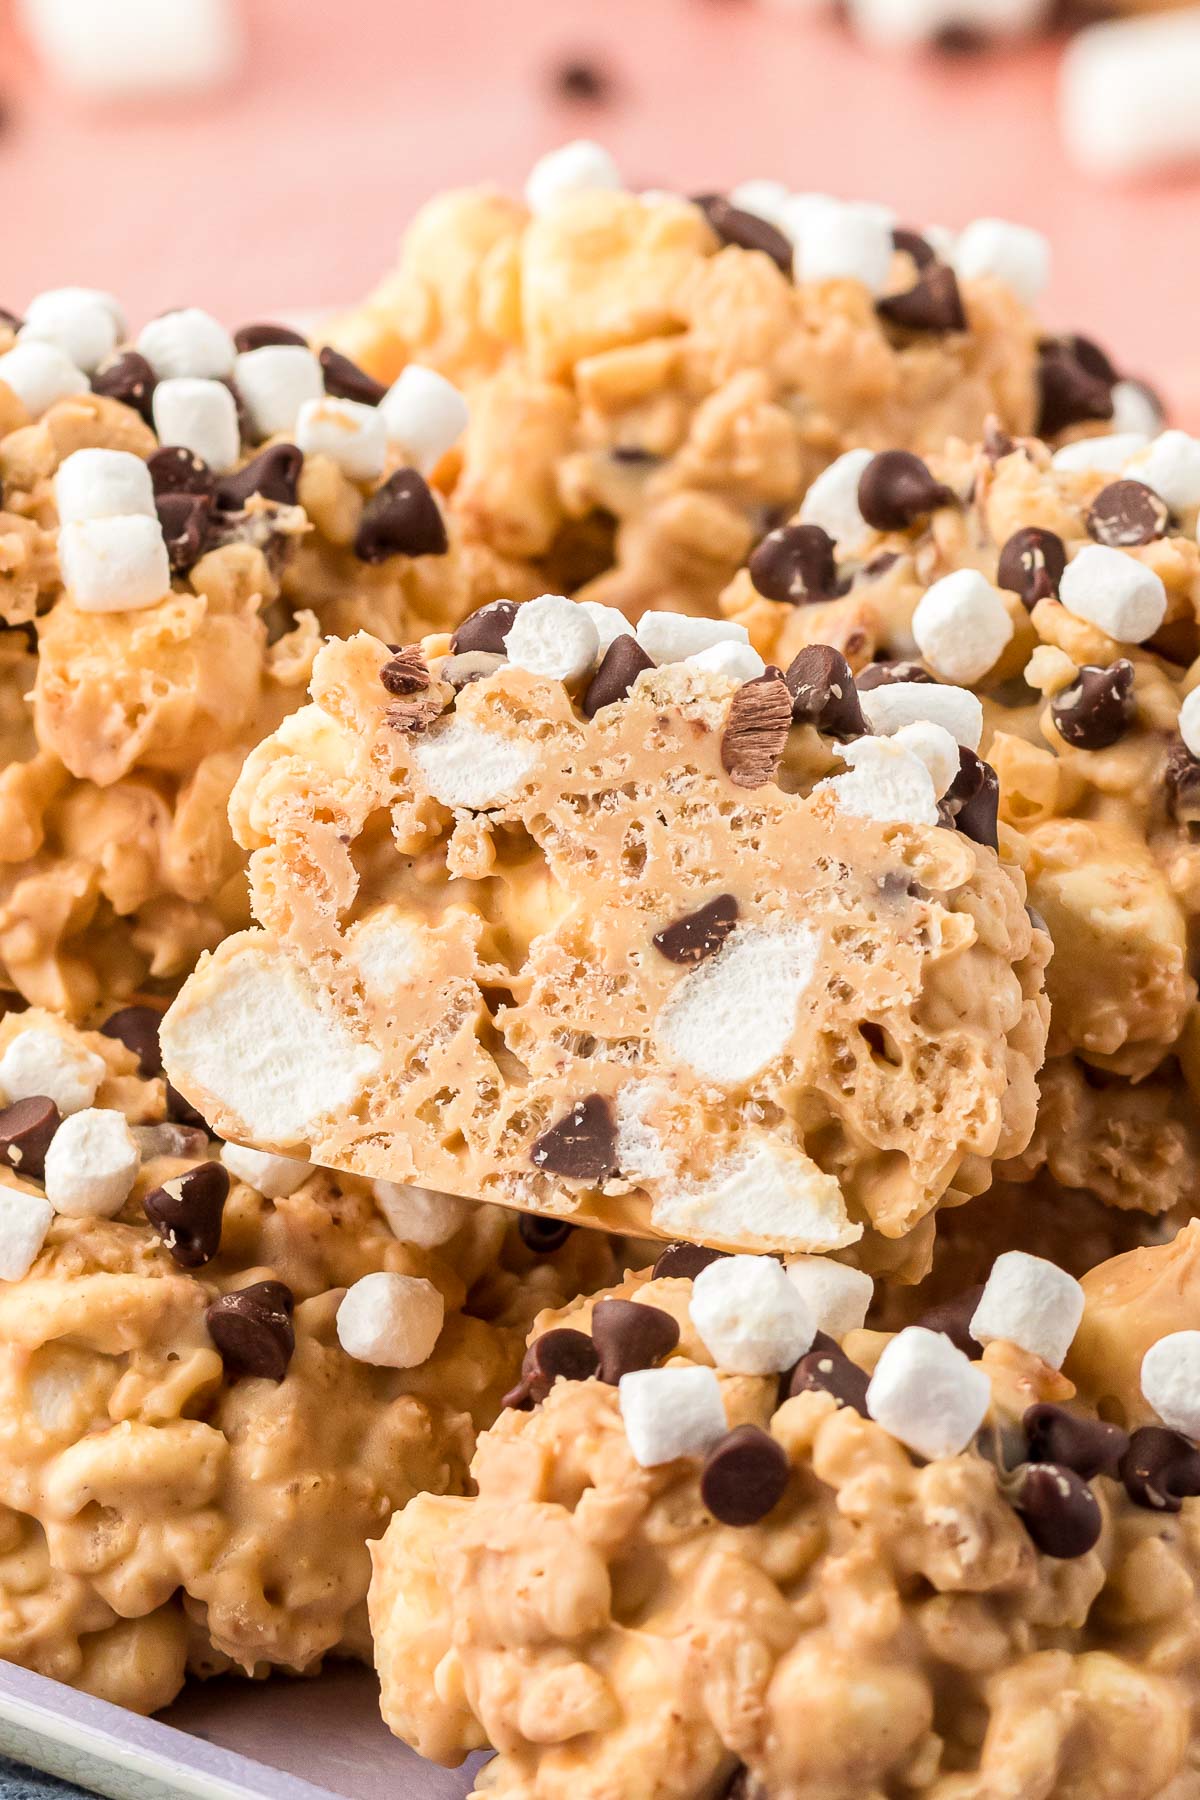
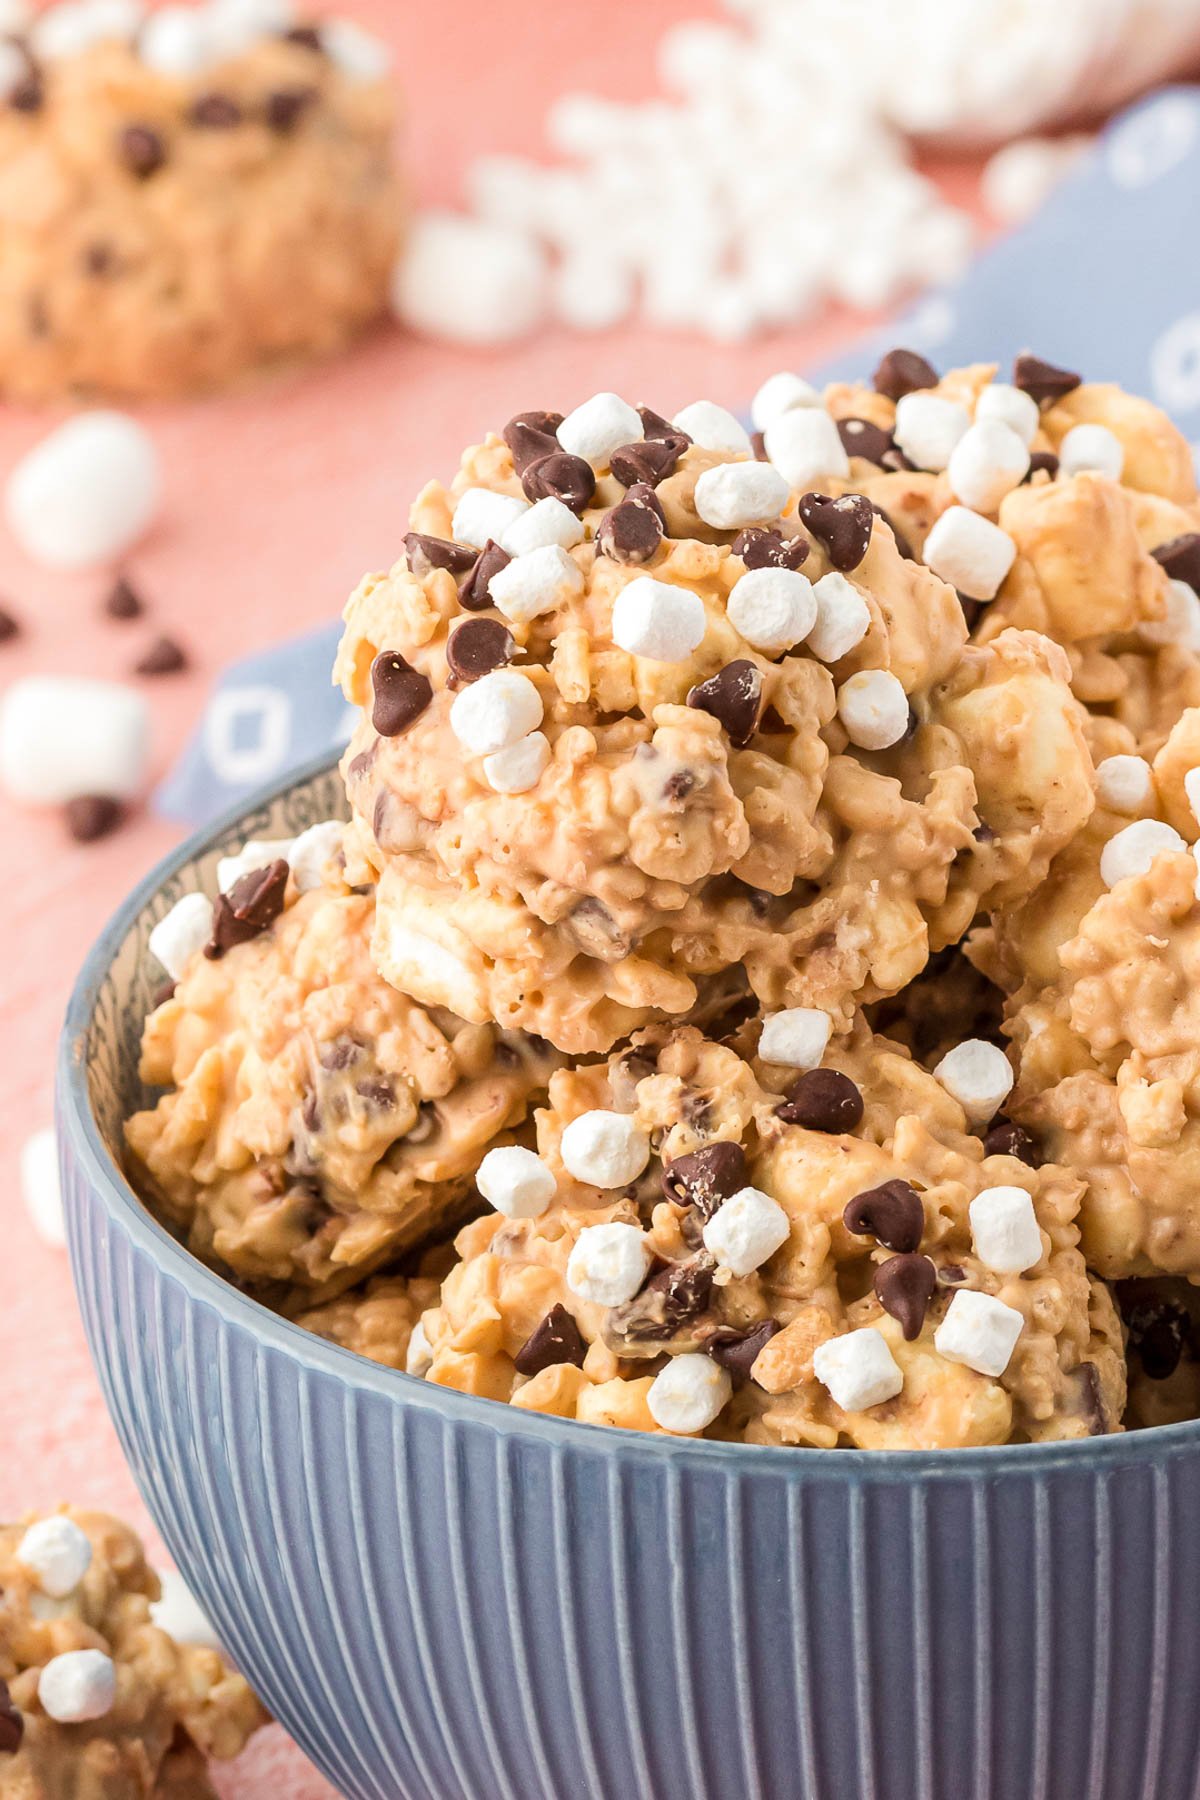
Avalanche cookies are a no-bake dessert that is made to look like actual snow chunks and snow-covered boulders and rocks that slide down during an avalanche. Fortunately, there’s no danger of snow here, just a really good cookie!
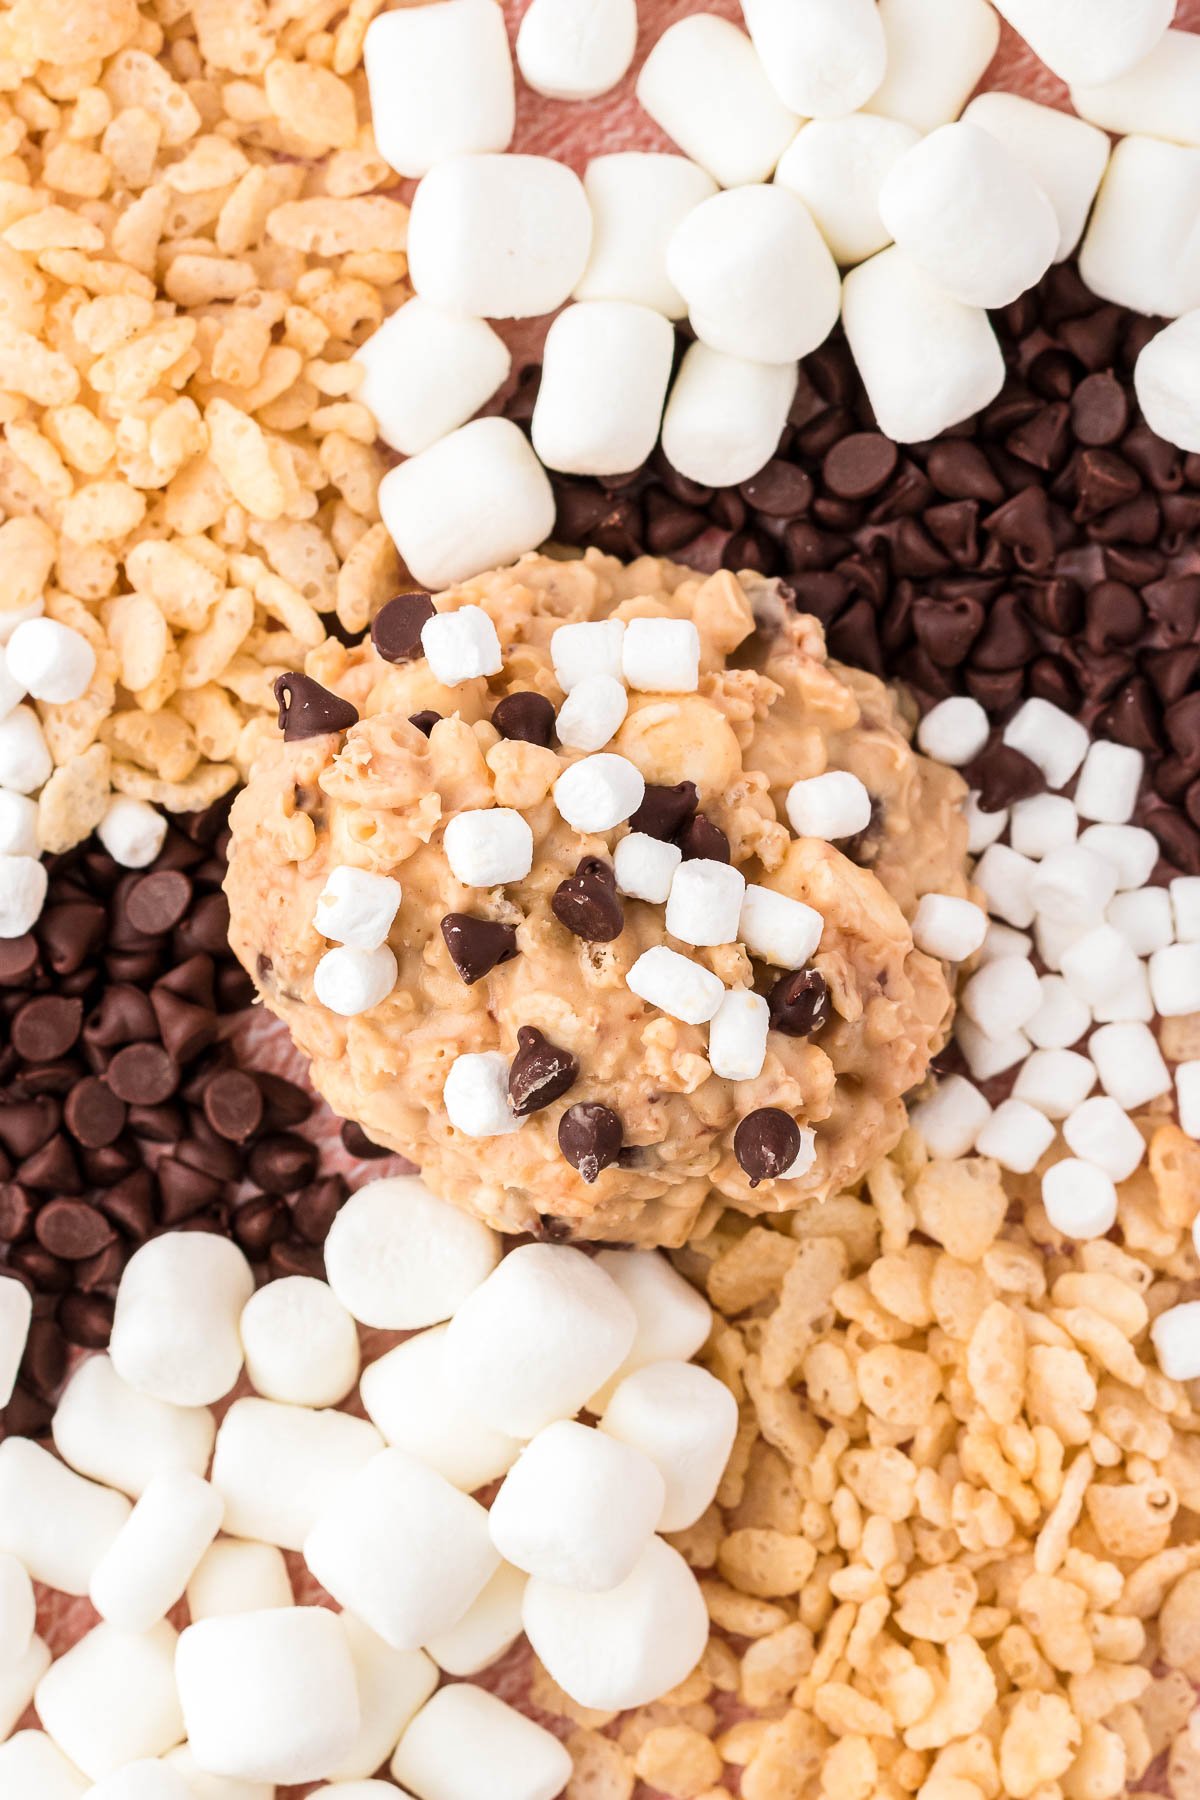
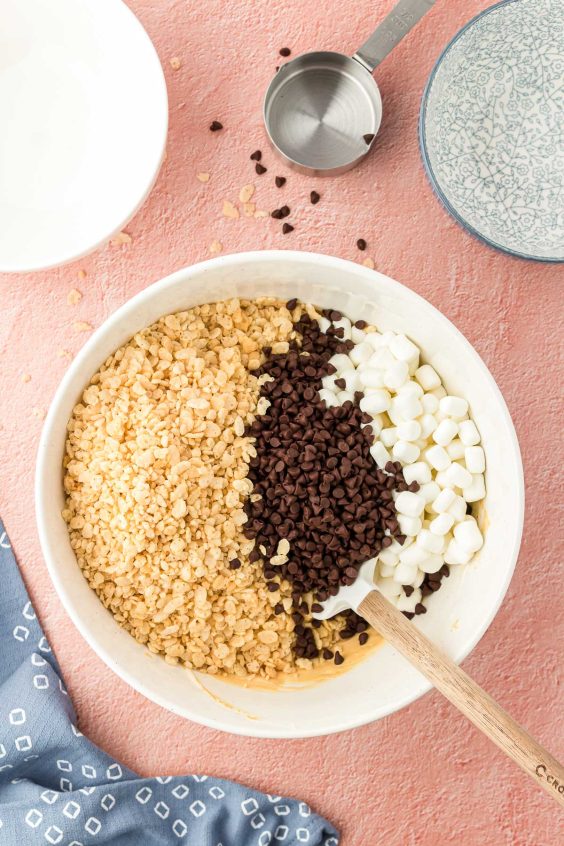
They are made by combining cereal, mini marshmallows, and mini chocolate chips and then coat them in melted white chocolate that’s been mixed with peanut butter. The white candy coating gives them their snow-covered appearance!
Their minimal prep time and simple ingredients make them a quick and easy treat to whip up that’s perfect for potlucks, gatherings, or any occasion! We love making them to curb our sweet tooth throughout the week!
Rebecca’s Recipe Review
Taste: Peanut buttery, marshmallowy, vanilla-y!
Texture: Soft coating around crunchy bits.
Ease: 2/10
Pros: No baking required and super easy to make.
Cons: None
Would I Make This Again? Yes, we love these cookies as a no bake option to round out holiday cookie tins with!
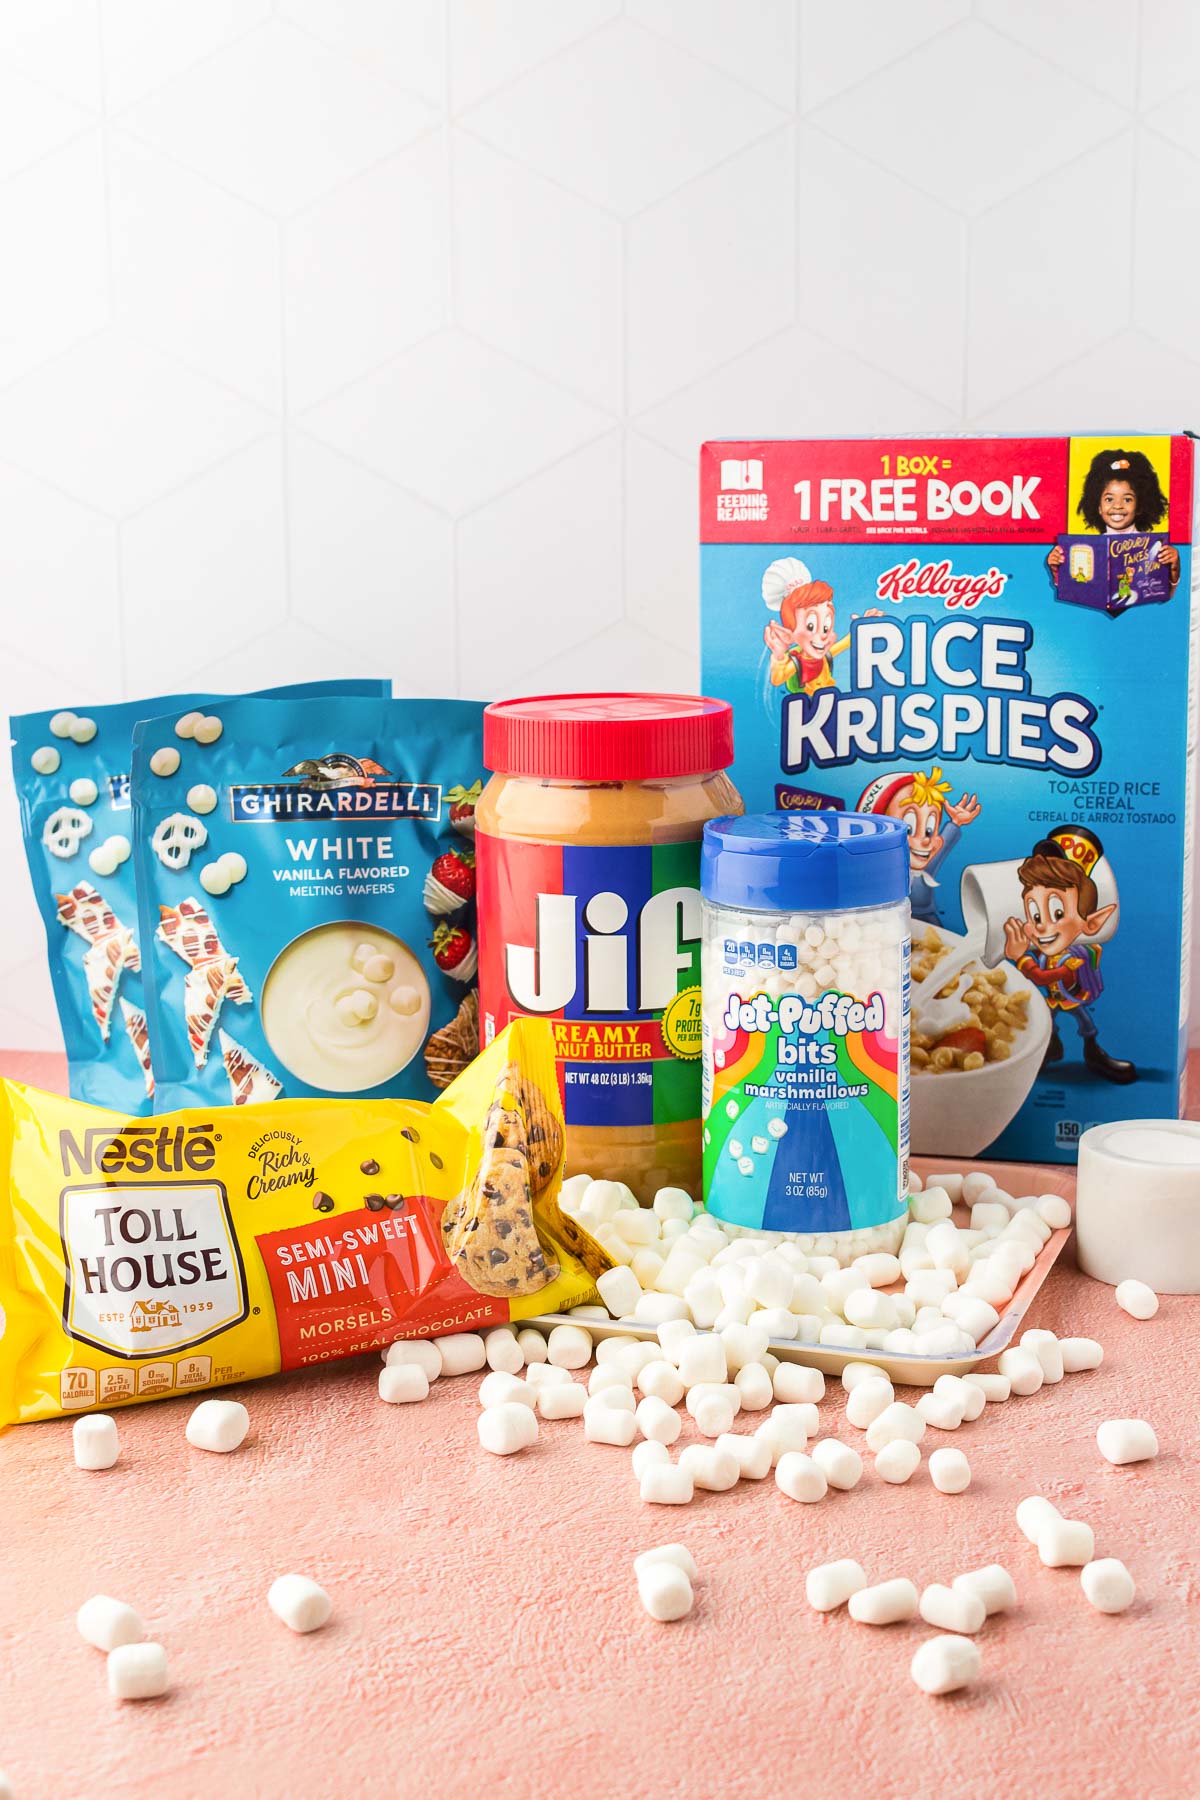
Avalanche Cookie Ingredients
The ingredients for this no-bake cookie recipe are super easy! Some you may have on hand already, and some you can easily grab at your local grocery store. Here’s what you’ll need:
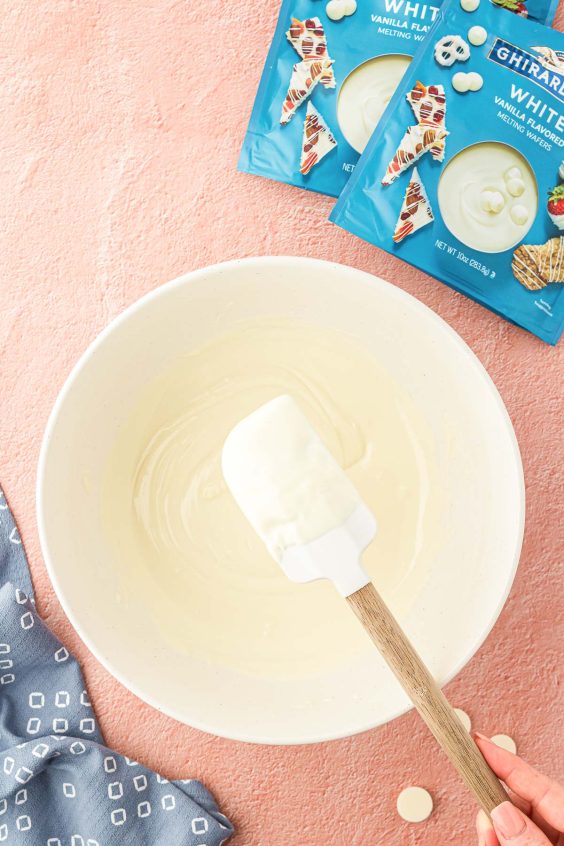
- White Chocolate Melting Wafers – I prefer to use white chocolate melting wafers since they melt down super smooth, but you can also use white chocolate chips or even white almond bark.
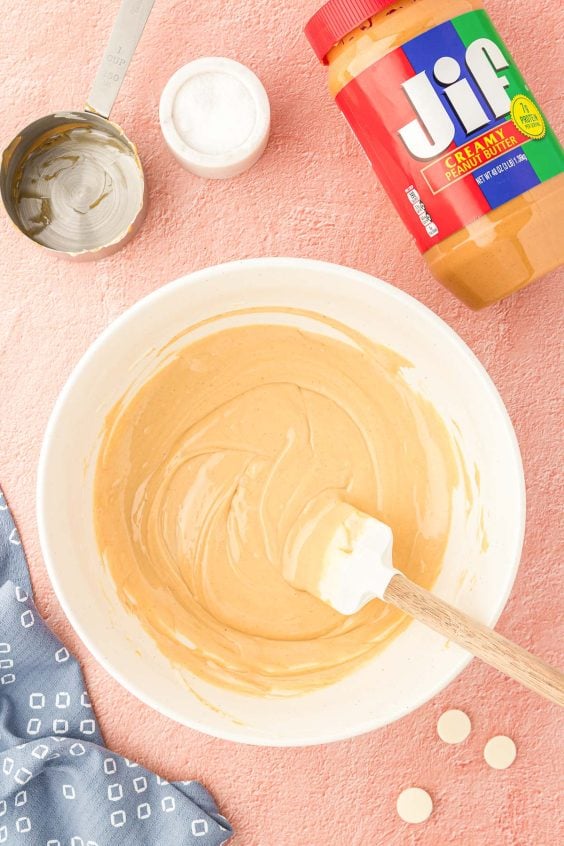
- Creamy Peanut Butter – I love these avalanche cookies with creamy peanut butter. However, chunky peanut butter would give them a nice, slight crunch if you’d like. I wouldn’t suggest using an all-natural peanut butter since those are typically a lot runnier and would change the consistency of the cookie. This would likely cause the cookies not to set up properly.
- Salt
- Rice Krispies Cereal
- Mini Marshmallows
- Mini Chocolate Chips
- Marshmallow Bits
How To Make Avalanche Cookies
- Melt the white chocolate melting wafers using a microwave-safe bowl in the microwave at 30-second intervals. Stir between each one until fully melted and smooth.
- Stir in the creamy peanut butter and salt until thoroughly combined and smooth.
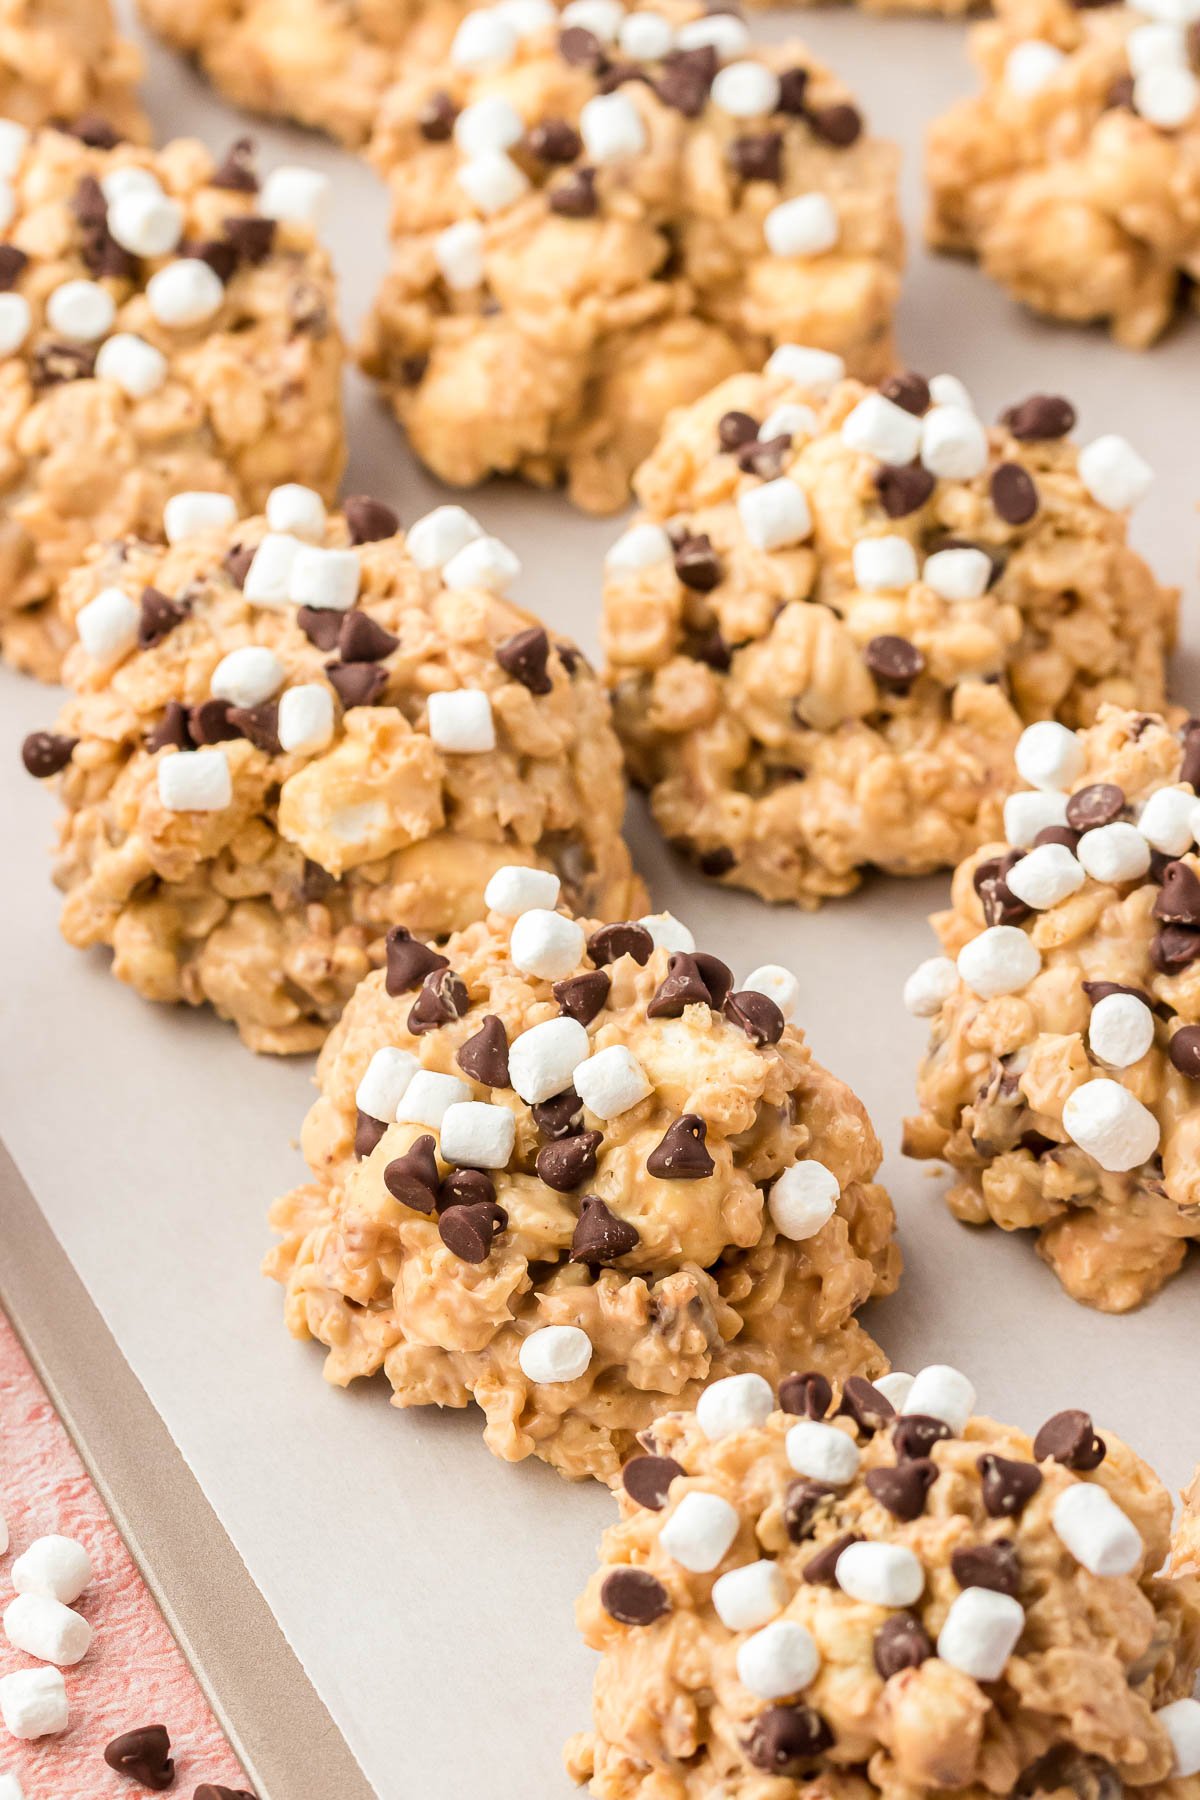
- Pour in the Rice Krispies Cereal, mini marshmallows, and mini chocolate chips. Stir all together until fully coated.
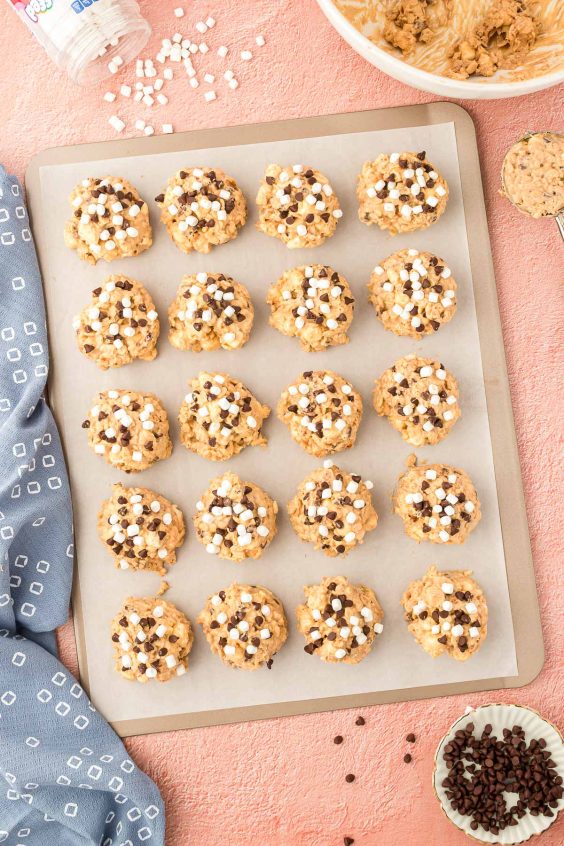
- Drop scoops of the cookie mixture onto a large baking sheet that’s lined with parchment paper. Top each cookie with more mini chocolate chips and marshmallow bits.
- Allow the Avalanche Cookies to sit at room temperature to set up.
- If you don’t have parchment paper, you can use wax paper or a silicone baking mat. You can also lightly spray aluminum foil or a baking sheet with non-stick cooking spray.
- These no bake cookies will take about 30 to 45 minutes to harden. However, to speed up the process, you can pop them in the fridge or freezer.
- If your cookies aren’t setting up, it may be too hot or humid in your home. Transfer them to a cool, dry part of your home for them to set up, or transfer them to your fridge or freezer.
How To Store Avalanche Cookies
Store avalanche cookies in an airtight container with parchment paper separating the layers to prevent them from sticking together. You can also store them in a Ziploc bag with the excess air squeezed out of it.
Avalanche cookies can then be stored at room temperature or in the fridge and can be enjoyed for up to 1 week!
Can You Freeze Avalanche Cookies?
Yes, these avalanche cookies freeze great! To freeze them, place them on a baking sheet and slide the sheet of cookies into the freezer to flash-freeze them.
Flash-freezing the cookies first will prevent them from freezing into one big clump! Afterward, place the frozen cookies in an airtight container that’s freezer-safe or into a Ziploc freezer bag with the excess air squeezed out of it.
Then, store them in the freezer for up to 3 months. Thaw in the fridge or at room temperature, and enjoy!
More No Bake Recipes
- Chocolate Peanut Butter No Bake Cookies – Oat-based cookies made with just 7 ingredients!
- No Bake Nutella Cheesecake Bars – A deliciously sweet, creamy treat that preps in 15 minutes!
- Chocolate Chip Cookie Dough Dip – Serve with fresh fruit, crackers, or pretzels!
- Easy Recipe for Buckeyes – The best dessert combo: peanut butter and chocolate!
- Cookie Butter No Bake Cookies – A cookie butter twist on a classic cookie!
Did You Make This Recipe?
If you’ve tried this recipe, please let leave a review in the comments below. I love hearing from you! Don’t forget to tag me – @sugarandsoulco – on Instagram and Pinterest with your photos, or join our Sugar & Soul Show-offs Community and share them there.
Did You Make This Recipe?
If you’ve tried this recipe, please let leave a review in the comments below. I love hearing from you! Don’t forget to tag me – @sugarandsoulco – on Instagram and Pinterest with your photos, or join our Sugar & Soul Show-offs Community and share them there.
The recipe was originally published in August 2023 and updated in October 2024.

Avalanche Cookies
Ingredients
- 20 ounces white chocolate melting wafers
- ¾ cup creamy peanut butter
- ¼ teaspoon salt optional
- 3½ cups Rice Krispies cereal
- 2 cups mini marshmallows
- 1 cup mini chocolate chips divided
- ½ cup marshmallow bits optional topping
Instructions
- Line a large baking sheet with parchment paper and set aside.
- Melt 20 ounces white chocolate melting wafers in the microwave at 30-second intervals, stirring between each one, until fully melted.

- Stir in ¾ cup creamy peanut butter and ¼ teaspoon salt until smooth.
- Stir in the 3½ cups Rice Krispies cereal, 2 cups mini marshmallows, and half of the 1 cup mini chocolate chips until fully coated.
- Drop scoops onto the prepared baking sheet and top with the remaining chocolate chips and ½ cup marshmallow bits if using.
- Let sit at room temperature or chill in the refrigerator until set.

Notes
- The amount of cookies will vary based on the size of the spoon or scoop you use to portion out the mixture.
Nutrition
Did You Make This Recipe?
Don’t forget to share it with me on Instagram @sugarandsoulco and follow on Tiktok @sugarandsoulco and Pinterest @sugarandsoulco for more!
Share your thoughts!
Love this recipe? Share your thoughts with me and leave a review! And don’t forget to connect on your favorite social platform below!


These were so fun to make and really tasty. Perfect family project!
They look delicious. I plan on making them. You said I can substitute cookie butter. So I could use Biscoff butter since it is nut free?
Yes, you can use biscoff instead of peanut butter.
So delicious!