
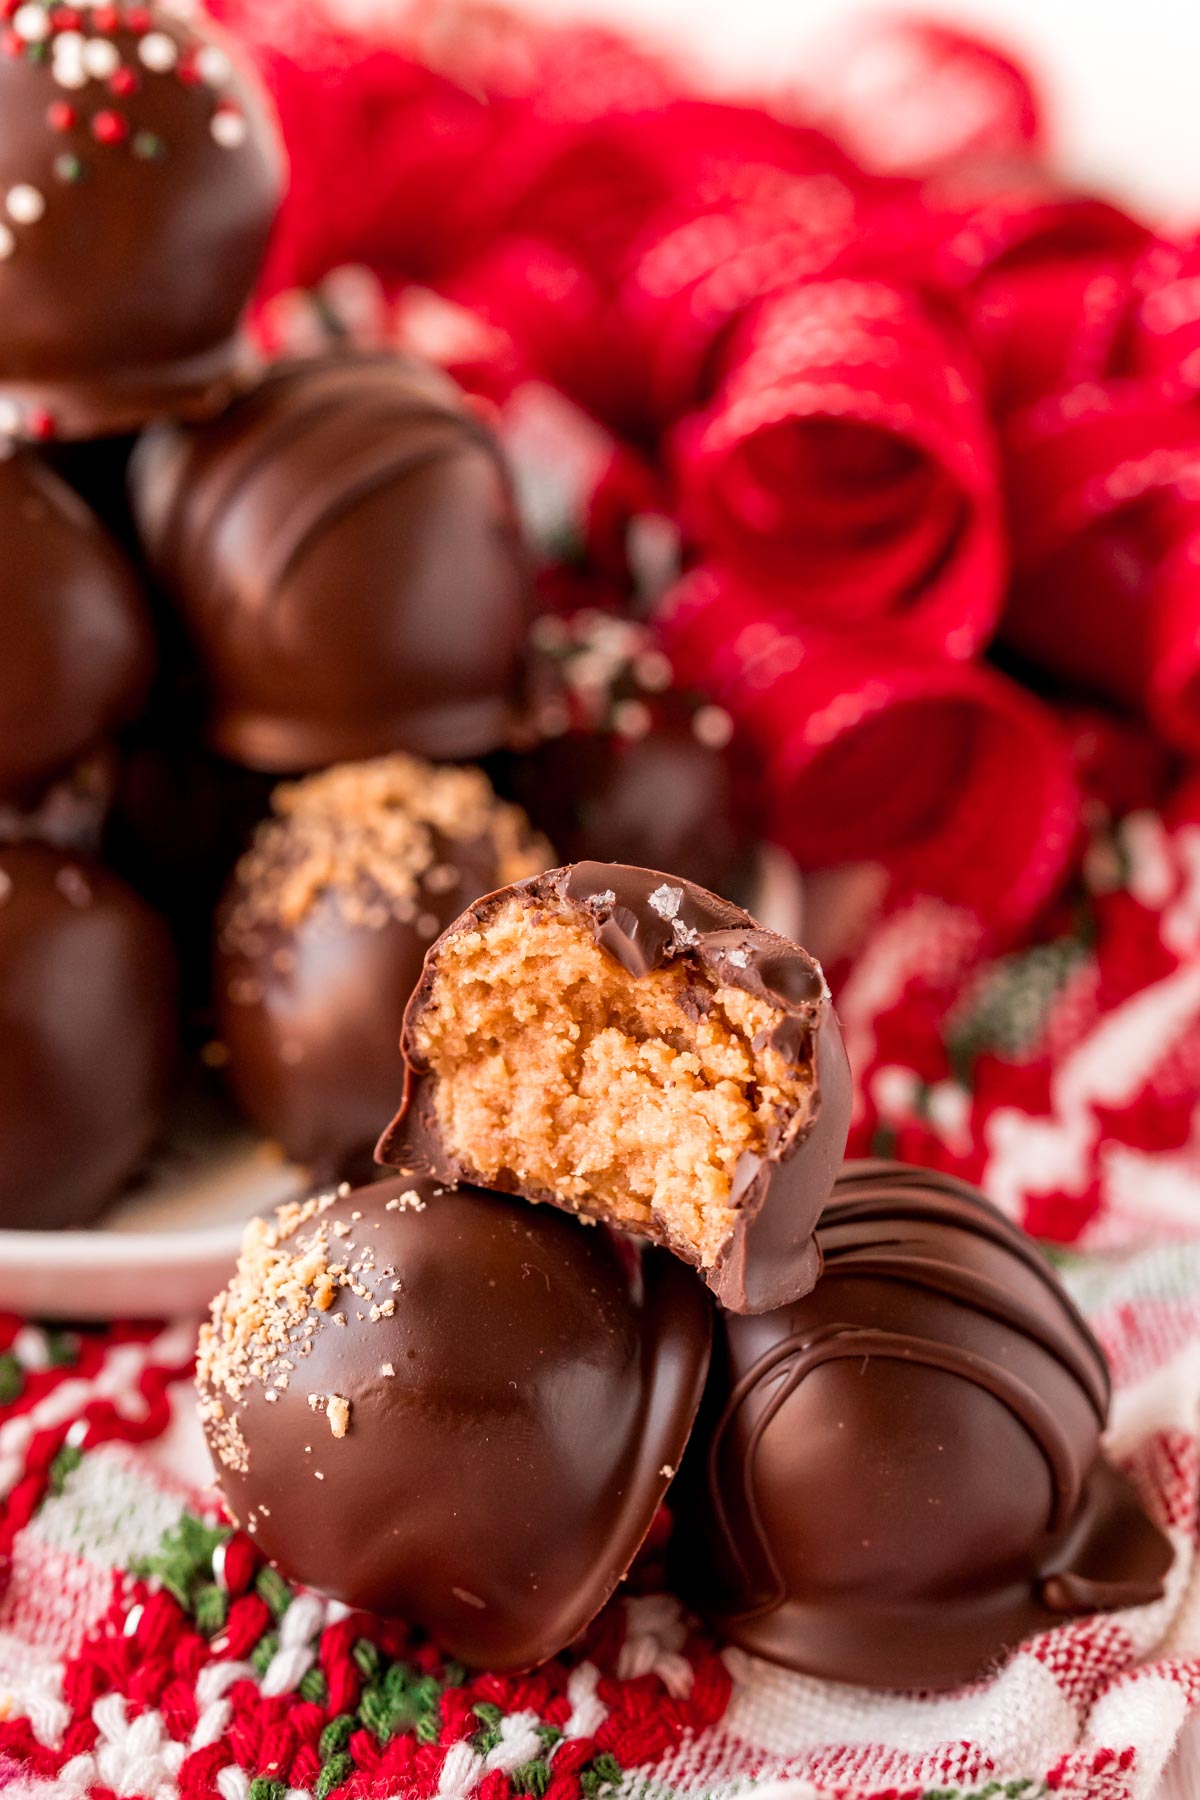
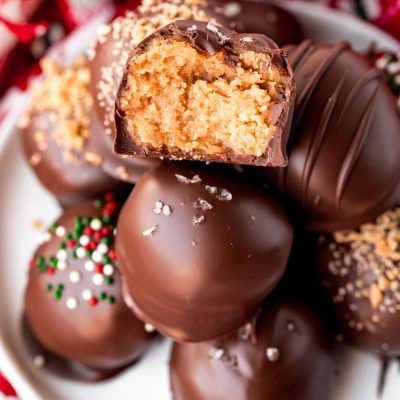
Nutter Butter Peanut Butter Balls


These Nutter Butter Balls are a nutty and sweet no-bake treat that’s ready in under an hour! These bite-sized dessert balls are the perfect combination of peanut butter and chocolate which means they’re sure to fly off the dessert table!
The Best No Bake Treat!
This Peanut Butter Truffles recipe is also an easy and quick way to finish up those holiday cookie tins! Delivering a taste comparable to peanut butter cups will have everyone’s sweet tooth thanking you for introducing them to their new favorite dessert!
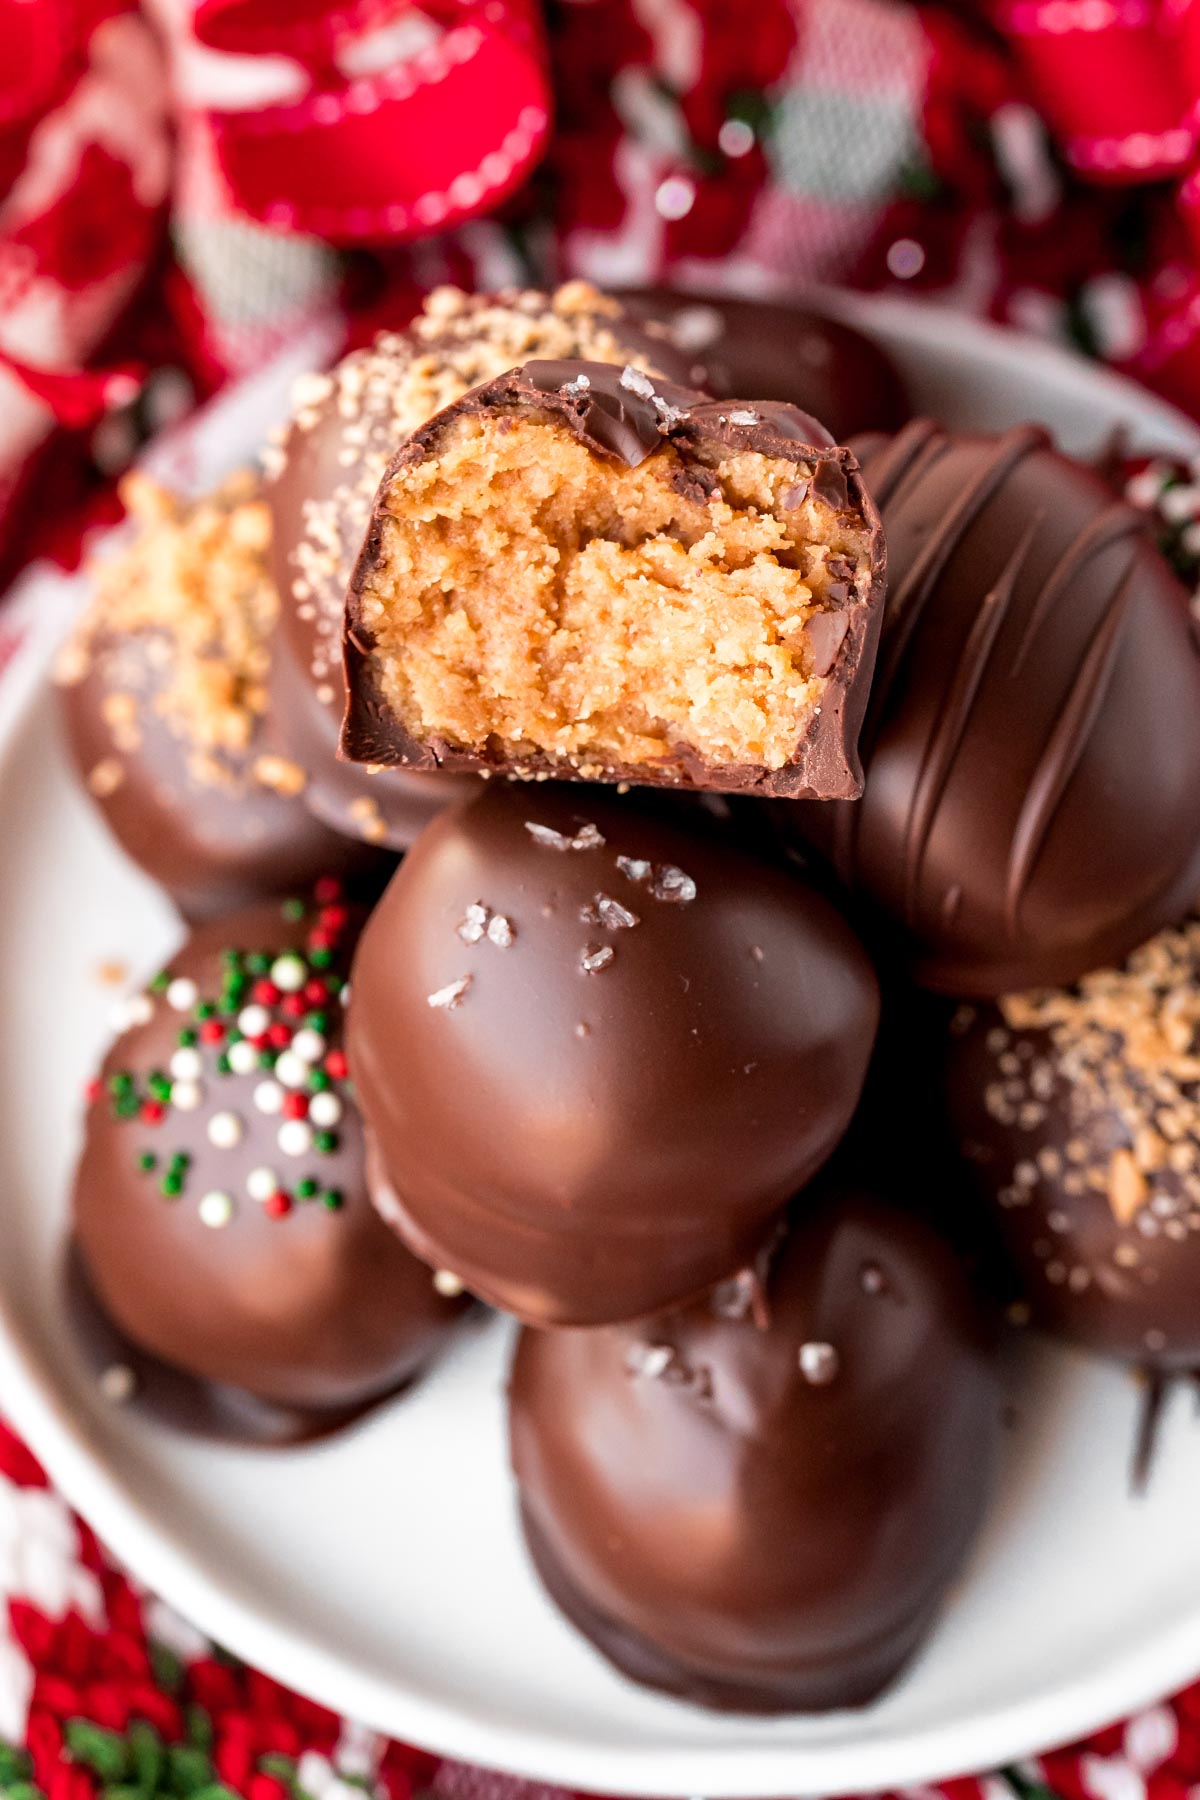
Just one bite into these Peanut Butter Balls and you’ll instantly know they’ve landed a permanent spot in your recipe box! The Nutter Butter Cookie and cream cheese filling balls are dipped in chocolate making this treat dangerously delicious!
Looking for something with a smoother texture? Try my Peanut Butter Buckeyes!
Rebecca’s Recipe Review
Taste: Salty, sweet peanut butter chocolate.
Texture: A smooth chocolate coating wrapped around a crushed cookie filling.
Ease: 5/10
Pros: Unlike most truffle recipes these balls don’t require chill time since they’re already fairly firm right after mixing. No chill time means biting into one of these Peanut Butter Cheesecake Balls will happen a lot quicker!
Cons: None.
Would I Make This Again? Yes.

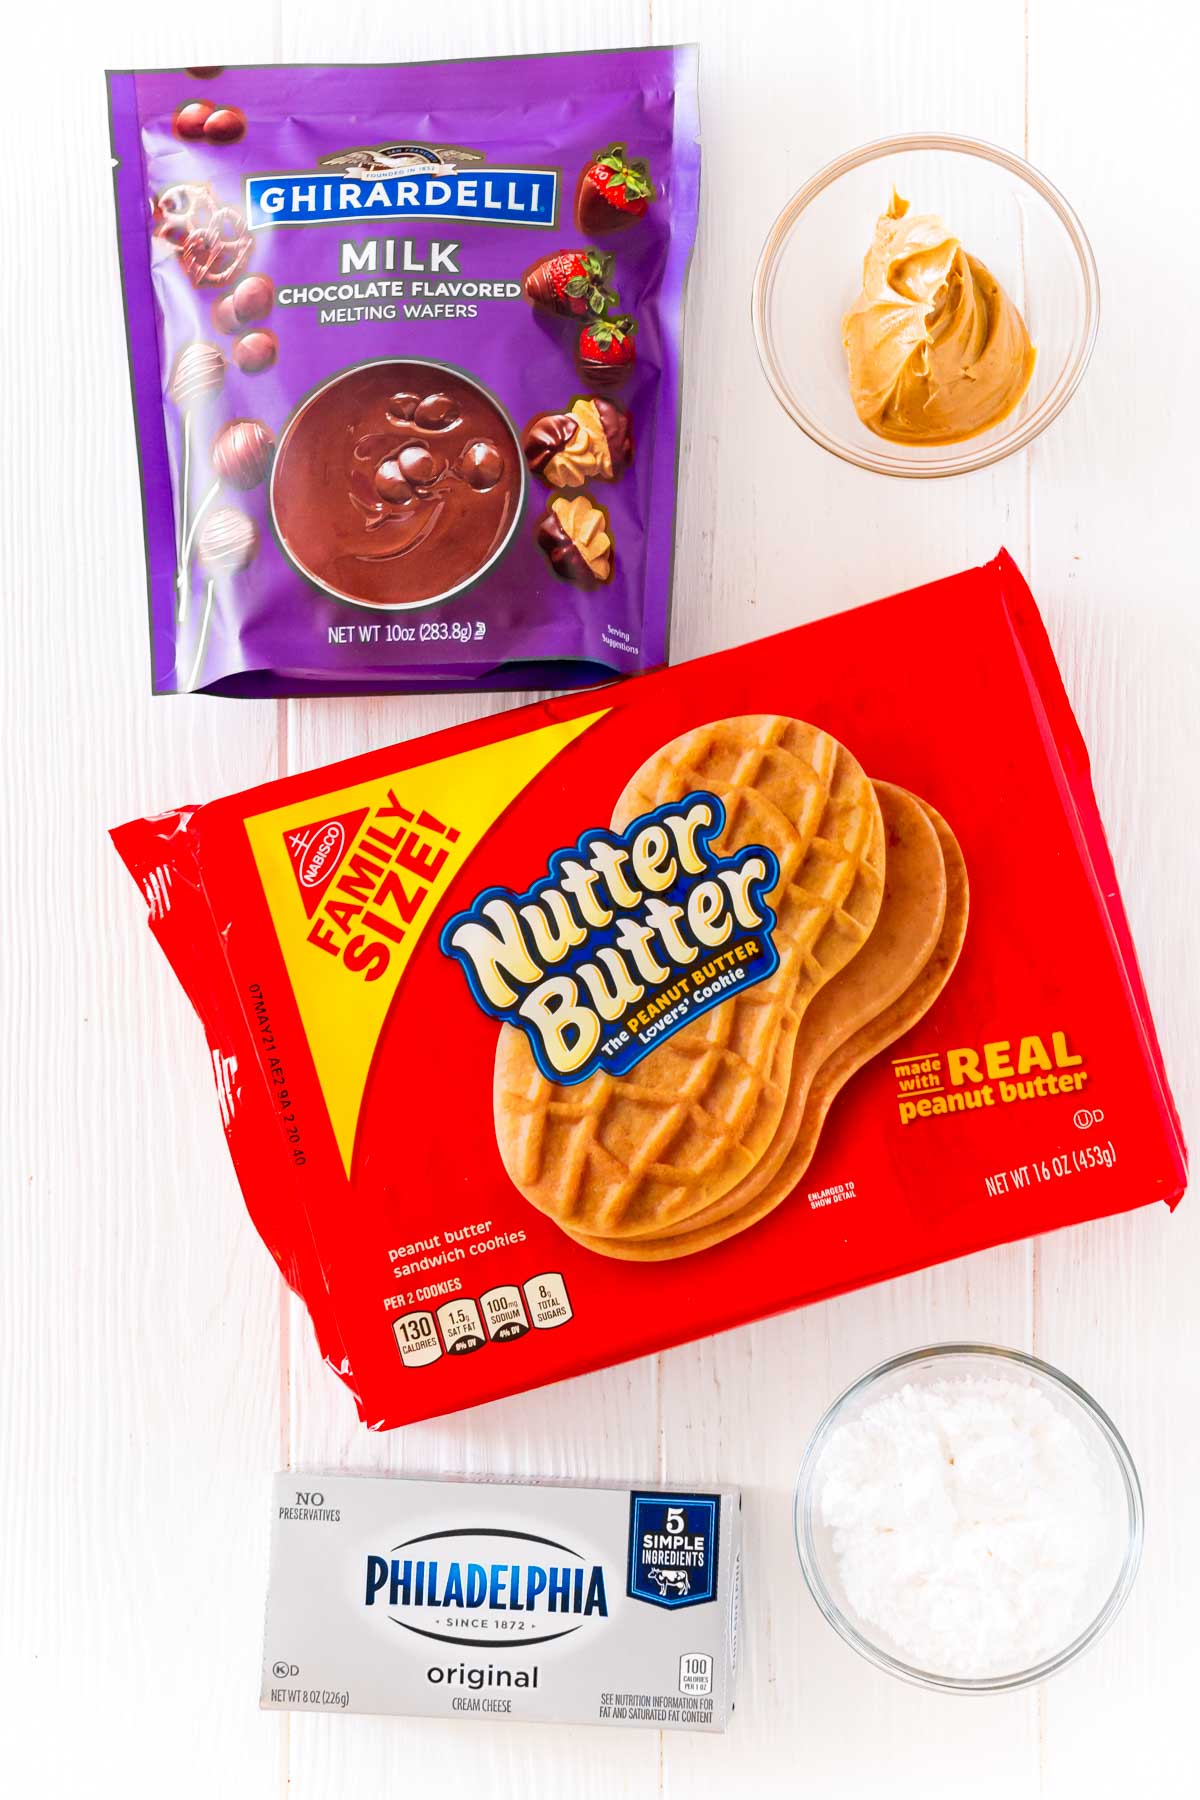
Nutter Butter Balls Ingredients
This recipe comes together quickly with 5 ingredients. Nutter Butter cookies, cream cheese, powdered sugar, and creamy peanut butter. The chocolate coating these butter balls are dipped in is even easier consisting of just chocolate melting wafers!
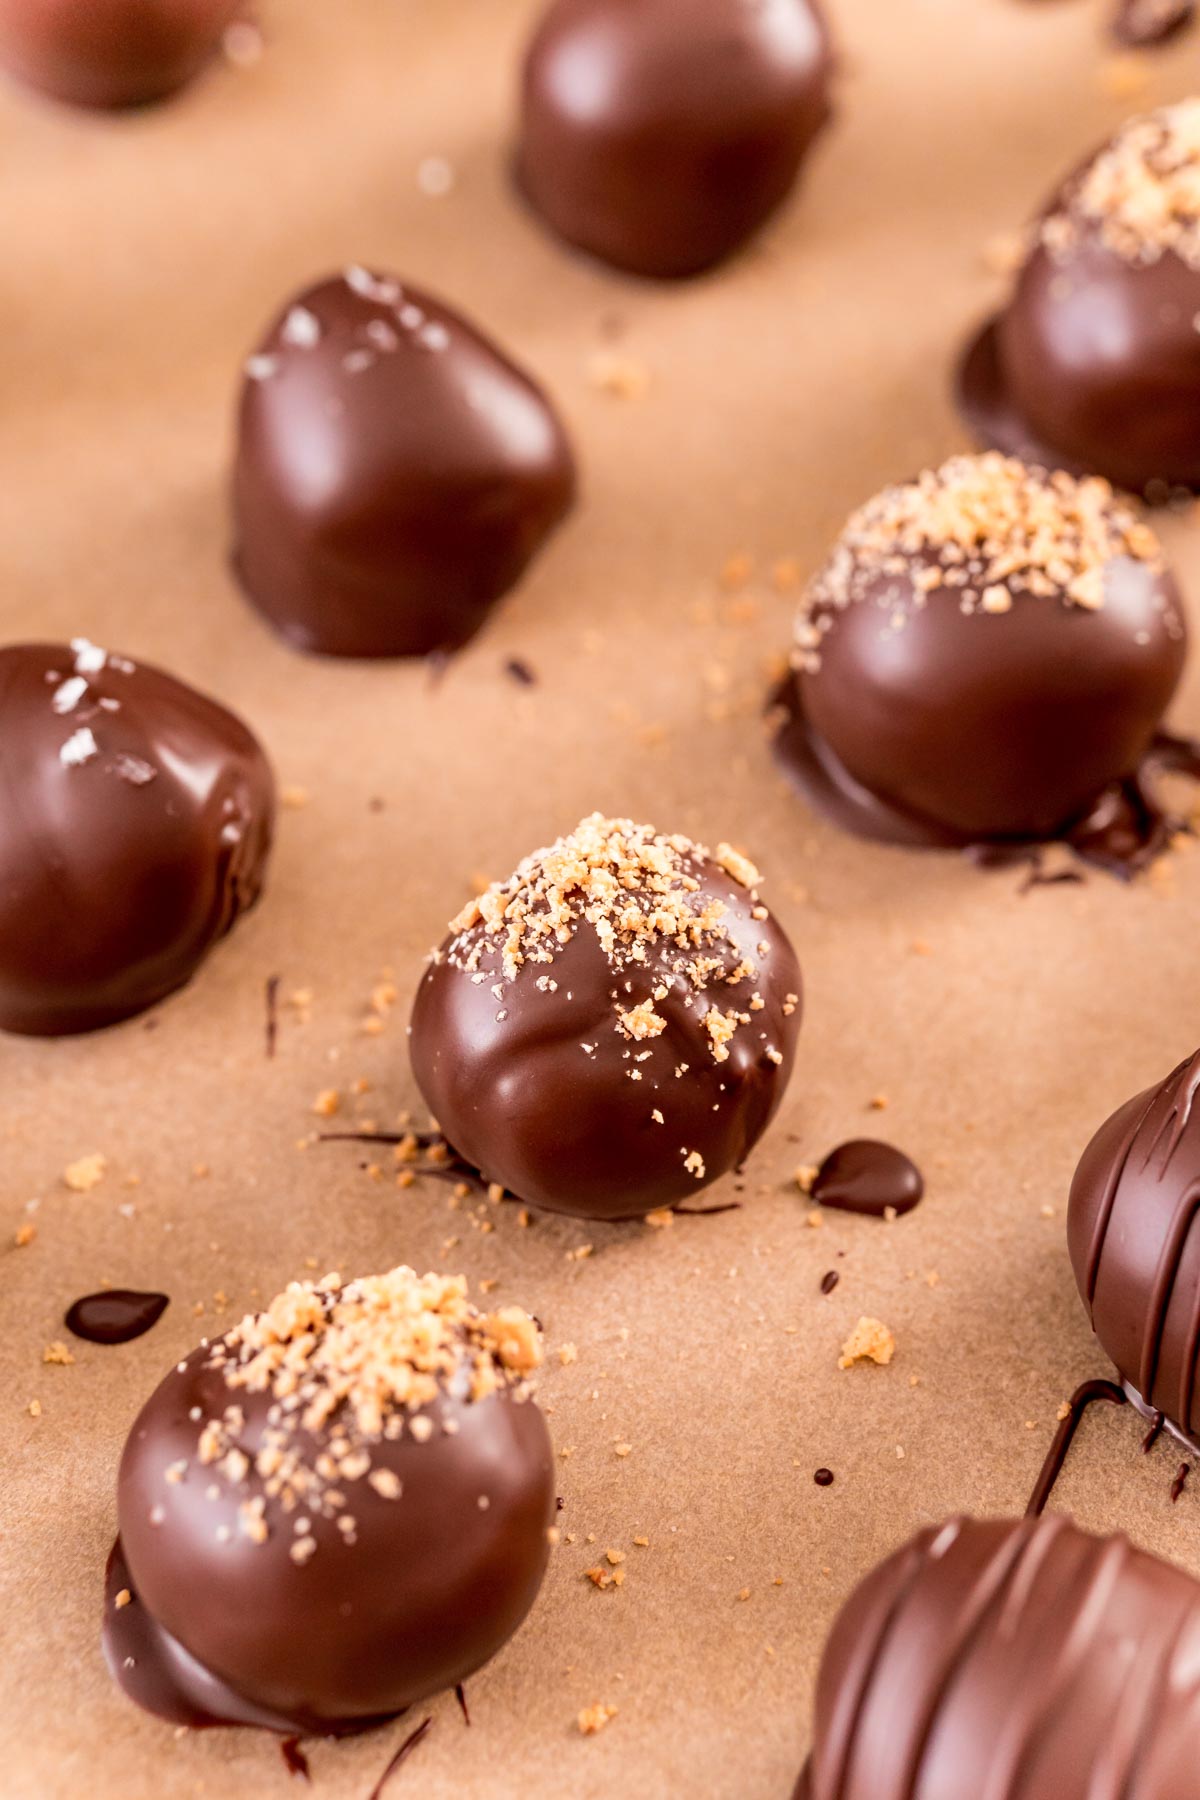
The topping is where you can really get creative and have fun! Top the truffles with nutter butter crumbs, sea salt, or your favorite festive holiday sprinkles!
With almost 3 dozen Nutter Butter Truffles, it gives you plenty to split up to try all three toppings!
Chocolate Coating Variations
If needed, you can substitute the melting wafers for 10 ounces of chocolate chips. Just be sure to mix in 1 teaspoon of coconut oil to prevent too much hardening of the chocolate.
Using white chocolate chips is also an option, again just add in the coconut or vegetable oil!
How To Make Nutter Butter Balls
- Line a baking sheet with waxed paper or parchment paper and set it aside.
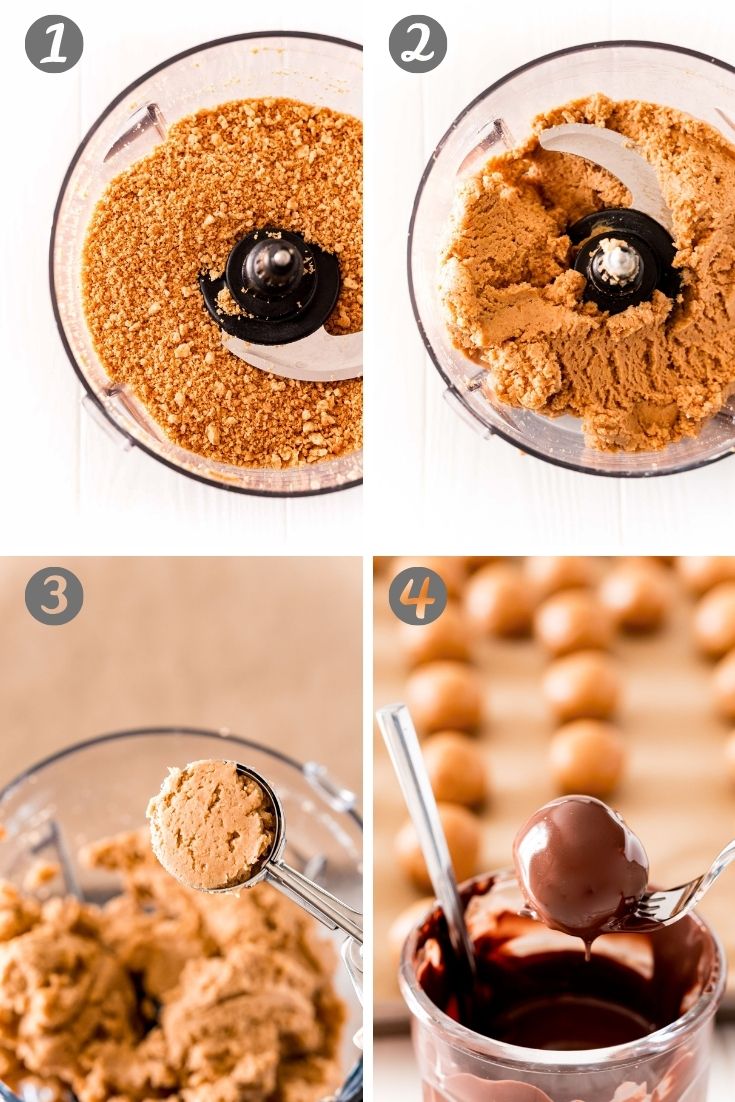
- Using a food processor pulse together the Nutter Butter Cookies until fine crumbs form. Don’t forget to reserve a tablespoon of the cookie crumbs for the topping!
- Add in the cream cheese, sugar, and peanut butter and pulse together until the peanut butter mixture is completely combined.
- Portion out the mixture with a medium cookie scoop and roll into balls and place them on your lined baking sheet.
- Place the melting wafers in a bowl to be melted at 30-second intervals, stirring after each round. Using a spoon and fork, begin taking the peanut butter filling balls and dip them in the melted chocolate.
- Once dipped in chocolate transfer them onto the parchment paper to set. After a handful of butter truffles are chocolate-covered then sprinkle them with your choice of toppings.
- Repeat this process until all of the Nutter Butter Balls are dipped and covered in toppings! Then allow the balls to harden at room temperature for 30 minutes.
What Kind Of Cream Cheese Should Be Used?
I recommend using whole fat cream cheese, this gives the best flavor and texture to the Nutter Butter Balls. You should also avoid using whipped cream cheese.
Milk Chocolate Vs Semi-Sweet Chocolate
If substituting melting wafers for chocolate chips you can choose between semi-sweet or milk chocolate! Semi-sweet yields a dark chocolate taste, while milk chocolate gives them a sweeter taste, choose your preference!
How To Store
These can be stored in the refrigerator for up to two weeks in an airtight container. They also freeze well for up to 3 months in a freezer bag without any excess air in the bag.
Tuck another delicious peanut butter recipe away to enjoy later!
- Chocolate Peanut Butter Poke Cake – A rich chocolate cake that’s both salty and sweet!
- Easy Peanut Butter Cheesecake – Creamy peanut butter filling in a sweet graham cracker crust!
- Perfect Peanut Butter Bars – Just 5 ingredients to make!
- The Best Peanut Butter Frosting – This is your new go-to recipe for frosting chocolate cakes!
- Peanut Butter Pie – Indulge in this no-bake pie that’s overflowing with peanut butter!
Did You Make This Recipe?
If you’ve tried this recipe, please let leave a review in the comments below. I love hearing from you! Don’t forget to tag me – @sugarandsoulco – on Instagram and Pinterest with your photos, or join our Sugar & Soul Show-offs Community and share them there.
Nutter Butter Balls
Ingredients
- 16 ounces Nutter Butter cookies 1 regular package
- 8 ounces cream cheese softened
- ¼ cup powdered sugar
- ¼ cup creamy peanut butter
- ¼ teaspoon salt optional
- 10 ounces chocolate melting wafers
- Sprinkles for topping
- Sea salt for topping
Instructions
- Add the Nutter Butters to a food processor and process until a fine crumbs forms. Reserve 1 tablespoon of crumbs for topping, if desired.
- Add in the cream cheese, sugar, and peanut butter and process until combined.
- Use a medium cookie scoop to portion out the mixture and roll into balls. Place them on a parchment-lined baking sheet.
- Add the melting wafers to a bowl and melt on 30-second intervals stirring between each addition until smooth.
- Use a spoon and fork to dip each of the balls in the chocolate and gently slide off the fork onto the parchment paper to set.
- After every 4th ball, top the balls with Nutter Butter crumbs, sprinkles, or sea salt before the chocolate sets.
- Allow the balls to set at room temperature for about 30 minutes until hardened or place in the fridge for about 10 minutes to speed up the process.
- Store balls in an airtight container in the refrigerator for up to 2 weeks.
Notes
- Make sure to use whole fat cream cheese for the best flavor and texture.
- 10 ounces of chocolate chips may be used instead of melting wafers but you will need to add 1 teaspoon of coconut or vegetable oil to the mixture so it doesn’t get too hard to bite through.
- These balls are pretty firm right after mixing and there is no need for them to chill before being dipped, unlike other similar recipes.
- I like adding salt to these balls because I think it adds to the overall flavor, but it can be left out.
Nutrition
Did You Make This Recipe?
Don’t forget to share it with me on Instagram @sugarandsoulco and follow on Tiktok @sugarandsoulco and Pinterest @sugarandsoulco for more!


Share your thoughts!
Love this recipe? Share your thoughts with me and leave a review! And don’t forget to connect on your favorite social platform below!