
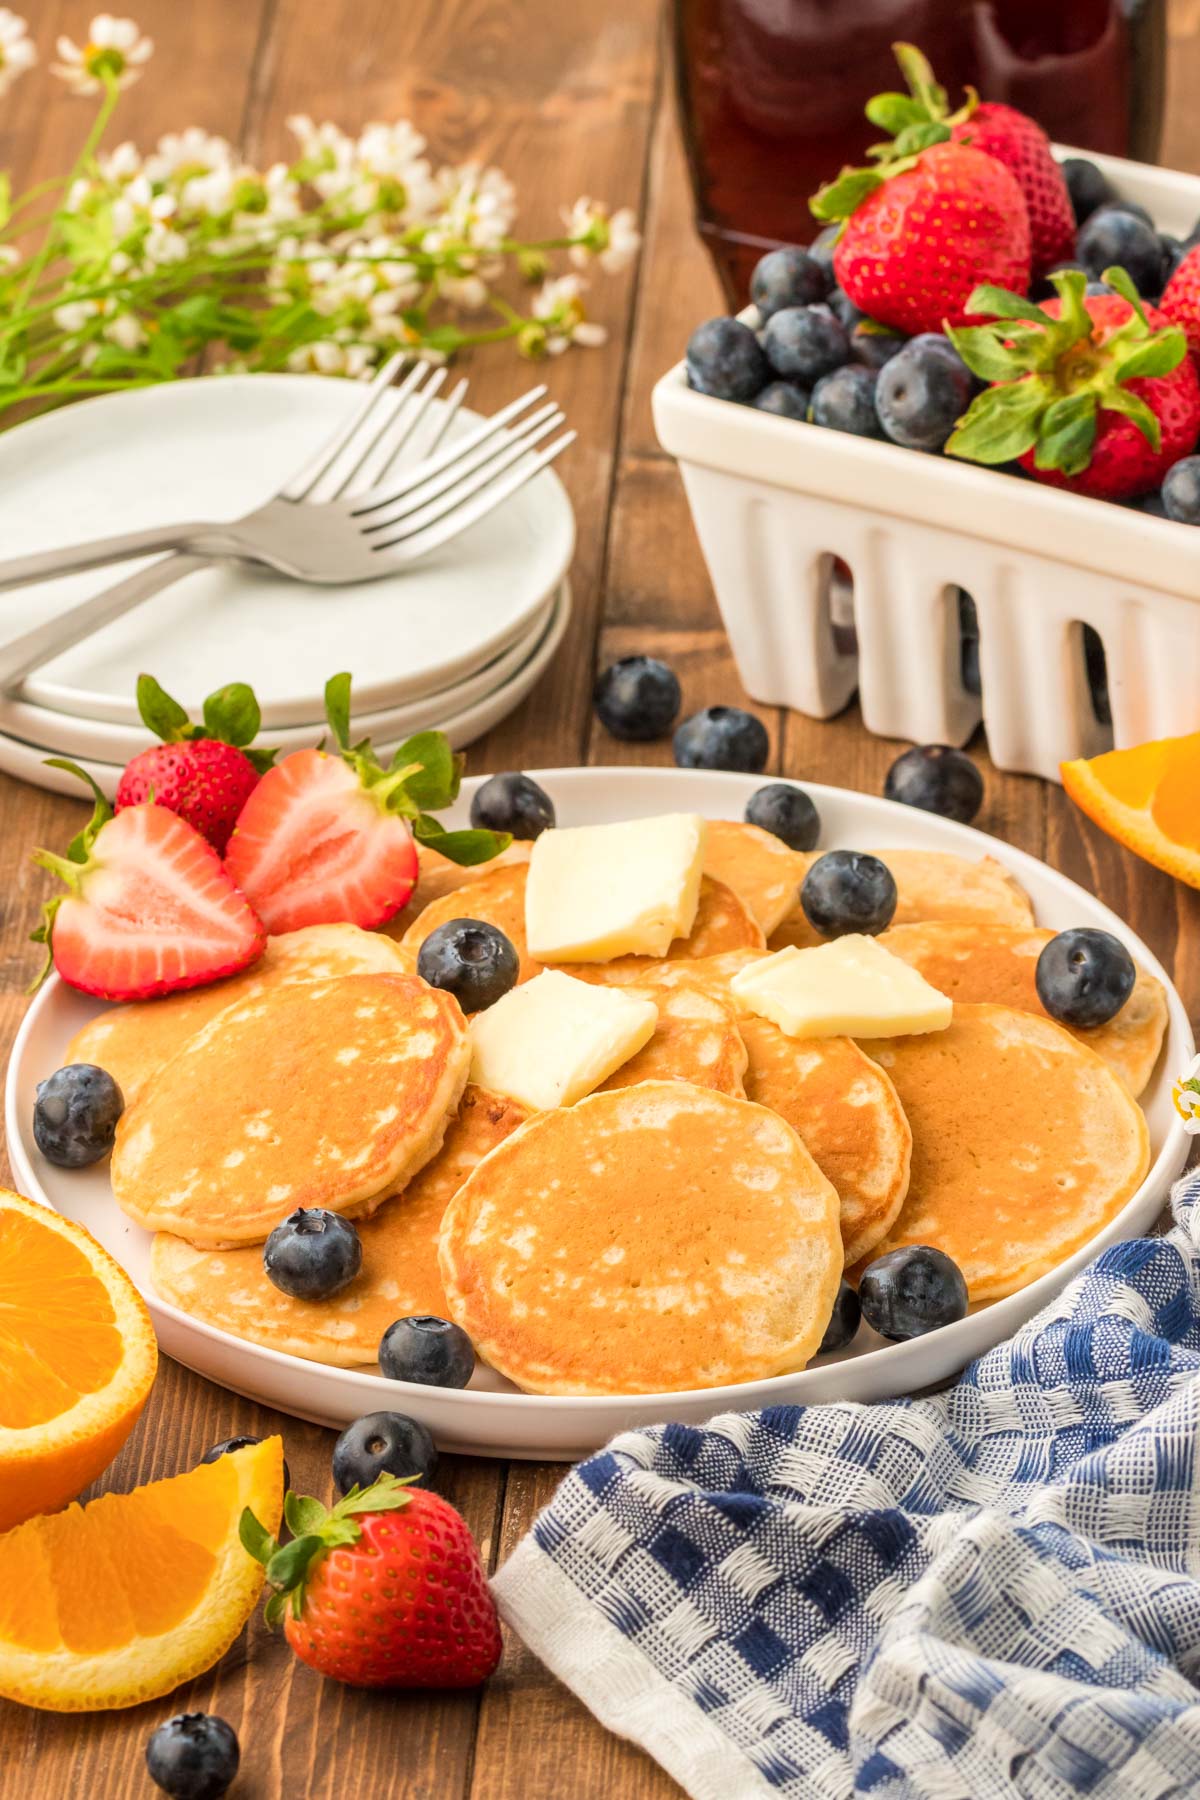
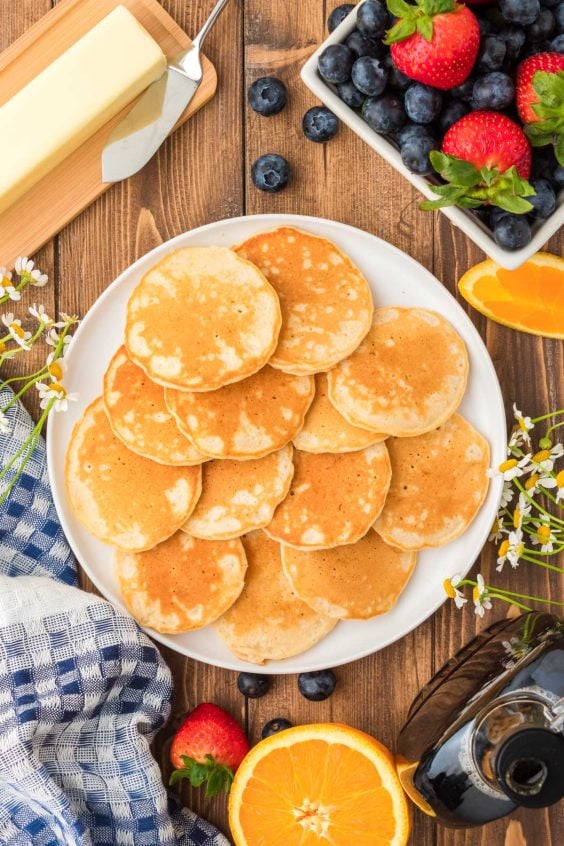
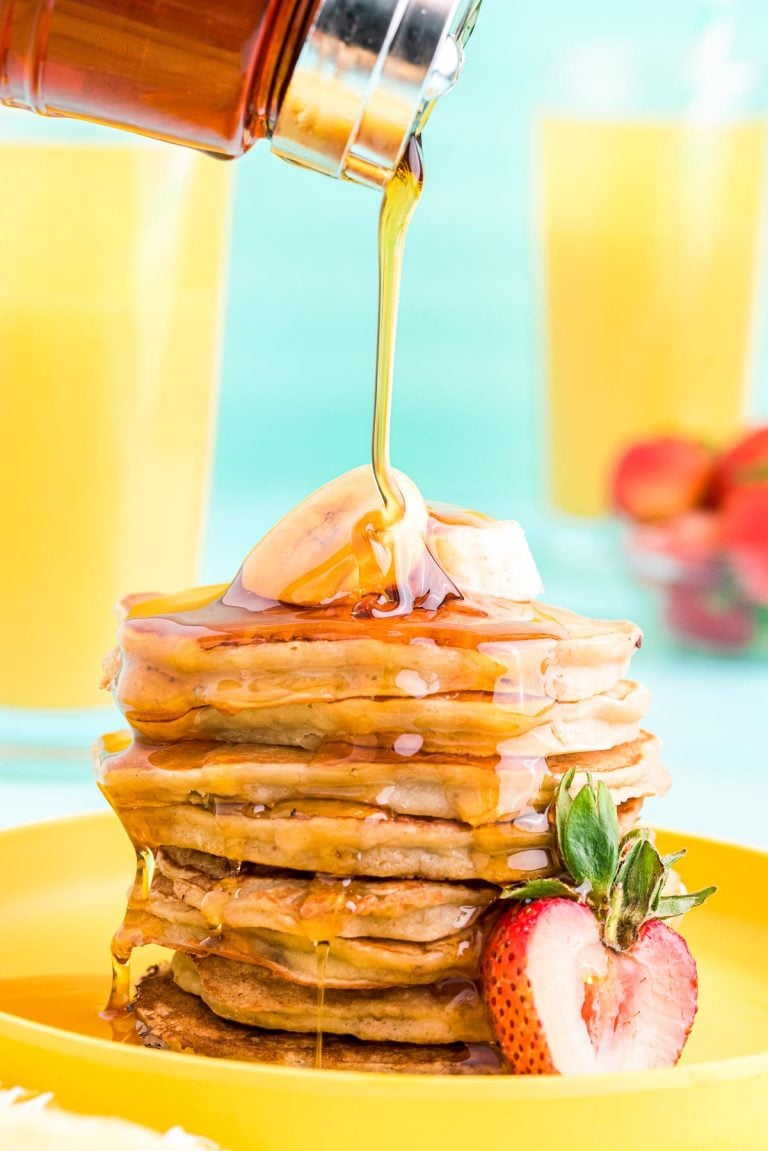
Silver Dollar Pancakes Recipe

Make breakfast time more fun (and delicious!) by serving up a batch of these Silver Dollar Pancakes! This simple recipe serves up two dozen fluffy and flavorful bite-sized pancakes that both kids and adults will love!

The Only Mini Pancake Recipe You Need!
If you’re like me, you rotate between the same breakfast recipes, but it’s time to break up that monotony with some tasty fun! For some reason, everything is more fun and delicious when it’s bite-sized.
Rest assured, though; this new tasty fun doesn’t come with a time expense because mornings are hard enough. Instead, this silver dollar pancakes recipe is made with a handful of pantry staple ingredients that cook up in just 15 minutes!
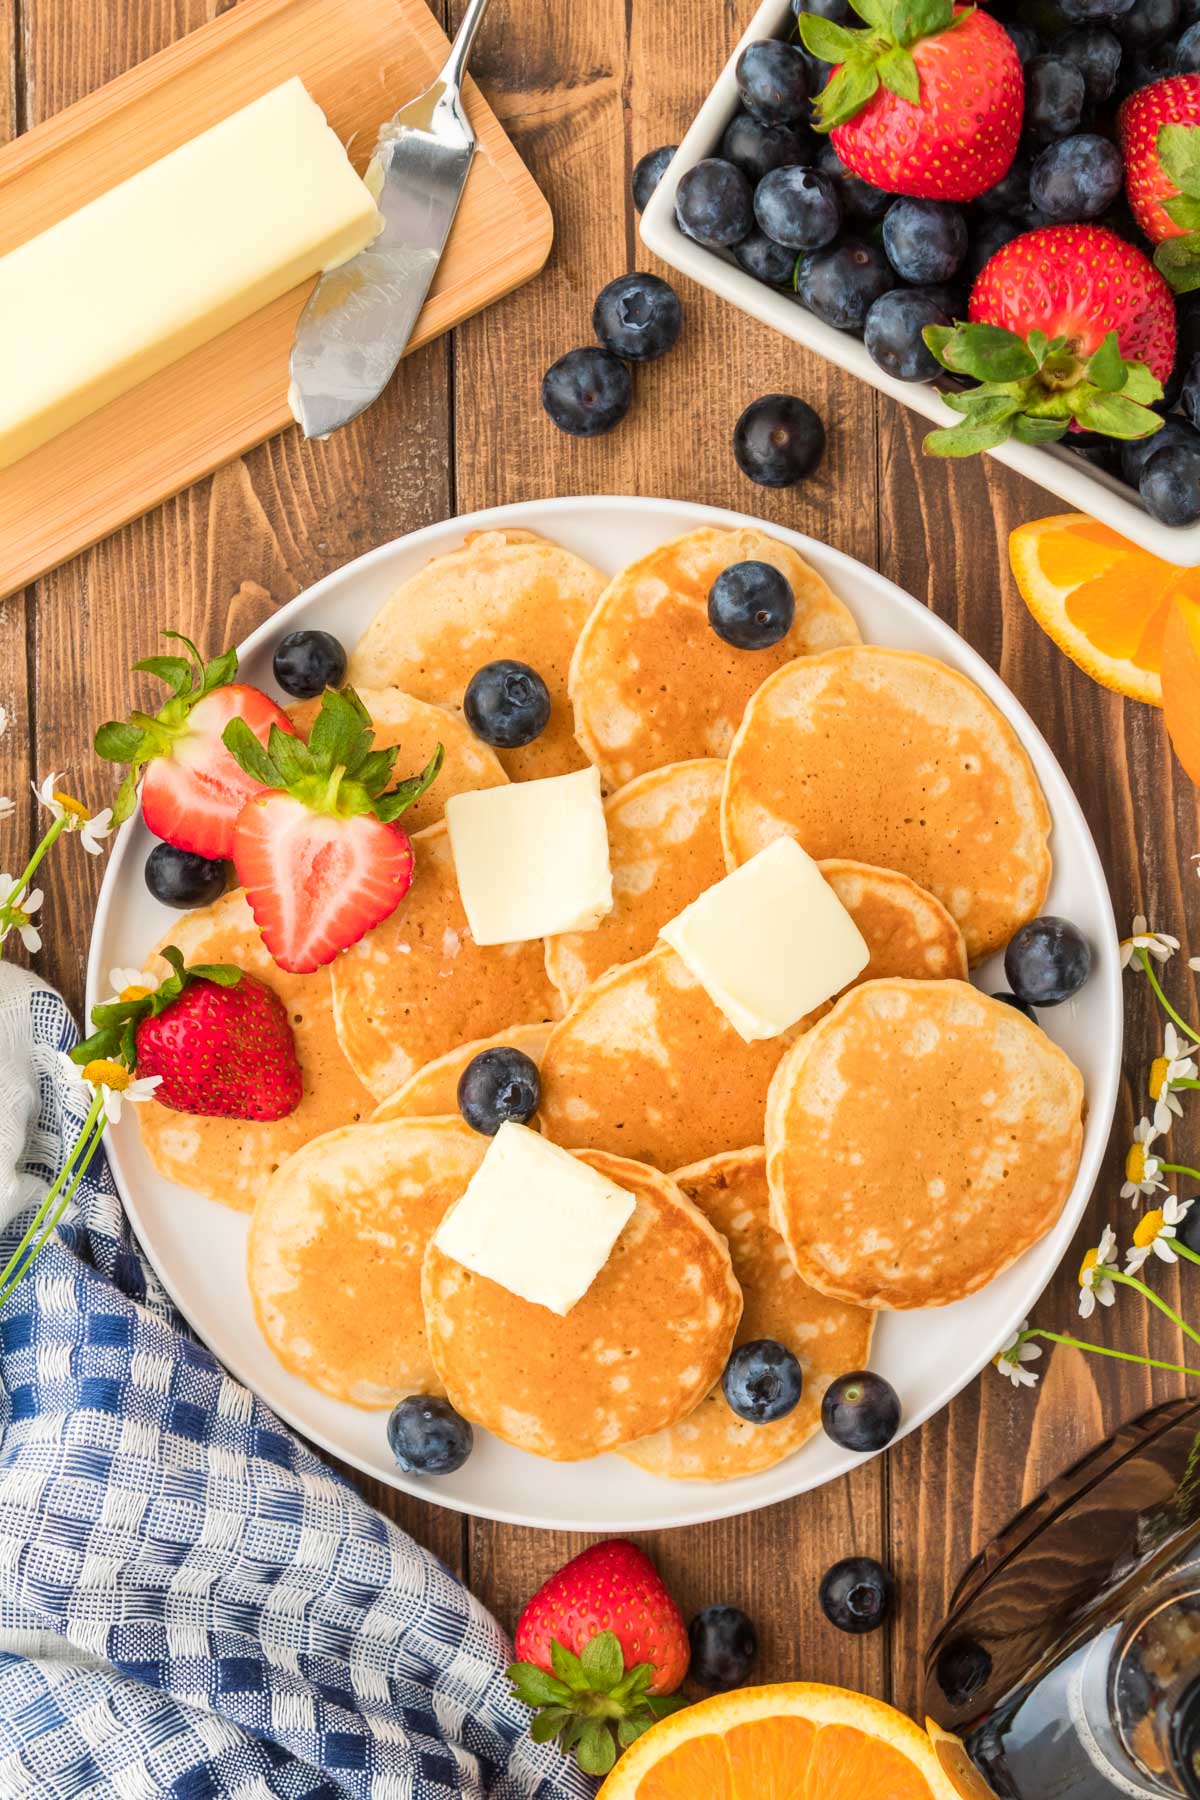
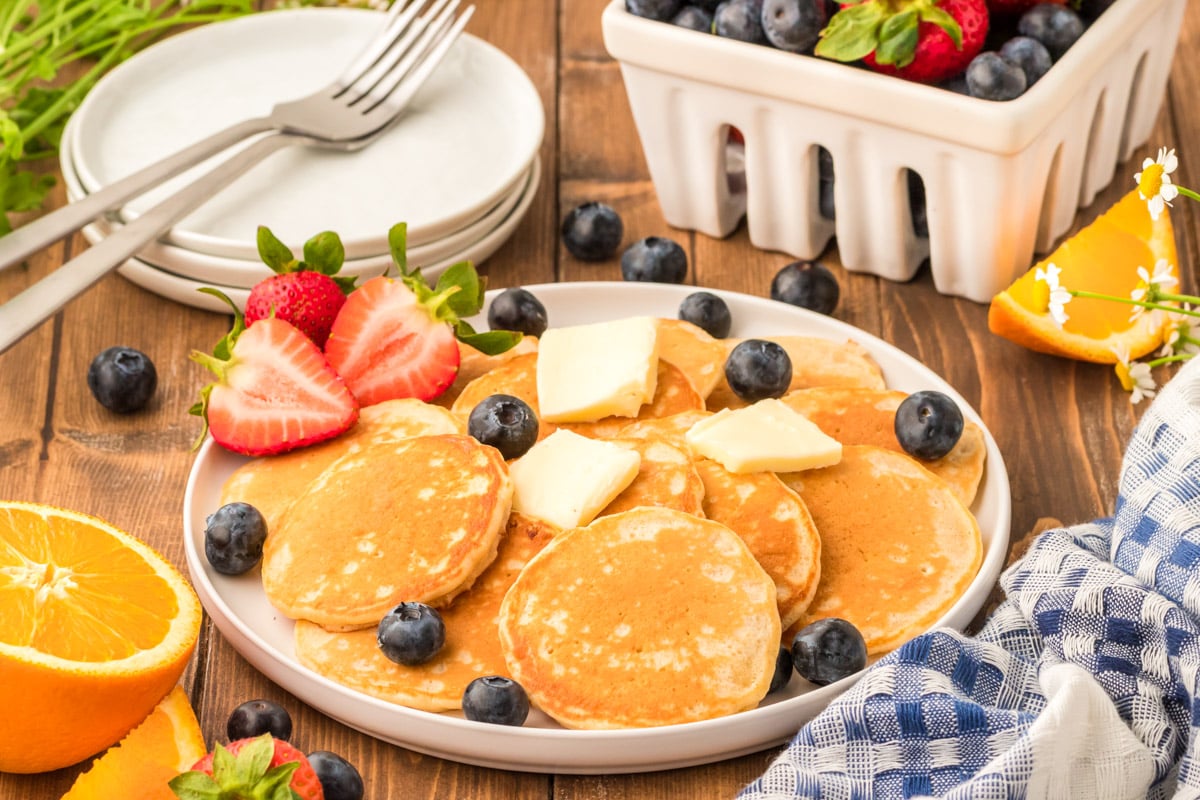
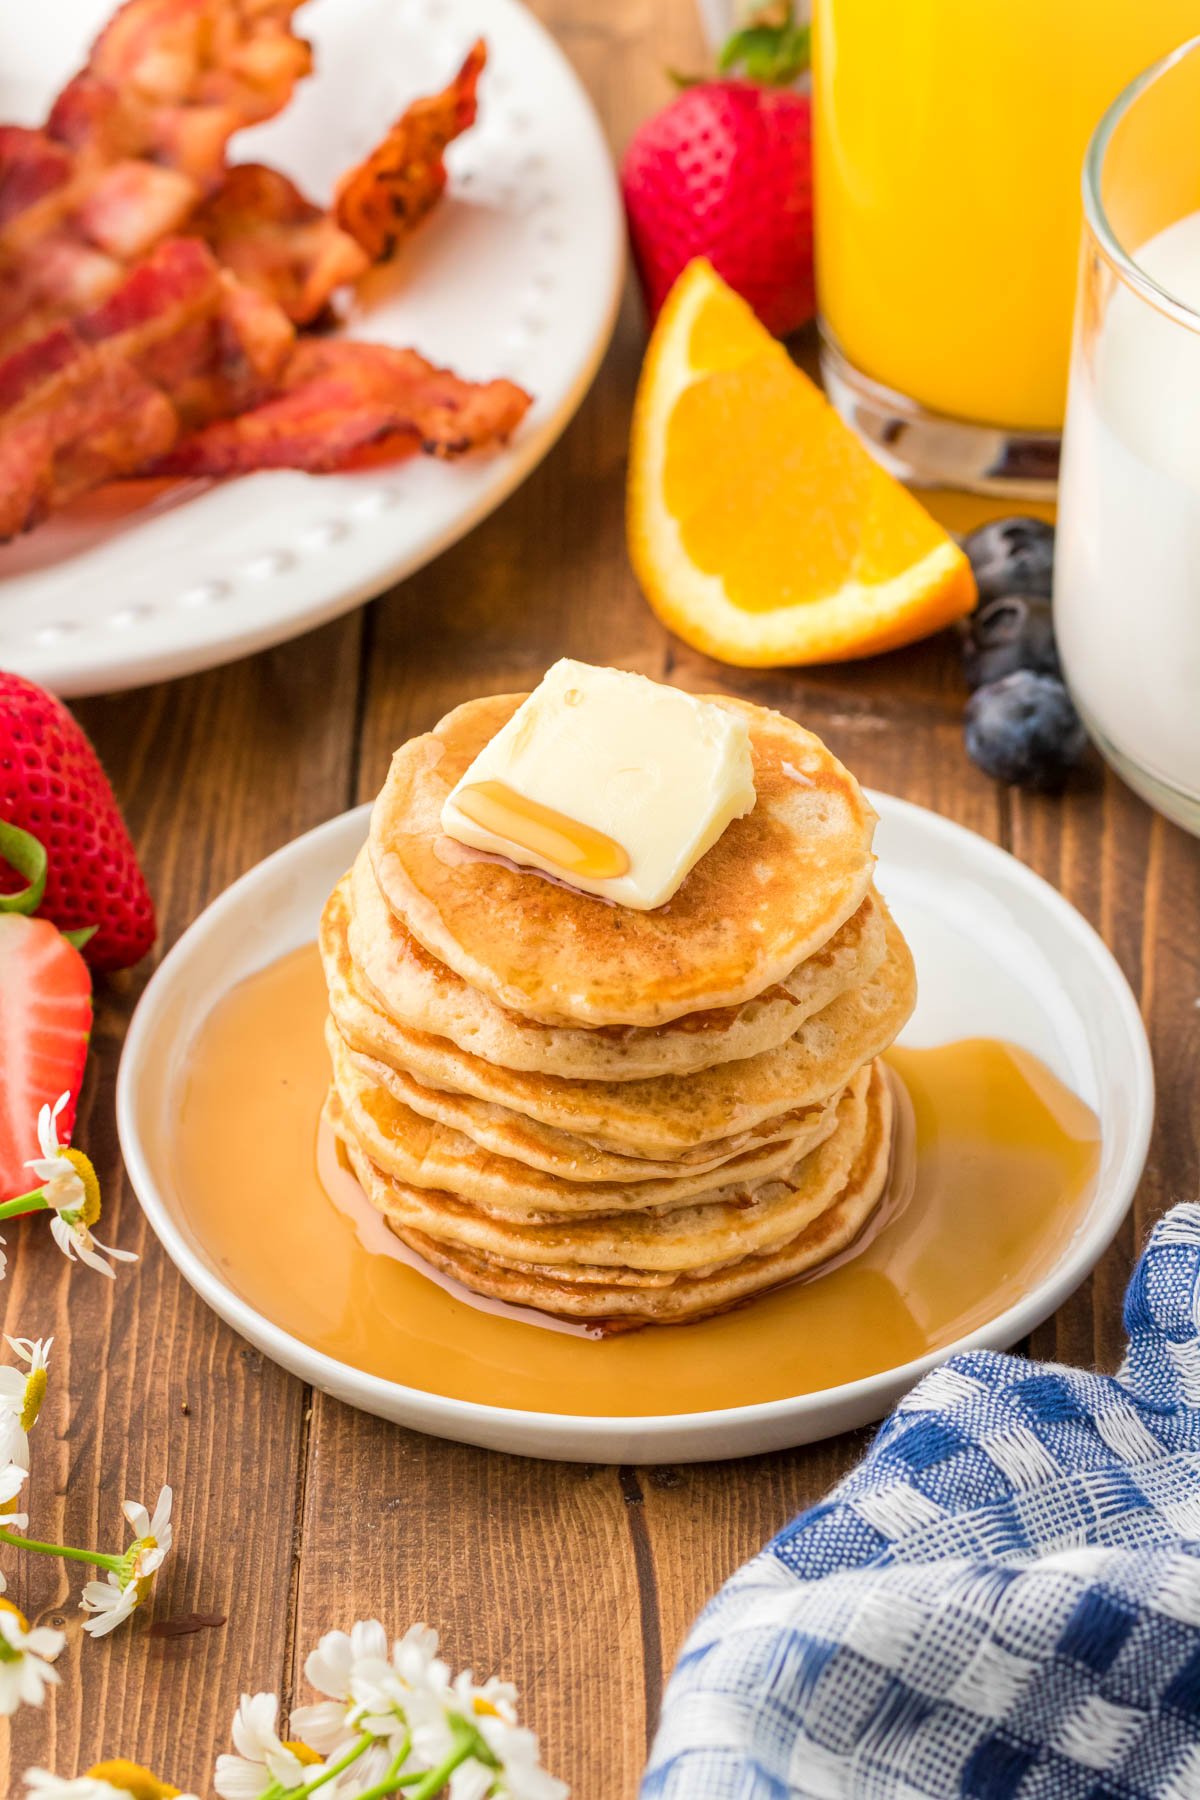
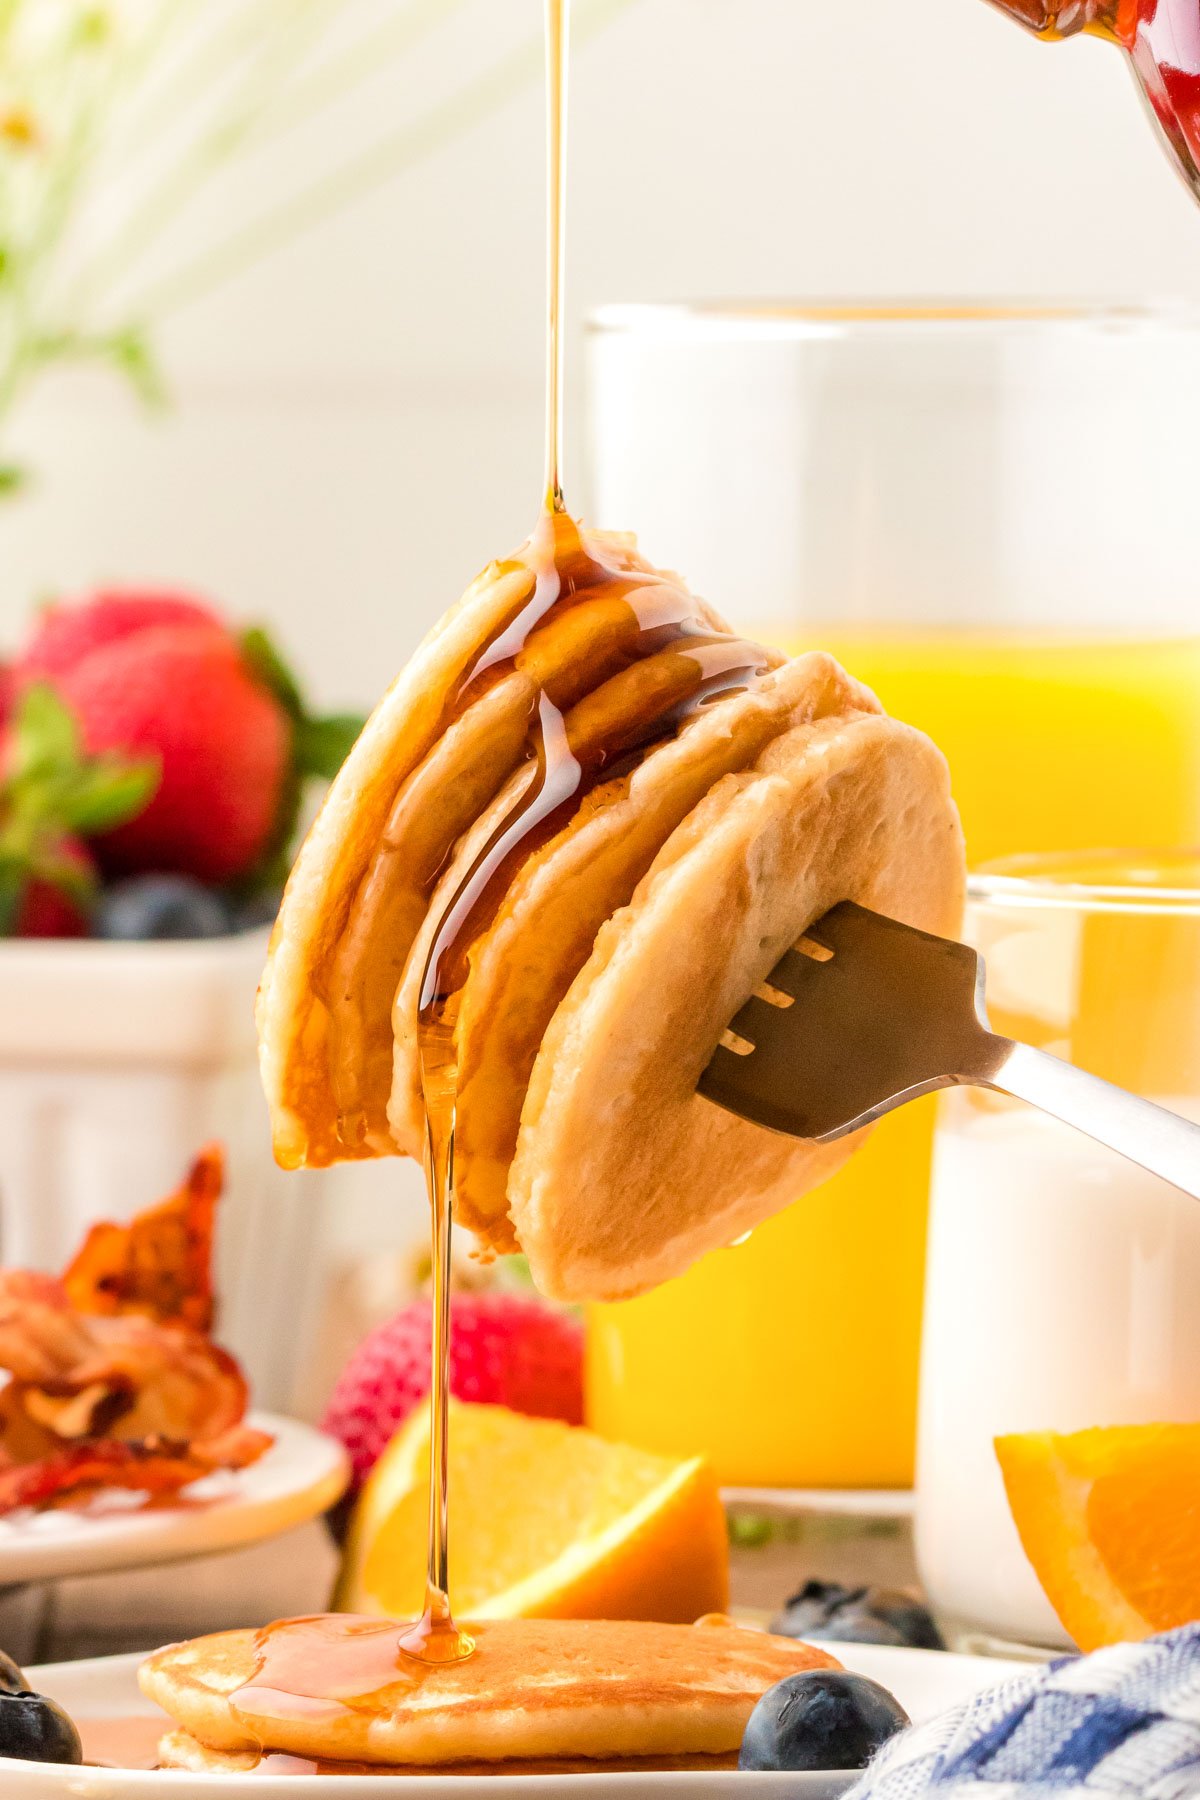
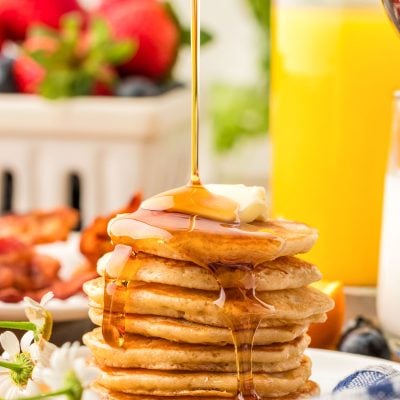
Serve them up with sauces, fresh fruit, maple syrup, or Nutella! You can even enjoy them as a snack skewer with mini marshmallows and fresh fruit!
Rebecca’s Recipe Review
Taste: With ingredients such as malted milk powder, vanilla extract, and granulated sugar, these pancakes turn out subtly sweet! The perfect blank canvas to cover in maple syrup before grabbing a bite of them!
Texture: These Silver Dollar Pancakes come off the skillet hot, with a satisfyingly crusty, golden-brown exterior and a deliciously fluffy interior.
Ease: 2/10
Pros: Fun size and incredible flavor!
Cons: They don’t cook themselves 😜
Would I Make This Again? Yes, they are a delicious and simple breakfast that my kids love, and they’re also easy to pack for school lunches.
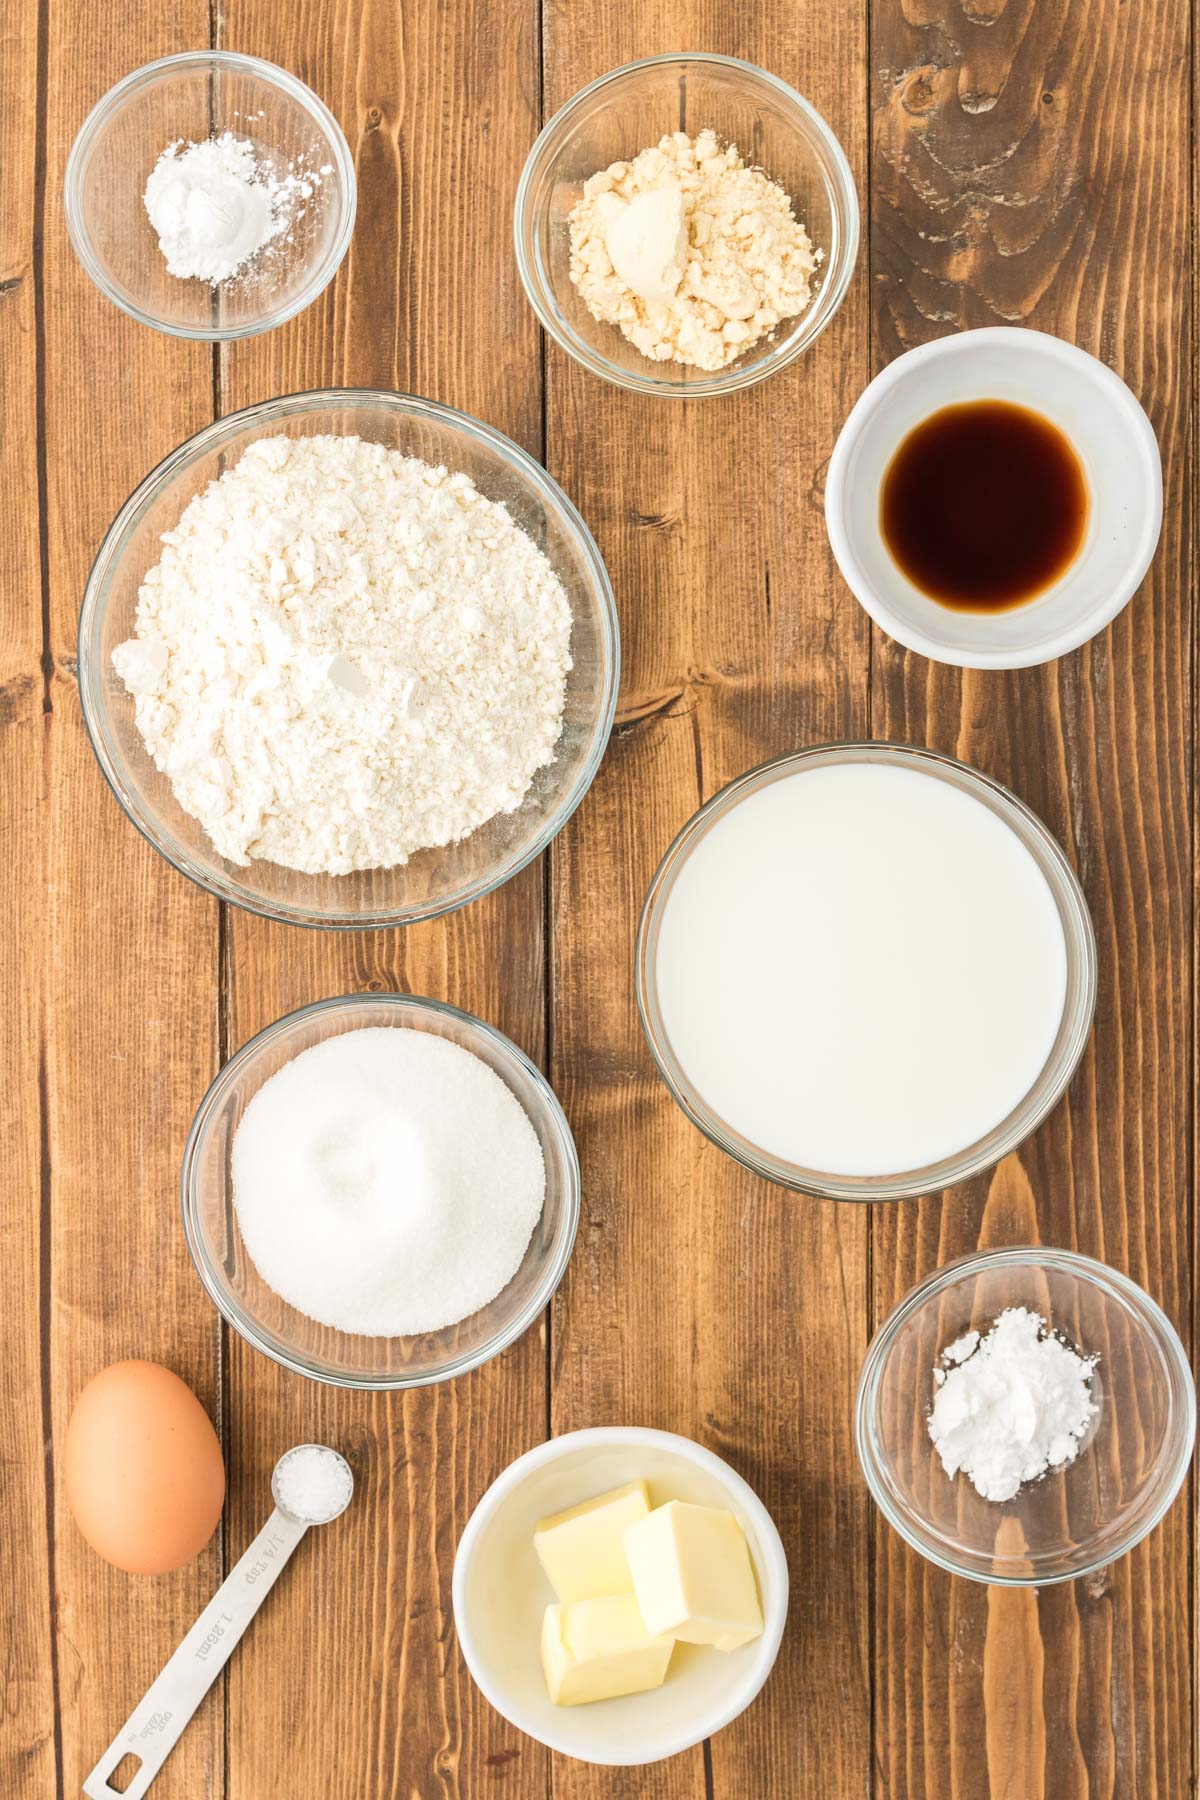
Silver Dollar Pancake Ingredients
Along with pantry staple ingredients such as flour, sugar, milk, and an egg, three other key ingredients make this recipe stick out!
Malted milk powder adds a lot of deliciously unique flavor to these pancakes, so I don’t recommend skipping out on it if possible! This can be found in the grocery store near the powdered drink mixes.
Next is the baking powder and cream of tartar; these leavening agents provide structural support in this recipe. Resulting in those fluffy pancakes we all look forward to!
Melted butter provides richness and flavor to the pancakes, but you could also use vegetable or canola oil.
Rounding off the key ingredients is pure vanilla extract, which adds an easy boost of flavor to the pancakes!
How To Make Silver Dollar Pancakes
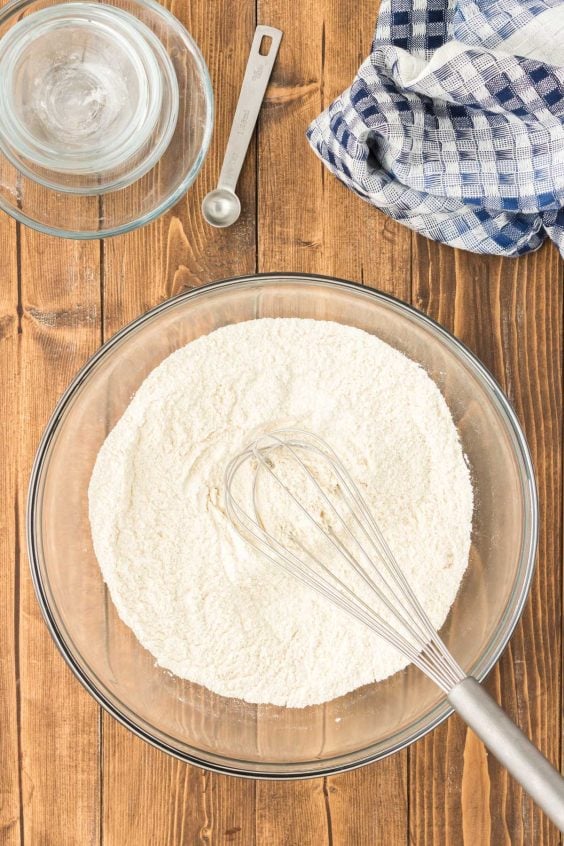
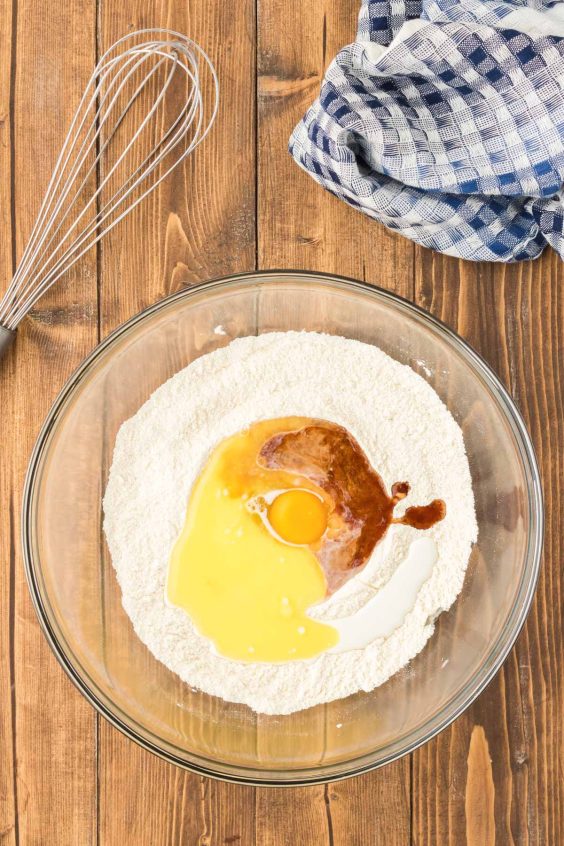
- Whisk together the dry ingredients in a bowl.
- Add the wet ingredients to the dry ingredients and mix to combine, leaving some lumps id good!
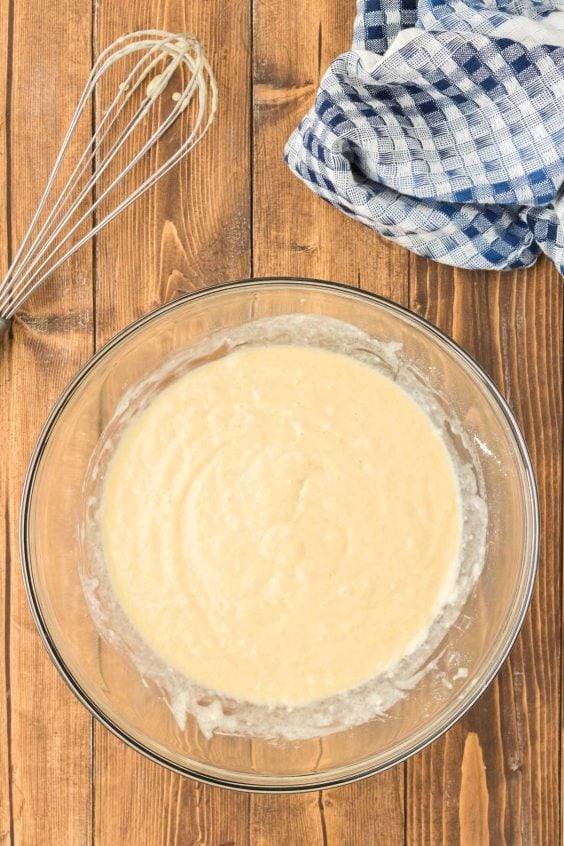
- Let the batter rest for 10 to 15 minutes before cooking.
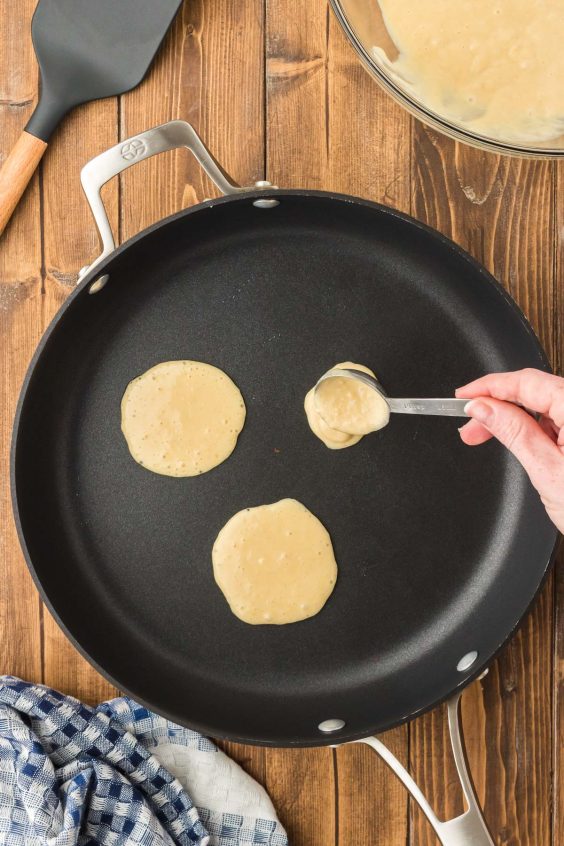
- Preheat the pan, drop spoonfuls of pancake batter on the pan, and cook until the top sides are bubbly.
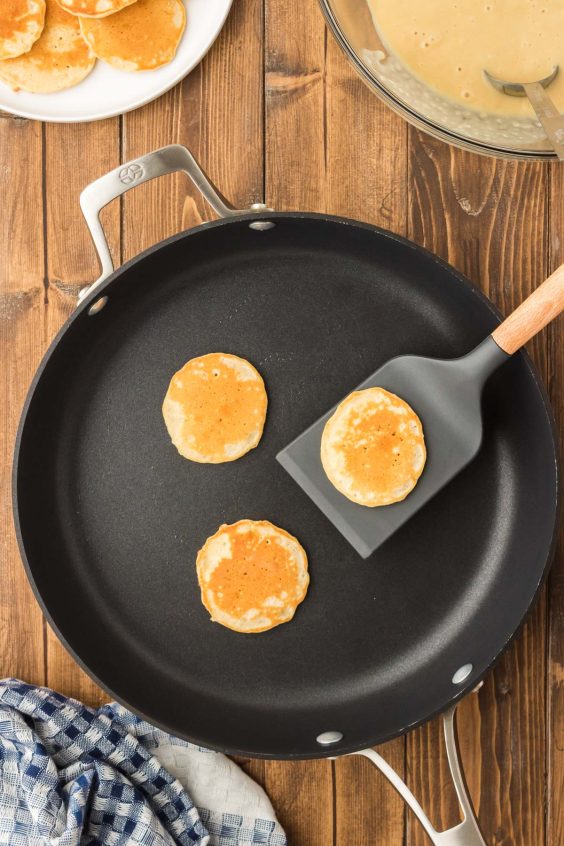
- Flip and finish cooking.

Rebecca’s Tips
- Rest – Be sure to allow the pancake batter to rest for 10 to 15 minutes before cooking. This rest time allows the gluten to develop and air bubbles to form, resulting in those delicious fluffy pancakes that we’re aiming for in this Silver Dollar Pancake Recipe.
- Heat – When it comes to cooking pancakes, the heat has to be just right! It can be tricky to find the right heat since it can vary depending on the pan that’s used, as well as if the stove is gas or electric. If the heat is too high, the pancakes will burn; if the heat is too low, they come out dense and flat. Therefore, I recommend doing a couple of test pancakes to help find the right temperature. If the batter spreads too much and doesn’t bubble on top within a minute, then slightly increase the heat. The pancake batter should be slow to spread and form thicker edges that bubble and rise.
- Pan – I have found that a seasoned cast iron pan works best since it evenly retains heat, eliminating some of the heating issues that can occur. The next best option is a nonstick pan. Both cast iron and nonstick will provide lovely golden brown pancakes. However, I don’t recommend using a stainless-steel pan.
- Warm – These silver dollar pancakes come out to be about 2 inches big; therefore, it may take a bit of time to get through the batter. To keep the cooked pancakes warm as you work through the remaining batter, I suggest placing them in a warming drawer or in an oven that’s set to 200 degrees F. This way, all the pancakes hit the table hot and ready to enjoy!
Silver Dollar Pancakes Recipe Serving Suggestions
There are so many delicious ways to top these yummy Silver Dollar Pancakes! Here are a few of our favorites:
- Fresh Fruit – Blueberries, raspberries, strawberries, and even blackberries would all be delicious served with these pancakes.
- Jam – If you don’t have fresh fruit on hand, berry jam makes a lovely topping. Go ahead and pop it in the microwave to loosen it up a bit before adding it to the pancakes.
- Whipped Cream – Grab a can of whipped cream from the grocery store or make up a batch of Homemade Whipped Cream in just 5 minutes using three ingredients.
- Syrups – Drizzle real maple syrup or your favorite storebought syrup over your stack of silver dollar pancakes. Chocolate syrup or chocolate sauce would also make for a tasty drizzle!
- Sauces – Kick these pancakes up a notch by serving them with Homemade Strawberry Sauce!
- Serving – For an added element of fun for kids, serve these silver dollar pancakes on a skewer rotating between a pancake, a fresh piece of fruit, and a mini marshmallow.
Regardless of which toppings you choose, these Silver Dollar Pancakes make for a breakfast recipe that will be a hit on any morning! For another quick and simple start to your day, try this protein-packed Easy Ham And Cheese Quiche!
However, if you have more of a sweet tooth in the mornings, you may prefer a batch of Easy Jelly Filled Donuts or Waffle Cookies!
How To Store Leftover Pancakes
Store leftover Silver Dollar Pancakes in an airtight container or Ziploc bag in the refrigerator. Enjoy the leftovers for up to 4 days.
Reheating Silver Dollar Pancakes
When reheating from the fridge, simply pop them in a skillet for a couple of minutes for best results. If reheating from frozen, stack the pancakes 3 or 4 high and microwave for 30 seconds; check them and microwave for an additional 45 seconds if needed.
Can I Cook These Pancakes On A Griddle?
Using a griddle to cook pancakes is tempting since you can cook a lot at once. However, the location of the heating element makes for inconsistent cooking results. Therefore, I really encourage using a skillet instead of a griddle. However, you can cook these on a Blackstone grill!
How Do I Cook These Pancakes So That They Have A Crisp Exterior?
To achieve pancakes with a crispier exterior, you can add a tablespoon of butter to the pan to cook them in.
More Pancake Recipes:
- Homemade Blueberry Pancakes – Big fluffy pancakes studded with juicy blueberries!
- Ice Cream Pancakes – A delicious viral TikTok recipe that’s easy to make!
- Banana Pancakes – Made with mashed ripe bananas!
- Homemade Buttermilk Pancakes – The best recipe for fluffy, buttery pancakes!
- Easy Sheet Pan Pancakes – Breakfast made simple!
Did You Make This Recipe?
If you’ve tried this recipe, please let leave a review in the comments below. I love hearing from you! Don’t forget to tag me – @sugarandsoulco – on Instagram and Pinterest with your photos, or join our Sugar & Soul Show-offs Community and share them there.
This recipe was originally posted in April 2023 and was updated in March 2025 for post formatting.
Silver Pancakes Recipe
Ingredients
- 1 cup all-purpose flour 130g, spooned and leveled
- ⅓ cup granulated sugar 67g
- 2 tablespoons malted milk powder 20g, or powdered milk
- 1 teaspoon baking powder
- 1 teaspoon cream of tartar
- ¼ teaspoon salt
- ⅔ cup whole milk 160mL
- 1 large egg
- 3 tablespoons salted butter 42g, melted
- 2 teaspoons vanilla extract
Instructions
- In a medium bowl, whisk together 1 cup all-purpose flour, ⅓ cup granulated sugar, 2 tablespoons malted milk powder, 1 teaspoon baking powder, 1 teaspoon cream of tartar, and ¼ teaspoon salt.

- Make a well in the dry ingredients and add in ⅔ cup whole milk, 1 large egg, 3 tablespoons salted butter that's been melted, and 2 teaspoons vanilla extract and mix with a whisk or fork just until combined. You want there to be some lumps, but make sure you get all the flour off the bottom of the bowl.
- Let the batter rest for 10 to 15 minutes before cooking.
- Heat a large nonstick skillet or seasoned cast iron over low heat until hot (see notes).
- Drop 1 tablespoon of batter onto the pan to test. If the batter spreads too much and the pancake has a hard time bubbling on the top after a minute or so, increase the heat slightly. You are looking for the batter to have a slow spread thanks to the heat and forming thicker edges that bubble and rise.
- Once your heat is set where you want it, cook off the batter, using 1 tablespoon of batter per pancake. Cook until the center bubbles about 1 to 2 minutes and starts to lose its glossy look, then flip with a thin spatula and cook for 30 to 60 more seconds.
- Transfer to a plate and cook off the rest of the batter. Serve with butter and syrup.
Video
Notes
- Heat can be finicky because you have to have it just right for pancakes. This is why I recommend doing a couple of test pancakes to make sure you have everything set right for your particular oven, as the type of pan you use and the type of heat you have (gas or electric) can make a big difference. If the heat is too high, the pancakes will burn. If it’s too low, they will be dense and flat.
- A seasoned cast iron pan should be nonstick and is the best option for cooking because it evenly retains heat and helps eliminate some of the heating issues above. A nonstick pan is the next best option. I really don’t recommend stainless steel for making pancakes.
- If you prefer your pancakes to have a crispier exterior, you can add a tablespoon of butter to the pan to cook them in.
- I personally don’t recommend using a griddle for cooking these. We tested the recipe on ours and found the cooking results were just too inconsistent because of the location of the heating element. I know it’s tempting, but I think a skillet is the way to go with this recipe.
- Letting the dough rest allows the gluten to develop and air bubbles to form, which results in fluffy pancakes.
- Make sure that your milk powder is fine and not clumped so that it mixes easily into the batter.
- Powdered coffee creamer may be used instead of milk powder.
The milk powder adds a lot of flavor to these pancakes, so I don’t recommend skipping it, but you can, if in a pinch, they will still be a yummy traditional pancake, just not have the dynamic flavor. - Keep cooked pancakes warm in a warming drawer or in an oven set to 200 degrees F.
- This recipe makes 24 to 26 2-inch pancakes.
Nutrition
Did You Make This Recipe?
Don’t forget to share it with me on Instagram @sugarandsoulco and follow on Tiktok @sugarandsoulco and Pinterest @sugarandsoulco for more!


Share your thoughts!
Love this recipe? Share your thoughts with me and leave a review! And don’t forget to connect on your favorite social platform below!